Seated Hands To Feet Hold
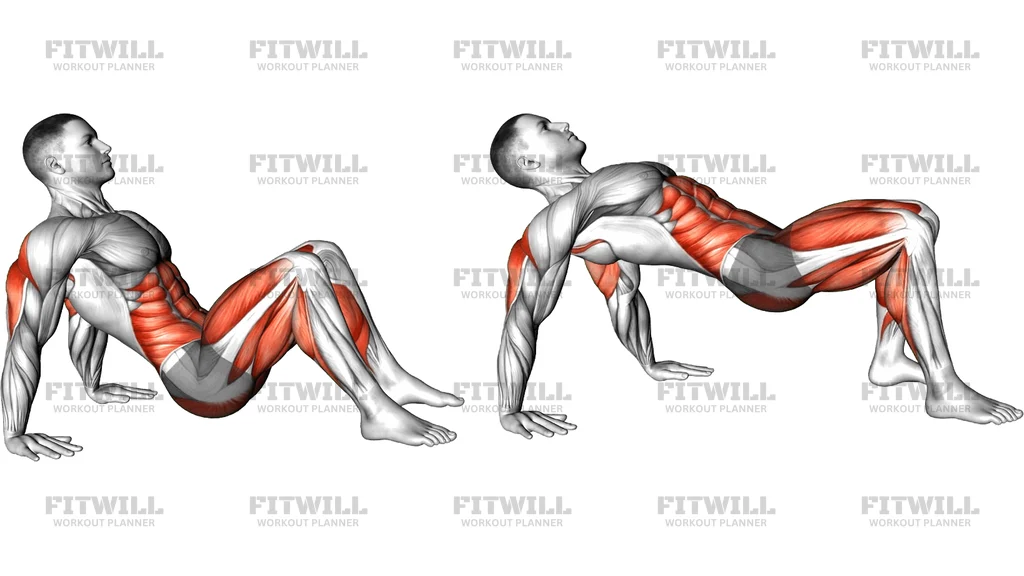
The Seated Hands To Feet Hold is a simple bodyweight isometric performed from a long-sitting position on the floor. You sit tall with your legs extended in front of you, plant your palms flat on the floor beside your hips, and press down through your hands while drawing your knees in toward your chest so your feet lift clear of the ground. The challenge is holding that tucked position quietly for time, which forces your arms to support your torso and your trunk to stay organized the whole way through.
This hold is a low-load way to build pressing endurance in the triceps and the muscles around the shoulder, while the hip flexors and abdominals work to keep the thighs drawn up. Because nothing is moving, the demand is steady rather than explosive, which makes it a useful tool for people who want strength-endurance without adding external weight. It also doubles as a clean assessment: if you shake, shrug, or sink within a few seconds, you have found a gap in your support strength.
It suits a wide range of trainees. Beginners can use it as an entry point before progressing to dips or support holds on bars, since the floor provides a stable, predictable base. Home trainers appreciate that it needs nothing but a bit of floor space, and more advanced lifters often slot it into warm-ups or finishers to prime the shoulders and triceps or to accumulate time under tension at the end of a pressing day.
Setup matters more than it looks. Hand placement beside the hips, fingers pointing forward, determines how comfortably your wrists load and how much of your bodyweight the arms actually carry. Sitting up on your sit bones with a tall chest keeps the shoulders in a strong position; slouching shifts the work into the upper traps and makes the hold feel twice as hard for the wrong reasons. Take a moment to set this before you ever lift the feet.
To execute it well, press your palms actively into the floor as if trying to push the ground away, keep a small bend in the elbows rather than locking them, and draw your heels in toward your hips until your feet hover. Hold there with your shoulders pulled down away from your ears and your breathing calm. The most common breakdown is the shrug: the moment your shoulders creep toward your ears, you have stopped pressing and started hanging on your joints.
A practical dose is three to five holds of ten to thirty seconds, resting enough between sets to reset your wrists and shoulders. Ease in conservatively the first few sessions, since the wrists and elbows are doing more work than they may be used to. If you feel strain rather than effort in the joints, shorten the hold or come out early rather than pushing through discomfort.
[ Workout Log & Planner ]
Put your next workout in Fitwill
Keep your plan and training log ready when you are.


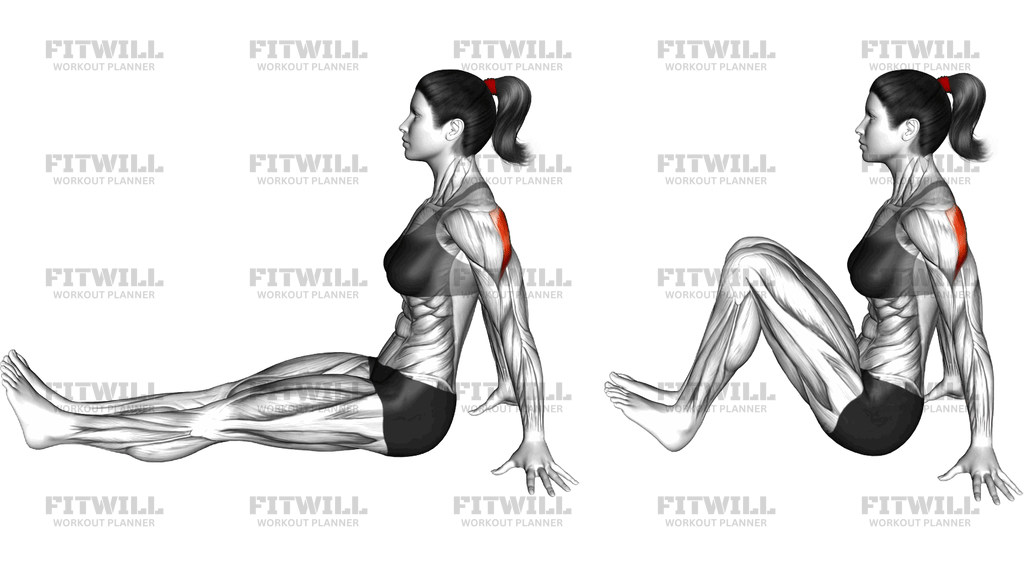
Instructions
- Sit on the floor with your legs extended straight in front of you and your spine tall, resting on your sit bones.
- Place your palms flat on the floor beside your hips, fingers pointing forward, arms nearly straight with a soft bend at the elbows.
- Press your palms firmly into the floor so your shoulders lift away from a slouched position and your upper arms support your torso.
- Brace your abdominals and draw your shoulder blades down, keeping your upper traps relaxed and away from your ears.
- Exhale, bend your knees, and pull your heels in toward your hips until both feet lift clear of the floor.
- Hold the tucked position with your chest lifted, feet quiet and off the ground, and your weight evenly spread across both palms.
- Breathe steadily throughout the hold, taking small nasal inhales and controlled exhales instead of holding your breath.
- After your target time, lower your feet back down slowly until your legs return to the extended starting position.
- Relax your arms, shake out your wrists and shoulders briefly, then reset your posture before starting the next hold.
Tips & Tricks
- If your wrists complain, spread your fingers wide and grip the floor slightly, shifting a little more weight toward the heel of each palm rather than the base of the fingers.
- Shrugging is the telltale mistake here: once your shoulders ride up toward your ears, press the floor away harder instead of letting your torso sink into your shoulder joints.
- Locked elbows turn this into a joint hold rather than a muscle hold, so keep a small, active bend and let the triceps carry the load.
- Rounding your lower back as the knees come in is common; re-tallen your spine on the sit bones before tucking rather than slumping into the hold.
- Bouncing or swinging the feet defeats the purpose. The value comes from a still, quiet hold, so pick a duration you can complete without movement.
- If your chest starts to collapse mid-hold, that is your signal to end the set. Better to hold ten good seconds than thirty sloppy ones.
- A mat or slightly textured floor helps more than you would expect, because sweaty palms sliding forward change your hand position partway through the set.
- To progress, add five seconds per week, or make it harder by lifting the feet slightly further from the floor rather than tucking them tightly.
- If floor pressing bothers your wrists, making loose fists or pressing on the knuckles keeps the same shoulder and arm demand with a straighter wrist.
Frequently Asked Questions
What muscles does the Seated Hands To Feet Hold work?
The triceps and the muscles around the shoulder support your torso while your palms press into the floor, while the hip flexors and abdominals hold the knees drawn up. It is primarily an isometric strength-endurance hold rather than a heavy strength builder.
Is the Seated Hands To Feet Hold suitable for beginners?
Yes. Because it uses only bodyweight and a short lever, beginners can start with ten-second holds and build up. It is a good stepping stone toward dips and other support-based pressing exercises.
Why are the hands placed behind the hips instead of under the knees?
Placing the palms beside the hips creates a stable base directly under your torso, so the arms support your weight as the feet lift. Hands under the knees would shift the load away from the pressing muscles this exercise is meant to train.
How long should I hold the tucked position?
Start with ten to twenty seconds per set and progress toward thirty to forty-five as your pressing endurance improves. Stop the set as soon as your shoulders shrug or your feet start to drift downward.
My wrists ache during the Seated Hands To Feet Hold. What should I change?
Spread your fingers, grip the floor lightly, and bias your weight toward the heels of your palms. If discomfort persists, press on loose fists or a pair of light dumbbells to keep the wrists straighter.
Should my elbows be completely straight?
No. Keep a small bend and stay active through the triceps. Fully locked elbows dump the load into the joint structures rather than the muscles.
Is this a stretch or a strength exercise?
It is a strength exercise. Although you are seated with bent knees, the intent is an active isometric hold, not a passive stretch, so stay pressed into the floor and engaged the entire time.
Can I train the Seated Hands To Feet Hold every day?
For most people, yes, since the load is low and the hold is short. Still, leave a day off if your wrists or elbows feel sore rather than merely worked.
How does this exercise carry over to dips or L-sits?
It trains straight-arm pressing endurance and teaches you to keep the shoulders depressed under load, both of which are required for support holds. The tucked knees also begin conditioning the hip flexors you need for a full L-sit.