Standing Pelvic Stabilizers Mobilization
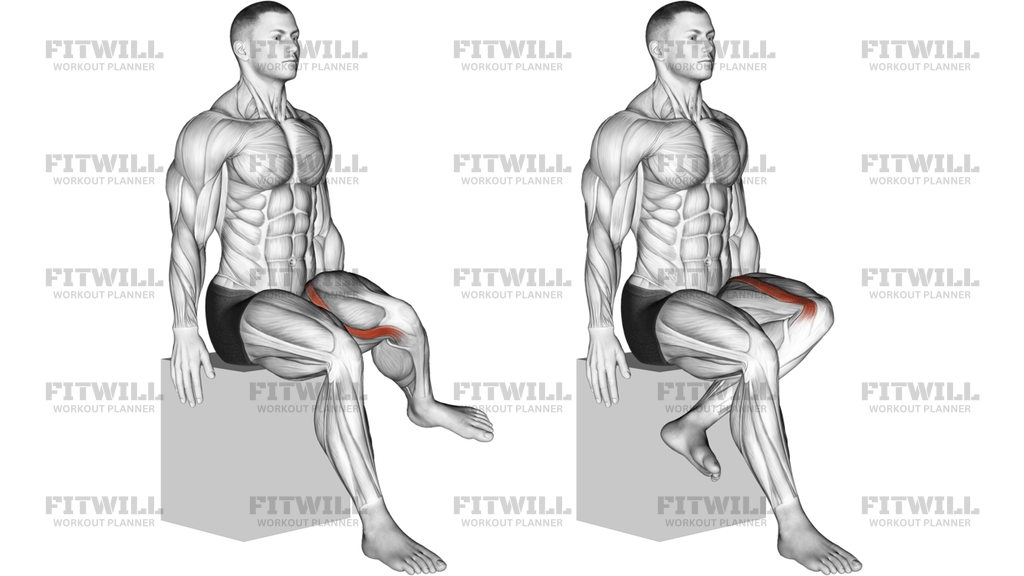
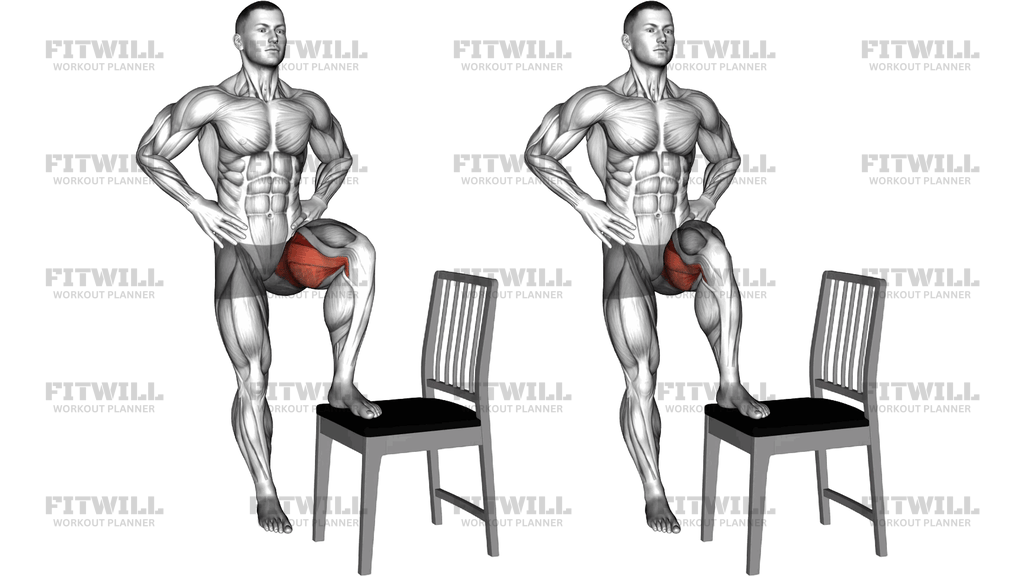
Standing Pelvic Stabilizers Mobilization is a standing hip mobility drill performed with one foot elevated on a sturdy chair or bench. You place the raised foot flat on the seat, rest your hands on your hips, and slowly rotate the lifted knee outward and back inward while keeping your pelvis square and your standing leg quiet. The goal is not range at any cost — it is controlled hip rotation on top of a stable pelvis.
The elevated position takes some load off the moving leg and lets the hip rotate through a comfortable arc without fighting your body weight. That makes the drill useful for anyone with stiff hips from prolonged sitting, runners and lifters who want the hip to move well before squats or lunges, and people working on single-leg balance since the standing side has to hold steady the whole time.
The muscles doing most of the visible work are the gluteal group around the raised hip, especially the deep hip rotators and gluteus medius, while the standing leg trains the hip stabilizers that keep you from wobbling. Your trunk muscles stay engaged isometrically to stop the torso from twisting along with the knee, which is exactly what makes this a pelvic stabilizer exercise rather than just a hip circle.
Setup matters here. The chair should be at roughly knee height or slightly below, stable enough that it cannot slide, and positioned so your raised foot rests fully on the seat. If the seat is too high, the hip jams early; too low, and you lose the freedom to rotate. Stand close enough that the knee stays over the ankle on the chair, not drifting past the toes.
Execution is slow and deliberate. Rotate the knee outward to a comfortable end range, pause briefly, then bring it back inward across the midline with the same control. Keep your hands on your hips so you can feel whether your pelvis is rotating with the leg — if it is, shrink the range. Breathe steadily throughout and let each repetition travel a little further only as the hip warms up.
Use this drill in warm-ups, between sets of lower-body work, or as a standalone mobility break during the day. It needs no equipment beyond a chair, takes under two minutes per side, and pairs well with other standing hip and glute mobilizations before training or after long periods of sitting.
[ Workout Log & Planner ]
Put your next workout in Fitwill
Keep your plan and training log ready when you are.


Instructions
- Place a sturdy chair with its seat at about knee height on a non-slip floor, and stand beside it facing slightly toward the seat.
- Place one foot flat on the center of the seat with the knee bent to roughly 90 degrees, and set your hands on your hips with your thumbs pointing back.
- Stand tall with your weight balanced over the standing leg, and gently brace your abdominals so your pelvis stays level and facing forward.
- Slowly rotate the raised knee outward, opening the hip to the side while the foot stays planted on the seat.
- Pause for a moment at the outward end range, feeling the deep hip muscles work without forcing the rotation.
- Reverse the motion with the same control, bringing the knee inward across the midline of your body.
- Keep the standing leg still and the torso upright — the knee moves, the pelvis does not follow it.
- Exhale as the knee rotates out, inhale as it returns in, keeping the breath smooth and continuous.
- Complete 8-10 controlled rotations, then switch the elevated leg to the chair and repeat on the other side.
- Step down carefully between sets, and check that the chair has not shifted before starting the next round.
Tips & Tricks
- If your lower back arches or twists as the knee rotates, the pelvis is compensating — reduce the range until only the hip is moving.
- A chair that slides or rocks is the most common setup failure; test it with a firm push of the hand before you put weight on it.
- Keep the raised foot fully flat on the seat; rolling onto the outer edge of the foot changes the rotation path and loads the ankle unevenly.
- Do not let the standing knee lock out or hyperextend — a soft knee keeps the stabilizers on that side active.
- Moving the knee quickly turns this into momentum-driven swinging; if you cannot pause at the outward end range, slow down.
- If the seat height pinches the front of the hip at the top, choose a slightly lower surface so the joint has room to rotate.
- Hands on hips are not decorative — use them to monitor whether your pelvis stays square to the front throughout each rotation.
- Expect one side to rotate further than the other; match the range to the stiffer side rather than forcing the loose side to keep up.
- A brief hold of two or three seconds at the outward position can help stiff hips, but keep the return inward equally controlled.
Frequently Asked Questions
Which muscles does the Standing Pelvic Stabilizers Mobilization work?
It primarily targets the gluteal muscles around the raised hip, including the deep hip rotators and gluteus medius, while the trunk muscles work to keep the pelvis from twisting. The standing leg's hip stabilizers also stay active the entire time.
Why is one foot placed on a chair for this exercise?
Elevating the foot on a knee-height seat puts the hip in a bent position where it can rotate freely without supporting your full body weight. It also challenges the pelvis to stay level on the standing leg, which is the stabilizing part of the drill.
Is the Standing Pelvic Stabilizers Mobilization suitable for beginners?
Yes. The chair provides balance support, and the movement requires no strength or equipment beyond a stable seat. Beginners should simply use a smaller rotation range and hold the chair back or a wall nearby if balance feels shaky.
How high should the chair or seat be?
Aim for roughly knee height so the raised knee bends to about 90 degrees with the foot flat on the seat. Too high and the hip pinches early in the rotation; too low and you lose the freed-up range the elevation provides.
Should my pelvis move along with the rotating knee?
No — the pelvis should stay square and level while only the thigh rotates at the hip. If your hips or lower back twist with the knee, you are losing the stabilizing benefit, so shorten the range until the motion isolates to the hip.
How many repetitions should I do on each side?
Eight to ten slow, controlled rotations per side works well as a warm-up or mobility break. If one hip is noticeably stiffer, you can add a few extra repetitions to that side rather than forcing a bigger range.
What is the most common mistake in this exercise?
Swinging the knee quickly using momentum instead of rotating under control. The other frequent error is letting the torso lean or the standing knee collapse inward, both of which shift the work away from the hip stabilizers.
Can I do this exercise without a chair?
You can perform a similar hip rotation standing with the knee lifted, but the chair makes the drill far more accessible and controlled. A stable bench, sturdy ottoman, or even a stair with a handrail nearby are reasonable substitutes.
When is the best time to use the Standing Pelvic Stabilizers Mobilization?
It fits well in a lower-body warm-up before squats, lunges, or running, and also works as a short mobility break after long periods of sitting. Because the load is low, it can be done daily if the hips feel stiff.
Is it safe if I have hip or lower back discomfort?
The drill is low load, but any rotation should stay within a pain-free range and never force a stretch deep in the joint. If a movement produces sharp or lingering discomfort, stop and consult a qualified professional before continuing.