Lizard Lunge (Beginner)
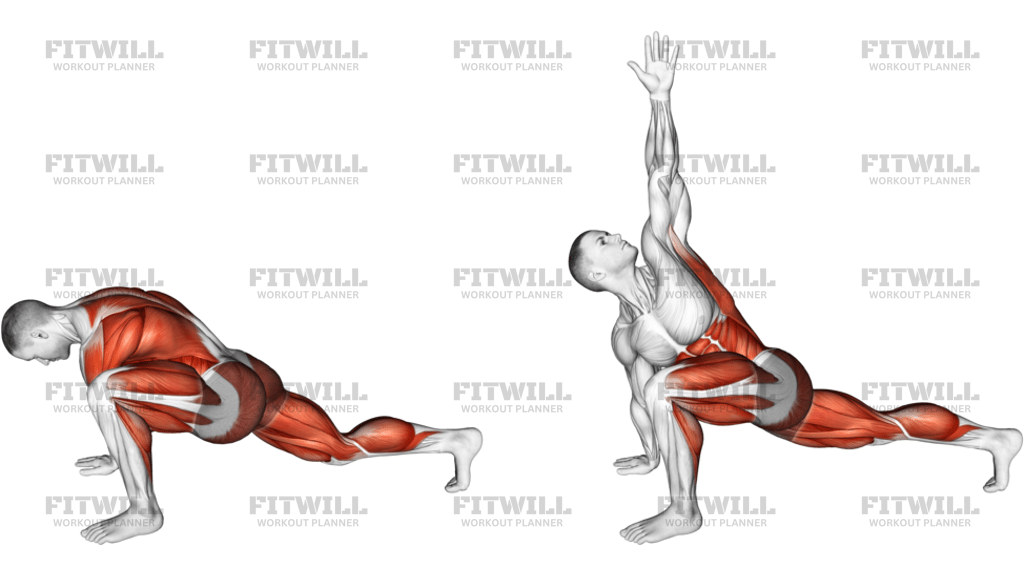
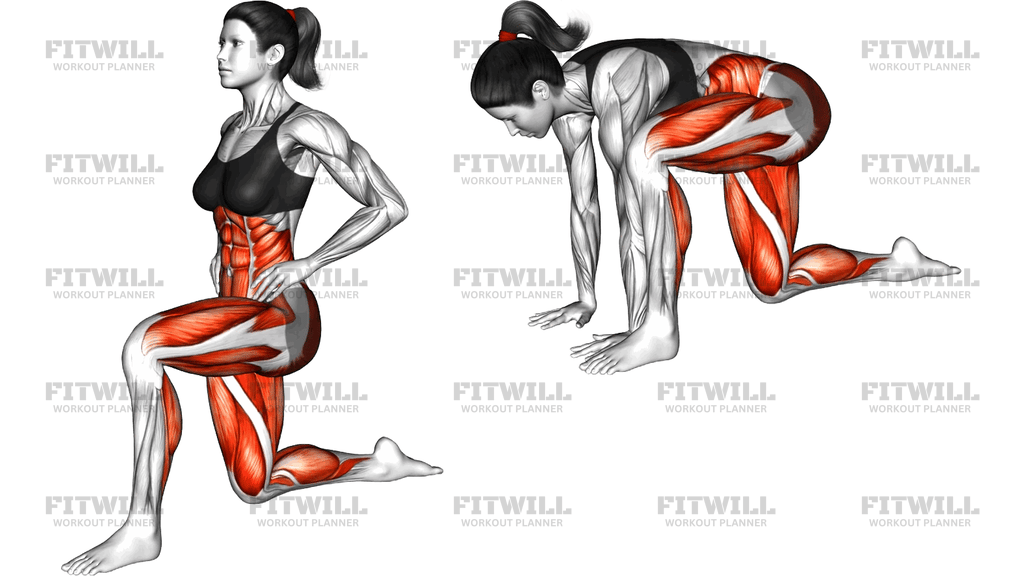
The Lizard Lunge (Beginner) is a deep lower-body stretch that takes you from a standing split stance down to a low lunge with both hands placed on the floor inside the front foot. The beginner variation keeps the back knee resting on the ground, which shortens the lever and reduces the load on the hips, making the position accessible if you are new to stretching or working with tight hip flexors. It is a staple warm-up and cool-down movement in yoga, general fitness, and mobility routines.
This stretch primarily targets the hip flexors on the trailing leg, especially the muscles that cross the front of the hip and get shortened by long hours of sitting. The front-leg position places a strong, controllable stretch on the inner thighs and groin as the knee travels outside the shoulder line, while the lowered back knee lengthens the quadriceps of the rear leg. Because your hands support you on the floor, you can fine-tune the intensity by shifting weight forward or back.
Setup matters more than most people expect. Placing the front foot far enough forward and keeping it flat keeps the front knee tracking safely over or slightly behind the toes, while a long enough stance lets the rear hip sink low enough to actually lengthen. If the stance is too short, the knee jams forward, the heel lifts, and the stretch leaks into the front of the knee instead of the hip.
To execute it well, step one foot forward between your hands from a hands-and-knees position, let the back knee settle onto the mat, and walk the front foot slightly outside the same-side hand. Lower your hips forward and down until you feel a steady stretch along the front of the rear hip and through the inner thigh of the front leg. Breathe slowly and let the hips relax with each exhale rather than forcing depth.
The Lizard Lunge (Beginner) is useful before leg training, running, or cycling, and after long sitting days when the front of the hips feels compressed. Runners and cyclists often favor it because their sports repeatedly shorten the hip flexors without taking them through a full range. Desk workers also benefit from holding it for 30 to 60 seconds per side.
Keep the movement pain-free and patient. A mild pulling sensation in the hip or groin is the goal; sharp pain in the knee, or pinching at the front of the hip, means you should shorten the stance, ease the hips back, or reduce how far you lower. Because it is a static stretch, avoid bouncing, and never push into a range your body is not ready to hold calmly.
[ Workout Log & Planner ]
Put your next workout in Fitwill
Keep your plan and training log ready when you are.


Instructions
- Start on an exercise mat on your hands and knees, with your wrists under your shoulders and your knees under your hips.
- Step your right foot forward and place it flat on the floor just outside your right hand, toes pointing forward or slightly out.
- Slide your left leg back until the left knee rests on the mat, keeping the top of the back foot flat against the floor and the back leg extended behind you.
- Brace your core lightly and keep your spine long as you begin to shift your weight forward over the front foot.
- Lower your hips forward and down until you feel a stretch along the front of the left hip and through the inner thigh of the front leg; keep the front heel grounded and the knee tracking over the toes.
- Rest your hands on the floor inside the front foot for support, keeping the elbows soft rather than locked.
- Hold the position for 30 to 60 seconds, breathing slowly and letting the hips sink a little further with each exhale.
- To come out, press through your hands, shift your weight back, tuck the rear toes under, and step the front foot back or bring the knee forward to return to hands and knees.
- Repeat on the other side, and complete 2 to 3 holds per leg if you are using this as a dedicated mobility block.
Tips & Tricks
- If your front heel keeps lifting, your stance is too short. Step the front foot a few inches farther forward so the heel can stay flat and the knee can sit over the ankle rather than past the toes.
- Front-of-knee discomfort usually means the back knee is too far behind the hips. Slide the back knee slightly forward to reduce the pull on the quadriceps and kneecap.
- Pinching at the front of the rear hip is common and usually comes from arching the lower back. Tuck the tailbone slightly and engage the glute of the back leg to open the stretch in the hip flexor instead.
- Spread the fingers and press evenly through both palms so your arms share the load; letting the shoulders collapse toward the floor turns this into an upper-body strain.
- Keep the front knee pointing in the same direction as the toes. Letting it cave inward reduces the inner-thigh stretch and loads the knee joint awkwardly.
- Widen the front foot a couple of inches outside the hand for a stronger inner-thigh stretch, or keep it closer to the hand and more centered for a milder version.
- Place a folded towel under the back knee if the hard floor is uncomfortable; the goal is to relax into the stretch, not tolerate pain in the kneeling leg.
- Do not bounce to gain depth. Static holds with slow breathing give the hip muscles time to release, while pulsing tends to trigger a protective tightening.
- If your hips sit high and you cannot feel the stretch, focus on drawing the rear knee backward and the front heel into the floor, which lengthens the hip flexor without dropping the torso.
Frequently Asked Questions
Which muscles does the Lizard Lunge (Beginner) stretch the most?
The main targets are the hip flexors of the rear leg, particularly the iliopsoas at the front of the hip. The front-leg position also stretches the inner thighs, and the lowered back knee lengthens the quadriceps.
How is the beginner version different from a full Lizard Lunge?
In the beginner version the rear knee stays on the floor and the forearms stay up, with the hands supporting you on the mat. The full version lifts the back knee and often drops to the forearms, which demands much more hip mobility and load tolerance.
Is the Lizard Lunge (Beginner) suitable for someone with very tight hips?
Yes, it is one of the more accessible deep hip stretches because the floor supports your weight and the back knee reduces the demand on the trailing hip. Shorten the stance and keep the torso higher if the stretch feels too intense at first.
Why does my front knee feel strained instead of my hip?
This usually means the stance is too short or the knee is collapsing inward. Step the front foot farther forward, keep the heel flat, and align the knee over the toes so the stretch moves back into the hip and groin.
How long should I hold the Lizard Lunge (Beginner)?
Hold each side for 30 to 60 seconds, resting briefly between holds. Longer, calm holds work better for tight hip flexors than short, rushed ones.
Should I do this stretch before or after a workout?
It works well either way. Before training, hold it briefly for 20 to 30 seconds per side to open the hips; after training or on rest days, use the longer 45 to 60 second holds to improve flexibility.
Can I use a cushion under my back knee?
Absolutely. A folded towel or a padded mat under the rear knee is a smart adjustment that lets you relax the back leg fully instead of bracing against a hard surface.
What can I substitute if the Lizard Lunge (Beginner) is too intense?
A half-kneeling hip flexor stretch with the torso upright is a gentler option, since the front leg stays more vertical and the groin is not stretched as deeply. You can progress to the lizard position once the half-kneeling version feels comfortable.
Is it normal to feel the stretch more on one side than the other?
Yes, most people have a noticeable side-to-side difference, often from posture habits or sport-specific patterns. Give the tighter side an extra hold, but never push that side dramatically harder in a single session.
Are there safety cues I should keep in mind?
Keep the front heel grounded and the knee tracking with the toes, avoid bouncing, and stay with a mild to moderate stretch sensation. Sharp pain in either knee or a pinching feeling at the front of the hip is a signal to adjust the stance or ease out of the position.