Front Lever Hold
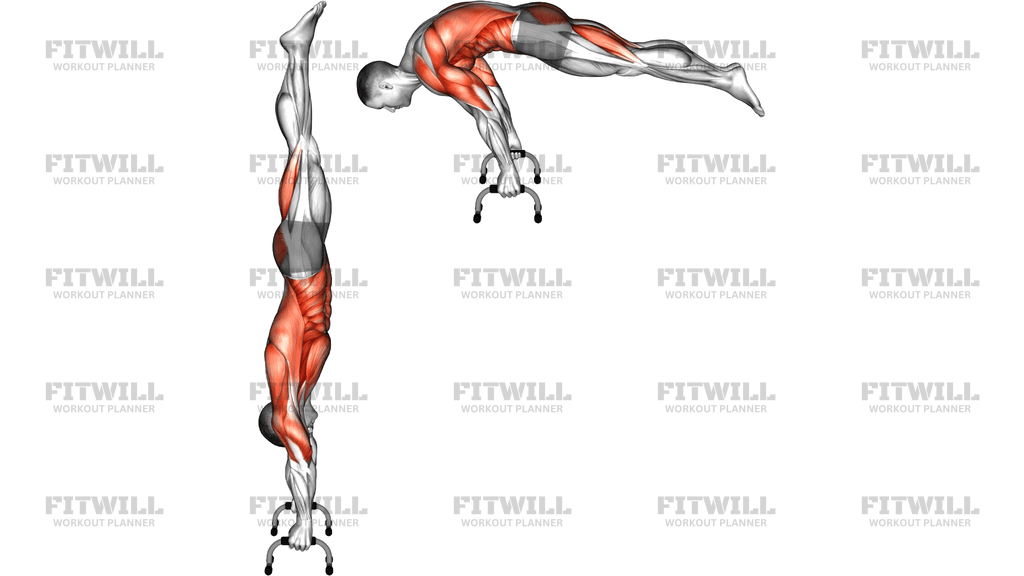
The Front Lever Hold is a static gymnastics strength position in which you hang from a set of parallel bars or a pull-up bar and hold your entire body horizontally, face-up, just above the ground. Your hands stay fixed overhead while your shoulders, back, and core work together to keep your body rigid as a plank. It is one of the most recognizable calisthenics skills and a benchmark of relative upper-body and trunk strength.
This hold is useful for intermediate to advanced trainees who want serious straight-arm pulling strength and a trunk that can resist being pulled into extension. Gymnasts, calisthenics athletes, climbers, and lifters who train bodyweight skills all use it. It also carries over well to movements like pull-ups, rows, and muscle-ups because it teaches you to generate tension through a long lever arm.
The main demand lands on the core, especially the abs and deep trunk stabilizers, which must hold the pelvis and spine in a flat line against a very long lever. The lats and shoulders pull the hands down toward the hips to keep the body from sagging, while the glutes, hamstrings, and hip flexors lock the legs into position. Grip and elbow stability work quietly the entire time.
Setup matters more than most people expect. On parallel bars, your grip width, hand position, and the height of the bars determine whether you can get your hips level with your shoulders and actually hold the line. Starting with a tucked or one-leg-extended variation lets you shorten the lever while you build the specific pulling and bracing pattern.
To execute it well, pull the bars down hard toward your hips, squeeze your legs together, tuck your pelvis slightly, and think about pushing your feet toward the far wall. The body line should be flat, with hips neither dropped toward the floor nor piked up toward the ceiling. Breathe shallowly and steadily, hold for quality seconds rather than grinding out a sloppy max, and lower down under control before resetting.
A practical safety note: this skill is very stressful on the shoulders and elbows in a straight-arm position, so build up gradually, warm the shoulders thoroughly, and stop any set where your hips drop and the position starts to break down.
[ Workout Log & Planner ]
Put your next workout in Fitwill
Keep your plan and training log ready when you are.


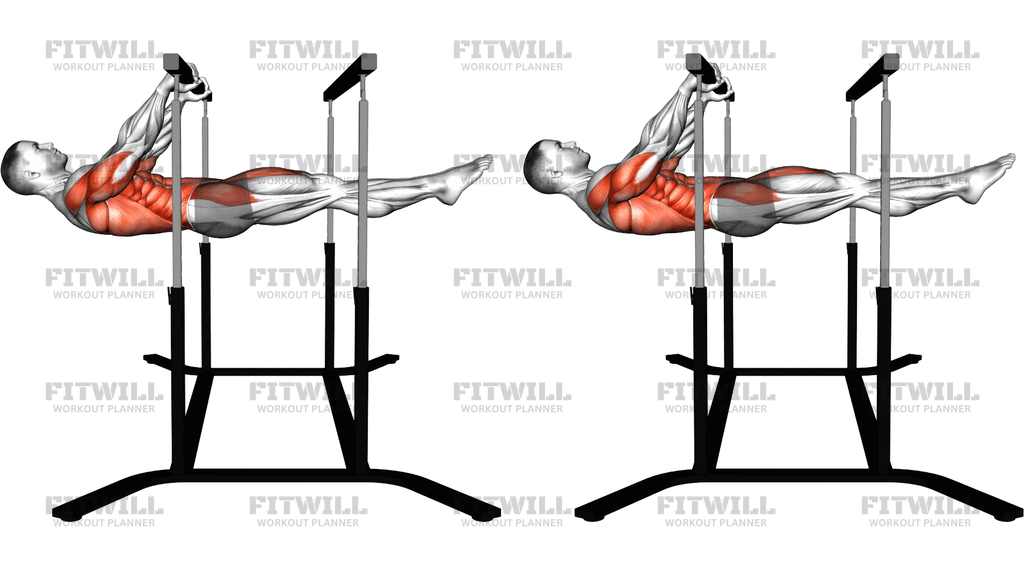
Instructions
- Set the bars at a height that lets your body hang clear of the floor when horizontal, then grip the parallel bars with a firm overhand grip about shoulder-width apart.
- From a supported hang with straight arms, lift your legs forward and up while pulling your hands down toward your hips, letting your body rotate backward until your shoulders, hips, and heels form one horizontal line.
- Squeeze your legs together and point your toes so your lower body works as a single rigid segment.
- Pull the bars down toward your hips with straight arms and press your shoulders down away from your ears to lock in the upper-body position.
- Tuck your pelvis slightly, brace your abs hard, and hold your hips at the same height as your shoulders with your body face-up and parallel to the floor.
- Keep breathing in short, steady breaths through the hold instead of holding your breath.
- Hold for your target time while watching one fixed point on the ceiling to help keep your head and neck neutral.
- When the hips start to drop or the line breaks, exit under control by piking the hips up and lowering the legs back to the hang, rather than dropping into a sag.
- Rest briefly between holds and reset your grip and brace fully before the next attempt.
Tips & Tricks
- If your hips sag below shoulder height, the lever is too long. Drop back to a tuck or advanced tuck Front Lever Hold until you can hold the line flat for 15 to 20 seconds.
- Cue the pull downward, not upward. Thinking about pulling the bars toward your hips keeps the lats engaged, whereas thinking about lifting the legs usually causes the shoulders to shrug and the position to collapse.
- A common mistake is bending the elbows to cheat the height. Straight-arm mechanics are the whole point, so keep the elbows locked and let the lats do the work.
- Film yourself from the side. From above or behind, a piked or sagging hip position is easy to miss, and side video shows the true body line instantly.
- Squeeze the glutes hard before you lift into the hold. Lazy glutes are the most frequent reason the lower body droops out of the line.
- Keep your chin slightly tucked and eyes toward your feet or the ceiling edge, since craning the neck forward tends to round the upper back and shorten the lever awkwardly.
- Avoid jumping straight into the position from a dead hang every time. Rotating up slowly builds the pulling pattern and spares your shoulders from ballistic straight-arm loading.
- If your grip fails before your core, use chalk and consider wrist wraps for longer holds, and prioritize grip work separately.
- Stop the set the moment the position degrades. Holding a broken front lever trains poor positions and loads the shoulders and lower back in a compromised way.
Frequently Asked Questions
Which muscles does the Front Lever Hold work the most?
The abs and deep core take the biggest load because they hold a long, rigid lever against gravity. The lats, front shoulders, grip, hip flexors, glutes, and hamstrings all contribute to locking in the horizontal line.
Can beginners train the Front Lever Hold?
Absolute beginners should start with tuck Front Lever Holds or front lever rows with bent knees, which shorten the lever and reduce straight-arm loading. Building base strength in hanging, rows, and hollow-body holds first makes the progression much safer.
Why train the Front Lever on parallel bars instead of a pull-up bar?
Parallel bars let you sit between the rails so your hips can pass up between them into a true horizontal position, and the grip feels more secure for many people. On a single pull-up bar the same hold works, but the wrist position and balance demands are slightly different.
How long should I hold the Front Lever Hold?
Aim for quality sets of 5 to 15 seconds at the hardest progression you can hold with a flat body line. Multiple crisp short holds beat one long, sagging attempt, and total hold time around 30 to 40 seconds per session is a good target.
What is the most common mistake in the Front Lever Hold?
Letting the hips drop toward the floor, which breaks the body line into a banana shape and shifts stress to the lower back. The fix is a harder glute squeeze, a slight posterior pelvic tilt, or stepping back to a shorter-lever progression.
What can I use as a substitute for the Front Lever Hold?
Tuck or advanced-tuck front lever holds, front lever raises on rings or a bar, and strict hanging leg raises with a hollow-body hold all train overlapping strength. Weighted pull-ups and straight-arm pulldowns also build the lat and shoulder strength the hold demands.
Is the Front Lever Hold safe for the shoulders and elbows?
It places a large straight-arm load on the shoulder and elbow, so it is safe when progressed gradually with a thorough warm-up and solid straight-arm strength base. If you feel joint pain rather than muscular effort, stop and regress the leverage or the hold duration.
How do I know when I am ready to progress from the tuck Front Lever Hold?
When you can hold a flat, rigid tuck for around 15 to 20 seconds for several sets, begin extending one leg at a time, then move to the advanced tuck with an open hip angle. Each step should still show a straight line from shoulders to knees or heels.
Should I breathe during the Front Lever Hold?
Yes, use short, shallow breaths while keeping the abs braced. Holding your breath for the entire set spikes internal pressure, makes the hold feel harder, and usually shortens your time under tension.
How often can I train the Front Lever Hold?
Two to three focused sessions per week works well for most people, since the hold taxes the same pulling and bracing structures repeatedly. Keep at least one easy or rest day between hard sessions so your shoulders, elbows, and grip recover.