Ring Handstand
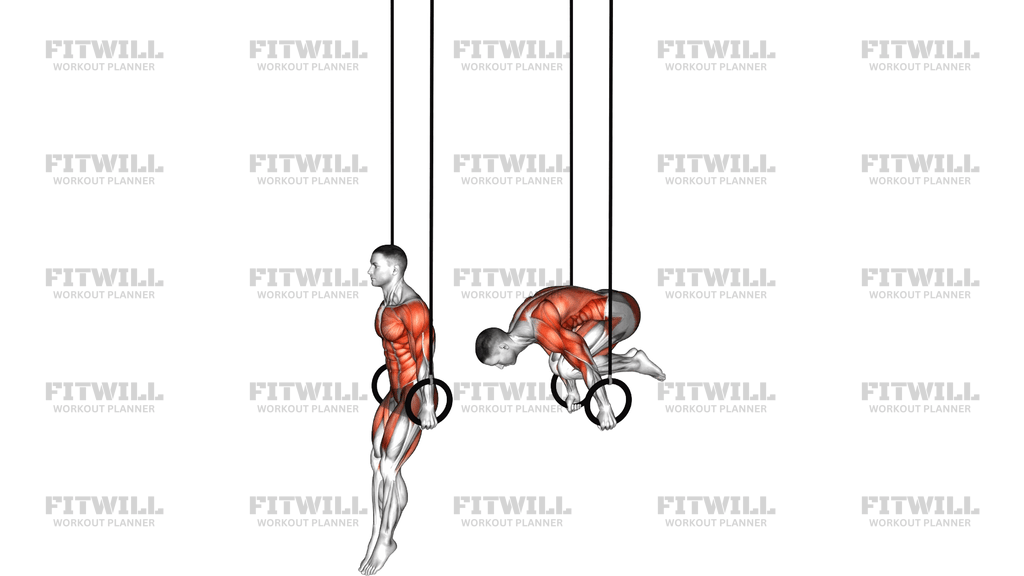
The Ring Handstand is a gymnastics-style hold in which you balance fully inverted on top of a pair of gymnastic rings, arms locked and body stacked in a straight vertical line. Unlike a floor handstand, the rings move under your hands, so every small correction has to come from your shoulders, grip, and trunk rather than from your wrists. The movement typically starts from a support hold on the rings: you press to a straight-arm support, turn the rings out to the sides, shift your weight forward, lift the hips over the shoulders through a tuck or pike, and extend the legs upward into the finished handstand.
This is an advanced calisthenics skill. It is useful for gymnasts, circus and acrobatic athletes, and experienced calisthenics practitioners who already own a solid floor handstand and a stable ring support hold. Because the rings are unstable, it builds an unusually high level of straight-arm shoulder strength, overhead pushing capacity, and midline control. The triceps, delts, and upper back handle the pressing and stacking work, while the abs, hip flexors, and lower back keep the inverted line from folding.
The setup matters more on rings than on the floor. Ring height, strap length, and how far the rings swing all affect the entry, and the rings must be turned out — rotated so the insides of your palms face slightly outward — to keep the elbows tracking safely and to give you a stable base. Rushing into the inversion without that turned-out support is the most common reason people lose control at the top. A spotter or a low training height is strongly recommended while you are learning, because a failed balance on rings usually ends with you falling sideways or forward rather than stepping out like on the floor.
Execution is slow and deliberate. From support, you lean the shoulders slightly ahead of the hands, tuck the knees and roll the hips up until they sit directly over the shoulders, then unfold the legs a little at a time so the body finishes stacked. At the top the elbows stay locked, the ribs stay down, and you balance with tiny adjustments through the shoulders and grip instead of big swings. Coming down should mirror the way up: tuck, lower the hips back through the support position, and only then drop to the floor.
Most people train the Ring Handstand as a skill piece at the start of a session, holding short sets of a few seconds at a time. Progressions matter here — wall handstands, ring support holds, ring tuck handstands, and band-assisted holds on low rings all bridge the gap. Treat it as a long-term project; the balance is delicate and the strength requirement at full extension is significant, so consistent, patient practice beats forcing the full hold before the pieces are ready.
[ Workout Log & Planner ]
Put your next workout in Fitwill
Keep your plan and training log ready when you are.


Instructions
- Set the rings to hang freely at roughly hip-to-chest height so you can mount into a support hold with straight arms, and check that the straps are even and not twisting.
- Grip the rings slightly wider than shoulder width with a neutral, turned-out position, so the inside edges of the rings face forward when you press up.
- Press down through the rings into a straight-arm support: shoulders pushed down away from the ears, elbows locked, legs together, toes pointed, body vertical.
- Brace your abs and glutes and hold a subtle hollow line from shoulders to toes, keeping the rings turned out the entire time.
- Shift your weight forward so your shoulders travel slightly past your hands, then tuck your knees toward your chest and pull your hips up over your shoulders.
- Keep pulling the hips upward until they stack over the shoulders, then extend your legs slowly toward the ceiling until the body is one straight vertical line over the rings.
- At the top, lock the elbows, press the rings apart slightly and keep them turned out, and balance with small corrections through the shoulders and grip rather than swinging.
- Hold the handstand while breathing in short, steady breaths through the nose; do not hold your breath.
- Descend by reversing the path: tuck the knees, lower the hips back down through the support position with straight arms, and only then dismount to the floor.
- Reset your grip and stance before the next attempt, and stop the set as soon as the rings start to turn in or your elbows begin to bend.
Tips & Tricks
- If the rings keep turning inward at the top, you are losing the turned-out grip — actively rotate the rings outward before you ever leave the support position, because you cannot fix it once inverted.
- Bent elbows are the classic failure point; they mean the shoulders are not stacked over the hands. Come down, and re-enter focusing on locking the arms before extending the legs.
- Overbalancing forward on rings is far more dangerous than on the floor. Plan your bail-out in advance: tuck and come back through support, or let go and land on your feet if the rings are set low enough.
- Do not attempt this before you can hold a clean floor handstand for at least 30 seconds and a solid ring support hold; the rings add instability on top of a skill you should already own.
- Start with a tuck Ring Handstand rather than the straight-body version. Extending the legs raises your center of mass and makes every balance error worse.
- Set the rings low, ideally over a mat, while learning. The height removes fear-tension from the shoulders and makes missed attempts recoverable.
- Grip fatigue ends Ring Handstand sessions before shoulder strength does — if your forearms are burning and the rings start slipping, stop and rest rather than fighting a fading grip.
- Keep the head neutral between the arms instead of craning the neck to look at the floor; tilting the head changes the line and usually tips the balance.
- Practice short, high-quality holds of a few seconds rather than grinding long, ugly ones. Bad repetitions on rings teach your body the wrong corrections.
Frequently Asked Questions
Which muscles does the Ring Handstand work most?
The primary work comes from the delts and triceps holding the locked-arm press, with the upper back and traps stabilizing the shoulder position. The abs, hip flexors, and lower back keep the inverted body line rigid over the moving rings.
Can a beginner train the Ring Handstand directly?
No — this is an advanced skill. You should first own a comfortable floor handstand of around 30 seconds and a stable straight-arm support hold on rings, then progress through tuck holds on low rings before attempting the full position.
Why must the rings be turned out during the Ring Handstand?
Turning the rings out keeps the elbows tracking safely in straight-arm work and creates a more stable base under your hands. Letting the rings turn in shifts stress onto the elbow joints and makes the balance noticeably harder to control.
How is the Ring Handstand different from a floor handstand?
On the floor, your wrists give you fine balance adjustments, but the rings move in every direction, so corrections come from the shoulders, grip, and trunk instead. The instability also demands more straight-arm strength to keep the elbows locked under load.
How long does it take to learn the Ring Handstand?
For someone with a solid floor handstand and ring support hold, several months of consistent practice is realistic. Starting from scratch, treat it as a one-to-two-year skill project built on handstand and ring strength progressions.
What is the safest way to come down from the Ring Handstand?
Reverse the entry: tuck the knees, lower the hips back through the support position with straight arms, and then dismount to the floor. Do not try to save a failed hold by bending the arms — either return through the tuck or bail cleanly and land on your feet.
What are the most common mistakes in the Ring Handstand?
Bending the elbows, letting the rings turn inward, arching the lower back and opening the ribs, and kicking into the inversion instead of lifting the hips with control. All four come back to the same root problem — trying the full skill before the support position and floor handstand are solid.
What can I use instead of a Ring Handstand?
Wall handstands and free-standing floor handstands build the balance base, ring support holds build the straight-arm stability, and tuck Ring Handstands or band-assisted holds on low rings bridge the gap. Parallette handstands are a good middle step because they are elevated but stable.
How long should I hold the Ring Handstand?
Short sets of three to ten seconds are ideal while learning, because quality of balance matters more than duration. Once you can hold a clean, straight-body position reliably, build toward 20 to 30 seconds across several sets.
Do I need a spotter for the Ring Handstand?
A spotter is highly recommended when learning, along with low rings over a mat. Unlike a floor handstand, a lost balance on rings can send you forward or sideways with nothing under your hands to step out on.