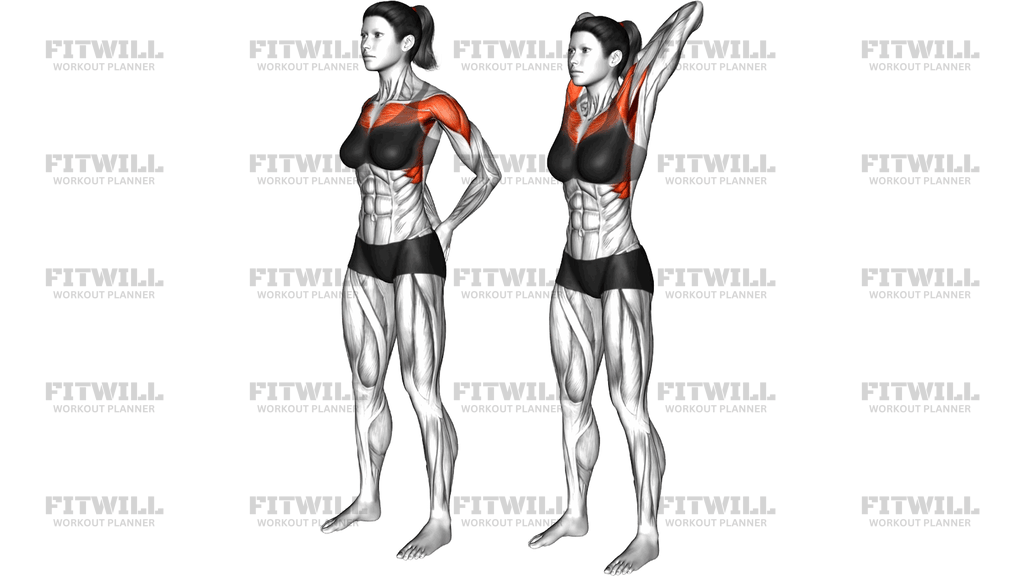
Single Arm Lat Stretch Against Wall
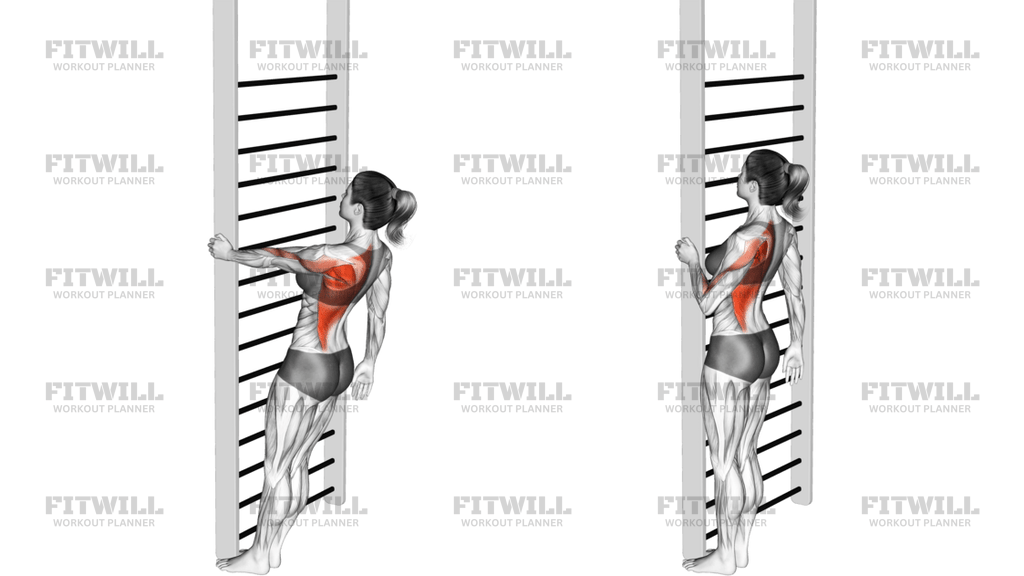
The Single Arm Lat Stretch Against Wall is a targeted flexibility drill that lengthens the latissimus dorsi on one side of your back at a time. You set up by standing beside a wall, hinging forward at the hips with soft knees, and reaching one arm up and out so the palm presses flat against the wall above shoulder height. As you sink your chest and hips away from the arm, you feel a deep pull running from the back of the armpit down the side of the torso — the exact line of the lat.
This stretch is especially useful for anyone whose lats tend to sit short and tight: lifters who pull heavy in rows, pulldowns, and deadlifts, overhead athletes like swimmers, volleyball and baseball players, and people who spend long hours at a desk with rounded shoulders. Working one side at a time matters because most people have a noticeable difference in lat flexibility between arms, and the single-arm setup lets you match the intensity to each side instead of forcing the tighter side to dictate the stretch.
Beyond the lats, the position lightly lengthens the teres major, the rear deltoid, and the tissues around the shoulder blade and armpit, which is why it often feels like it opens up the whole upper side of the body. The bent-over stance also encourages the hips to travel back and the spine to lengthen, adding a mild release through the mid back. Because the wall gives you something concrete to press into, you can fine-tune the intensity with tiny adjustments in hand height, torso angle, or hip position rather than relying on gravity alone.
Setup details make or break this stretch. Keep the palm flat and the elbow straight but not locked, hinge from the hips instead of rounding the low back, and let the knees bend enough that you can tilt the pelvis without strain. The stretch should register along the side and back of the armpit — not as a pinching sensation in the shoulder joint or a sharp pull in the neck.
A typical approach is to hold each side for 20 to 40 seconds while breathing slowly, repeating two to three rounds per side. It works well as a warm-up before upper-body pulling sessions, a cool-down after lat-heavy training days, or a standalone break during the workday when your shoulders feel crowded and stiff.
Stay inside a comfortable stretch — a strong but tolerable pull is the goal, never pain. If you feel impingement at the front of the shoulder, lower the hand slightly on the wall, reduce the forward lean, or shorten the hold and build up gradually over weeks.
[ Workout Log & Planner ]
Put your next workout in Fitwill
Keep your plan and training log ready when you are.


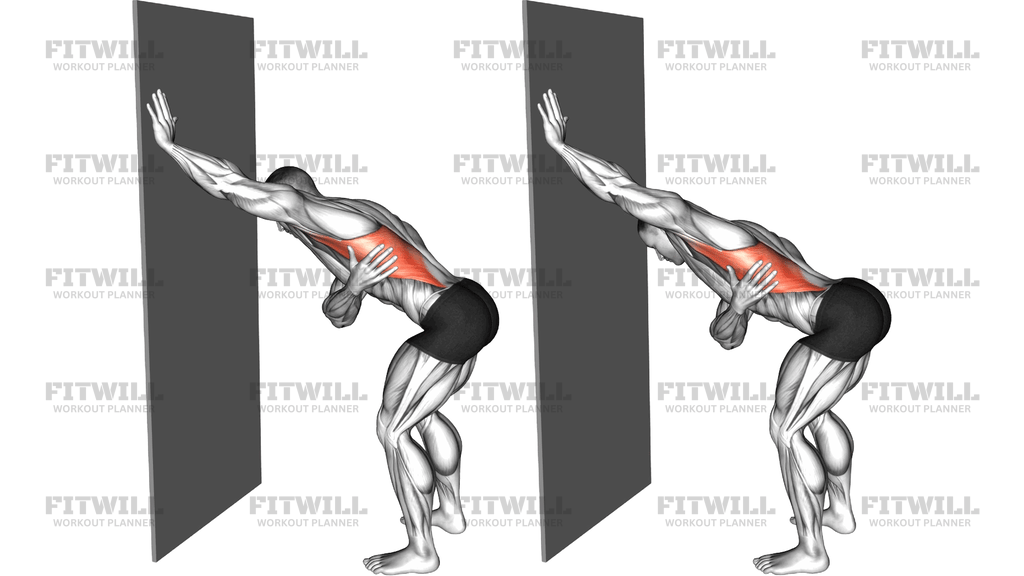
Instructions
- Stand facing a clear section of wall with about two to three feet of space between you and it, feet roughly hip-width apart.
- Reach one arm up and diagonally toward the wall so your palm contacts it at or slightly above shoulder height, elbow fully straight and fingers spread.
- Hinge forward from the hips and push your hips back, keeping a soft bend in both knees so your pelvis can tilt freely.
- Let your other hand rest lightly on your ribcage or thigh for balance and to help you feel the ribs stay down.
- Press the palm gently into the wall and drive your chest and hips away from the arm until you feel a steady pull along the side of the armpit and down the lat.
- Hold that position for 20 to 40 seconds, breathing slowly and letting the stretch deepen slightly with each exhale.
- To release, ease the pressure off the palm first, then walk your feet in and bring the arm down under control rather than dropping it.
- Shake out the shoulder, reset your stance, and repeat the same sequence on the opposite arm.
- Complete two to three holds per side, adjusting hand height or hip depth each round to find the most effective line of pull.
Tips & Tricks
- If you feel a pinch at the front of the shoulder instead of a lat stretch, lower your hand a few inches on the wall — the overhead line is not always the right angle for every shoulder.
- Keep the elbow straight but never hyperextended; pushing hard into a locked elbow shifts the tension into the joint instead of the lat.
- Do not let the low back round as you hinge. Bend the knees more and push the hips further back so the forward angle comes from the hips, not a slouched spine.
- Rotate your torso slightly away from the stretching arm to intensify the pull on the lat; rotating toward it weakens the stretch.
- Keep the ribs from flaring on the stretching side — pulling them down keeps the lat in a lengthened position instead of letting the torso compensate.
- Start with a modest lean and build pressure over the first few breaths. Forcing depth in the first two seconds usually just makes the shoulder guard against the stretch.
- The bent-over position can load the hamstrings on the standing leg; shift your weight slightly toward the wall if the backs of your legs grab your attention before the lat does.
- If one side is noticeably tighter, do an extra hold on that side rather than stretching it harder for longer in a single attempt.
- Exhale as you settle into each position — holding your breath tends to stiffen the lats and shorten the range you can reach.
Frequently Asked Questions
Which muscles does the Single Arm Lat Stretch Against Wall target?
The primary target is the latissimus dorsi, the large muscle running from the armpit down the side of the back. The teres major, rear deltoid, and tissues around the shoulder blade also get lengthened in this position.
How high should my hand be on the wall during the Single Arm Lat Stretch Against Wall?
Start with your palm at or slightly above shoulder height. Higher hand placement emphasizes the overhead length of the lat, while a slightly lower hand is gentler and often better if you have any shoulder discomfort.
Why do I need to bend my knees in this stretch?
Bent knees let your hips travel back and your pelvis tilt, so the forward lean comes from the hip hinge rather than a rounded lower back. This keeps the stretch focused on the lat and protects the spine.
Is the Single Arm Lat Stretch Against Wall suitable for beginners?
Yes. The movement needs no equipment beyond a wall, and the intensity is easy to regulate by changing your lean or hand height. Beginners should start with a smaller forward lean and shorter holds of around 20 seconds.
How long should I hold each side?
Twenty to forty seconds per side works well for most people, repeated two to three times. If you are cooling down after heavy pulling work, longer holds toward the 40-second end tend to feel more productive.
I feel this more in my shoulder than my lat. What should I change?
A pinching feeling at the shoulder usually means the arm angle is too aggressive. Lower the hand on the wall, reduce the forward lean, and make sure the elbow is straight without being jammed into a locked position.
What can I use instead of a wall for a similar lat stretch?
A doorframe, squat rack upright, or sturdy post works the same way. Kneeling lat stretches on a bench or floor, or a child's-pose-style reach with one arm angled across the body, are good alternatives when no wall is available.
When is the best time to do the Single Arm Lat Stretch Against Wall?
It works before upper-body pulling sessions to prepare the lats for overhead and rowing movements, and after training as a cool-down. Many people also use it as a mid-day reset when desk posture leaves the shoulders feeling tight.
Should I stretch both sides even if only one lat feels tight?
Yes, stretch both sides, but you can add an extra hold to the tighter side. Stretching only the stiff arm can quietly widen the imbalance between the two sides over time.