Hamstring Bridge
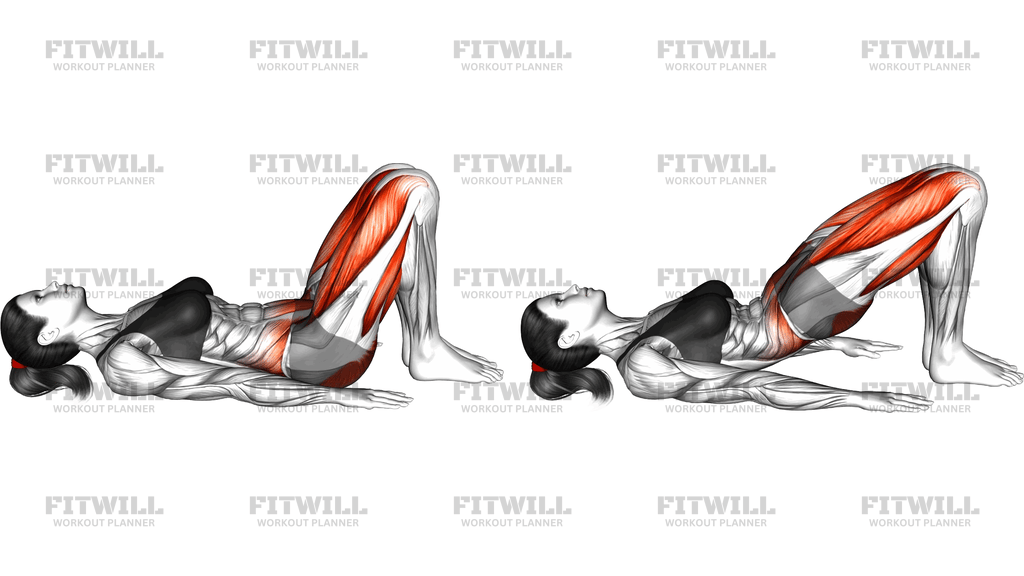
The Hamstring Bridge is a floor-based hip extension exercise performed lying on your back with your knees bent and feet flat. Unlike a standard glute bridge, the emphasis is deliberately shifted toward the hamstrings by keeping the heels planted and actively pulling them toward your hips as you lift. This small change in intent and foot placement turns a familiar glute movement into one that loads the back of the thigh through its key job: extending the hip with the knee bent.
Because you work from the floor with no external load, the Hamstring Bridge is accessible to almost anyone. It suits beginners building their first layer of posterior chain strength, people returning from time off who want a low-stress reintroduction to hamstring work, and lifters who need a controlled activation drill before deadlifts, squats, or Romanian deadlifts. It is also a practical option for home training, where leg curl machines and weighted hip hinges are not available.
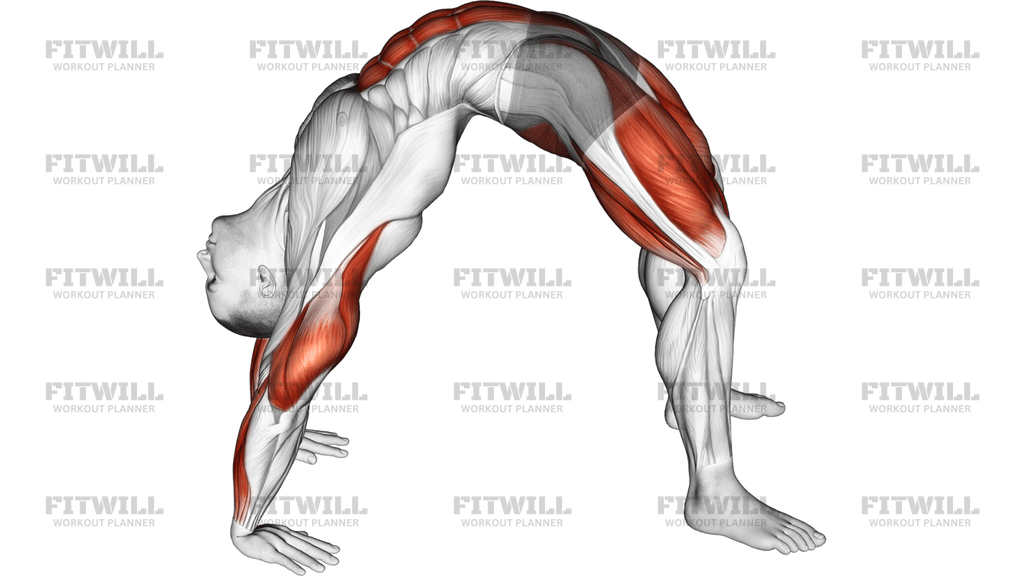
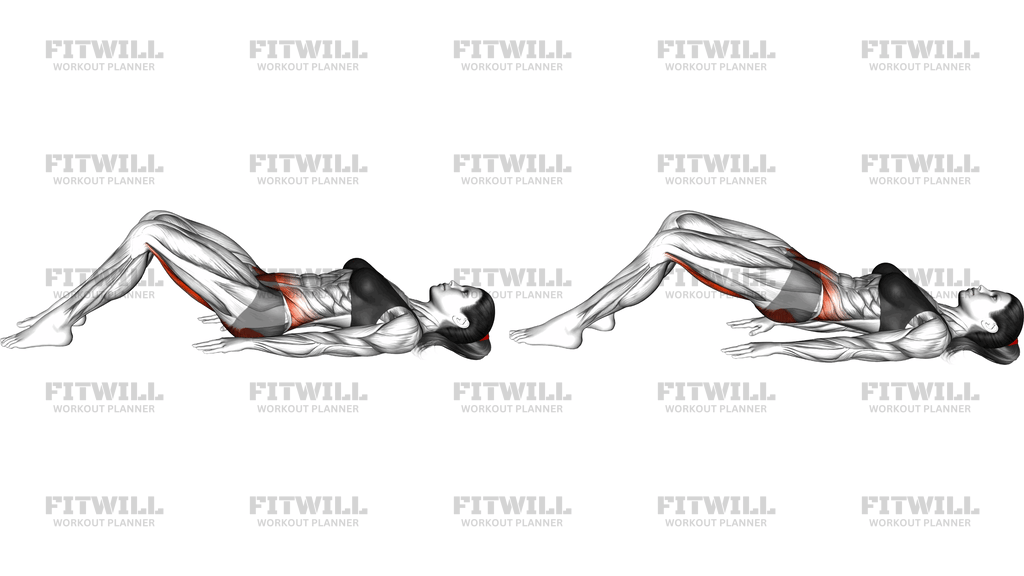
The primary muscles at work are the hamstrings along the back of the thigh, supported strongly by the glutes. Your lower back muscles and deep core stabilize the pelvis and spine, while the arms stay relaxed at your sides and simply help with balance. The highlight in the anatomy view reflects this reality: the hamstrings and hip area do most of the visible work, with the trunk bracing to keep the lift coming from the hips rather than the lower back.
Setup matters more than it looks. Heel distance from the hips determines how the effort is divided between the hamstrings and glutes: heels closer to the body and a deliberate heel-pull bias the hamstrings, while heels further away hand more of the job to the glutes. Feet flat, knees tracking over the ankles, and ribs kept down keep the movement honest and stop you from arching into the lower back at the top.
To execute it well, press your upper back and arms into the floor, exhale to brace, then drive your hips upward by pulling your heels toward you and squeezing the back of your thighs. Lift only until your body forms a straight line from shoulders to knees — over-lifting usually means lumbar extension instead of more hip work. Pause briefly at the top, then lower under control until your hips touch down softly.
A few practical points keep this exercise productive. Move at a pace you can own, especially on the way down, since the lowering phase is where the hamstrings do much of their work. Keep your neck relaxed and your gaze upward, and let your arms rest rather than pushing hard into the floor. If you feel the effort moving into your lower back, reduce your range or recheck your bracing before adding reps.
[ Workout Log & Planner ]
Put your next workout in Fitwill
Keep your plan and training log ready when you are.


Instructions
- Lie on your back on an exercise mat with your arms resting at your sides, palms down.
- Bend your knees and place your feet flat on the floor, heels roughly a hand-width from your glutes and about hip-width apart.
- Rest your head and upper back on the floor and let your shoulders stay relaxed; this is your starting position.
- Exhale and gently brace your core, keeping your ribs down so your lower back stays neutral.
- Press your heels into the floor and pull them toward your hips as you lift, letting the pull drive your hips upward.
- Raise your hips until your body forms a straight line from shoulders to knees, and squeeze the back of your thighs and glutes at the top.
- Hold the top position for one to two seconds without arching your lower back higher.
- Lower your hips slowly and with control until they touch the floor lightly.
- Breathe in as you lower, breathe out as you lift, and reset your brace before starting the next rep.
Tips & Tricks
- If your hamstrings are not working, slide your heels a little closer to your glutes and consciously drag them toward your hips on every rep — the pull, not just the push, is what biases the back of the thigh.
- Lifting your hips higher than shoulder-to-knee line usually means your lower back is arching instead of your hips extending; stop at the straight-line position and squeeze there.
- Do not push your hands into the floor to hoist yourself up — the arms are for balance only, and heavy pressing quietly turns this into a shoulder-driven lift.
- Point your knees straight up or slightly inward-facing feet square; knees drifting outward shifts work to the outer hips and away from the hamstrings.
- Lower your hips for a slow two to three count instead of dropping; the controlled descent is where the hamstrings lengthen under load.
- Keep your head resting on the floor and your neck relaxed — lifting your chin toward your chest tenses the neck and rounds the upper body out of position.
- If your heels slide on a smooth floor, wear trainers or place your feet on a mat edge for grip so the heel-pull actually works.
- Stop each rep with hips just touching the floor rather than slamming down; the brief reset keeps tension on the posterior chain instead of bouncing.
- Start with your feet hip-width apart and toes pointing forward; a wide or turned-out stance changes which muscles dominate the lift.
Frequently Asked Questions
Which muscles does the Hamstring Bridge work?
The hamstrings on the back of your thigh are the primary movers, with the glutes assisting hip extension. Your lower back and core muscles stabilize the pelvis and spine throughout the lift.
How is the Hamstring Bridge different from a regular Glute Bridge?
The foot placement and intent differ: in the Hamstring Bridge you keep your heels close to your glutes and actively pull them toward your hips as you lift, which shifts effort toward the hamstrings. A standard Glute Bridge focuses mainly on squeezing the glutes.
Is the Hamstring Bridge suitable for beginners?
Yes. It requires no equipment beyond a mat, the range is easy to adjust, and the floor supports your spine, making it a safe first step into posterior chain training.
How far should my heels be from my body?
Start with your heels about a hand-width from your glutes so your knees bend to roughly 90 degrees at the top. Heels closer increase hamstring involvement; heels further away shift more work to the glutes.
Why do I feel the Hamstring Bridge in my lower back?
This usually means you are arching your spine at the top instead of extending at the hips, or your core is not braced. Stop at a straight line from shoulders to knees, keep your ribs down, and re-engage before each rep.
How many reps and sets should I do?
Two to four sets of 10 to 15 controlled reps is a reasonable starting point. Prioritize a slow lowering phase and a firm squeeze at the top over chasing higher numbers.
Can I make the Hamstring Bridge harder without equipment?
Yes. You can pause longer at the top, slow the lowering phase to three or four seconds, perform single-leg variations with the other foot lifted, or elevate your heels slightly to increase the hamstring demand.
What can I use instead of an exercise mat?
Any firm, comfortable surface works, such as a folded towel or carpeted floor. The main goal is cushioning for your spine and enough grip that your heels do not slide during the pull.
Should my arms push into the floor during the lift?
No. Keep your arms resting at your sides and use them only for balance; pushing hard with the hands takes work away from the hamstrings and hips.
Is it safe to do the Hamstring Bridge every day?
For most people, a bodyweight hamstring bridge is gentle enough for frequent practice, especially as a warm-up drill. Still, treat it like any strength work: give the muscles a day of recovery between dedicated sessions rather than training to fatigue daily.