Band Front Raise
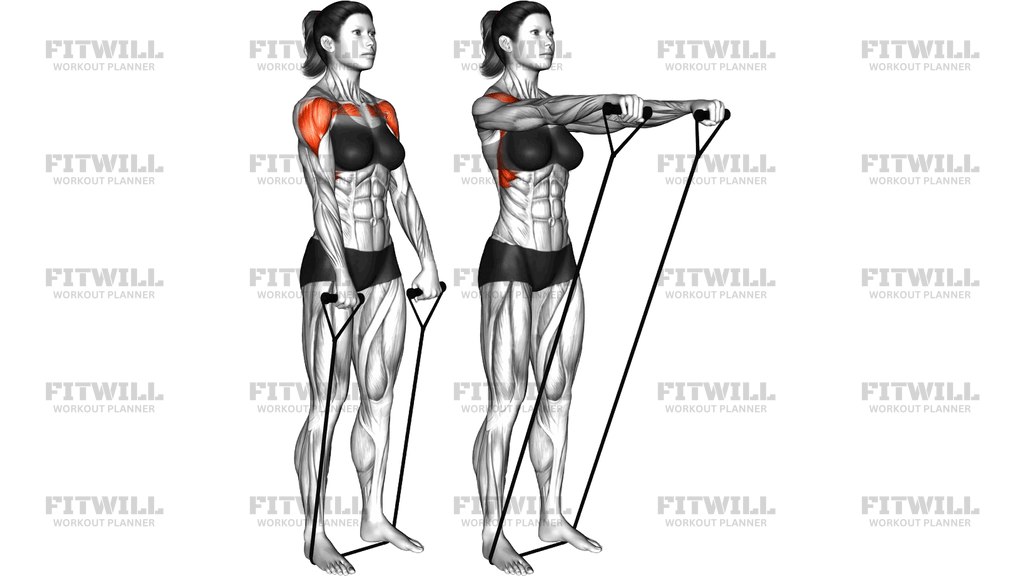
The Band Front Raise is a standing shoulder exercise performed with a resistance band anchored under both feet. You hold one handle in each hand at your thighs, then raise your straight arms forward and upward until they reach roughly shoulder height, before lowering them back down under control. The band creates resistance that increases as your arms rise, which challenges the front of the shoulders through the most difficult part of the range.
This movement primarily targets the anterior deltoids, the muscles at the front of each shoulder that lift the arm forward. The upper portion of the chest and the upper traps assist as your arms approach shoulder height, while your forearms and grip work to control the handles throughout. Because you are standing, your core also works quietly to keep your torso upright and stop you from leaning back as the band pulls.
The Band Front Raise suits a wide range of trainees. Beginners appreciate that the setup is simple and the resistance is self-scaling: a lighter or shorter band, or a wider stance, reduces tension, while a thicker band increases it. It is also a practical choice for home workouts, travel training, or as a burnout finisher after pressing work, since a single band replaces a pair of dumbbells and takes up almost no space.
Setup matters more than most people expect. Standing on the middle of the band with both feet secures the anchor, but your stance width and how much slack you leave determine the starting tension. Too much slack means the first half of the rep feels effortless and the muscles never work where they are weakest; too little slack makes the bottom position cramped and encourages shrugging. Adjust your feet so there is light tension with your arms hanging naturally at your sides.
To execute well, raise your arms straight ahead of your body to about shoulder height with your palms facing down or slightly inward, then pause briefly before lowering slowly. Keep your elbows nearly straight but not locked, and resist the urge to swing or lean. The band should stay under your feet for the entire set, and the handles should travel in a vertical path in front of your shoulders rather than drifting outward.
A few practical points keep this exercise safe and productive. Use a band in good condition with no cracks or thin spots, since a snapped band under tension can strike your face or chest. Move deliberately rather than explosively, and stop the set when you cannot raise your arms to shoulder height without shrugging or arching your back. If you feel pinching at the front of the shoulder, reduce tension, narrow your grip slightly, or lower the band to just below shoulder height.
[ Workout Log & Planner ]
Put your next workout in Fitwill
Keep your plan and training log ready when you are.


Instructions
- Stand with both feet in the middle of a resistance band, roughly hip-width apart, so the band is anchored securely under each foot.
- Grip one handle in each hand with your palms facing your thighs, and let your arms hang straight down at your sides with light tension in the band.
- Stand tall with your chest up, ribs stacked over your hips, and brace your abdominal muscles to keep your torso from swaying.
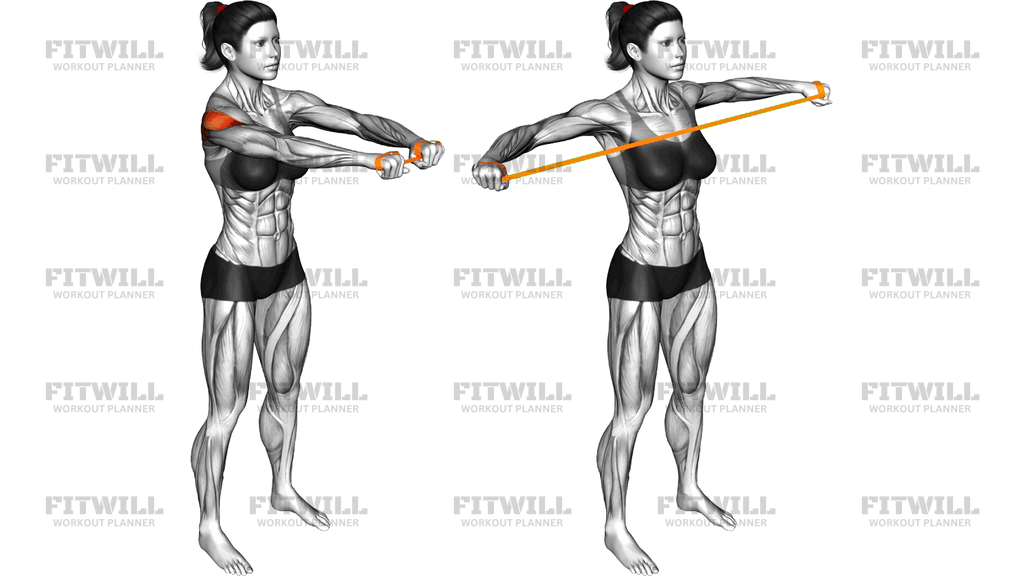
- Exhale and raise both arms straight out in front of your body, keeping your elbows nearly straight and your shoulders down away from your ears.
- Continue lifting until your arms are roughly parallel to the floor at shoulder height, with the band running down the front of your body to your feet.
- Pause for a moment at the top, keeping your wrists straight and neutral rather than letting them bend back.
- Inhale and lower your arms slowly back to your thighs, resisting the band's pull instead of letting it drop your arms.
- Reset your posture at the bottom, making sure the band stays anchored under both feet, then begin the next repetition.
Tips & Tricks
- Adjust your stance width to tune the difficulty: a wider stance shortens the band and makes the exercise easier, while a narrower stance adds tension before you even start lifting.
- If you find yourself shrugging at the top, you are using your upper traps to finish the rep; lower the weight of tension by choosing an easier band and stop the set when your shoulders start creeping up.
- Do not lock your elbows hard or hyperextend them; a soft, almost-straight arm keeps the tension on the shoulders instead of stressing the joint.
- Avoid leaning your torso back as your arms rise. If you cannot stay upright, the band is too heavy or you are lifting past a height you can control.
- Keep the handles traveling in a straight vertical line in front of your shoulders; letting your arms drift wide turns this into a different movement and reduces front shoulder work.
- Pause for a full second at shoulder height. Because band tension peaks at the top, the pause is where most of the muscle-building work happens.
- Control the lowering phase for two to three seconds. Letting the band snap your arms down wastes half the rep and is the most common form fault with this setup.
- Inspect the band for wear before each session, and never anchor it around sharp edges; standing on it with flat, dry feet is the safest setup shown here.
- If your wrists ache, check that the handles rest in the middle of your palm and that your wrists stay straight rather than cocked backward at the top.
Frequently Asked Questions
What muscles does the Band Front Raise work?
It primarily targets the anterior deltoids at the front of the shoulders. The upper chest and upper traps assist as your arms reach shoulder height, and your core works to keep your torso upright against the band's pull.
Why stand on the band with both feet instead of one?
Standing on the band with both feet creates a stable, symmetrical anchor and lets you adjust tension by widening or narrowing your stance. A single-foot anchor shifts your balance and makes the load uneven between sides.
How high should I raise my arms during the Band Front Raise?
Raise your arms to about shoulder height, where they are roughly parallel to the floor. Lifting much higher shifts work toward the traps and often causes shrugging or back arching without added shoulder benefit.
Is the Band Front Raise good for beginners?
Yes. The setup is simple, and resistance is easy to scale by choosing a lighter band or shortening the range slightly. Beginners should start with light tension and focus on a smooth, controlled tempo before adding difficulty.
How is a band front raise different from a dumbbell front raise?
A band's resistance increases as your arms rise, so the top of the movement is hardest, while a dumbbell is hardest at the start when gravity acts straight down on the arm. Both build the front shoulders, but the band keeps tension through the entire range when anchored properly.
My lower back arches when I lift my arms. How do I fix it?
Brace your abs before each rep and think about keeping your ribs stacked over your hips. If you still arch, the band is too heavy or you are raising past shoulder height, so reduce tension and cap the range at parallel.
What can I use if I don't have a resistance band with handles?
A plain loop band works if you grip the ends or loop it around your hands, though the handles are more comfortable. Dumbbells, a weight plate, or a cable handle also perform front raises if you have them available.
How many reps and sets should I do?
For muscle endurance and general shoulder development, 2 to 4 sets of 10 to 15 controlled reps works well. Because band tension peaks at the top, choose a load you can lift cleanly to shoulder height on every rep.
Is it safe to do the Band Front Raise with shoulder pain?
Mild muscle fatigue is normal, but sharp or pinching pain at the front of the shoulder is a signal to stop. Lower the tension, reduce the range slightly, and if discomfort persists, have the shoulder assessed before continuing.
Should my palms face down or toward each other?
Either works. Palms facing the thighs at the bottom and rotating slightly downward or inward as you lift is the most natural path shown in this setup. Choose whichever wrist position feels most comfortable and pain-free.