Lever Seated Upper Back Row
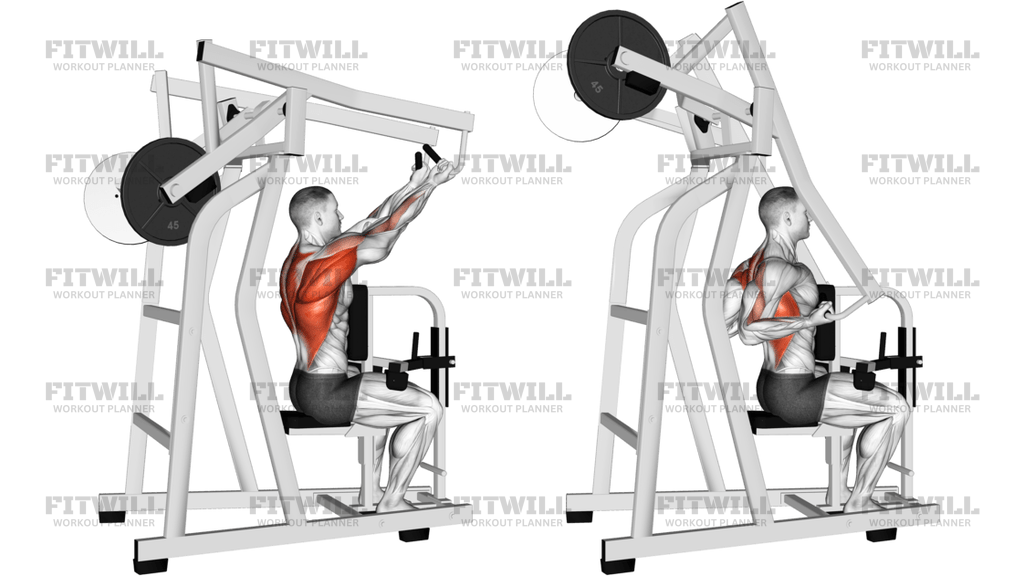
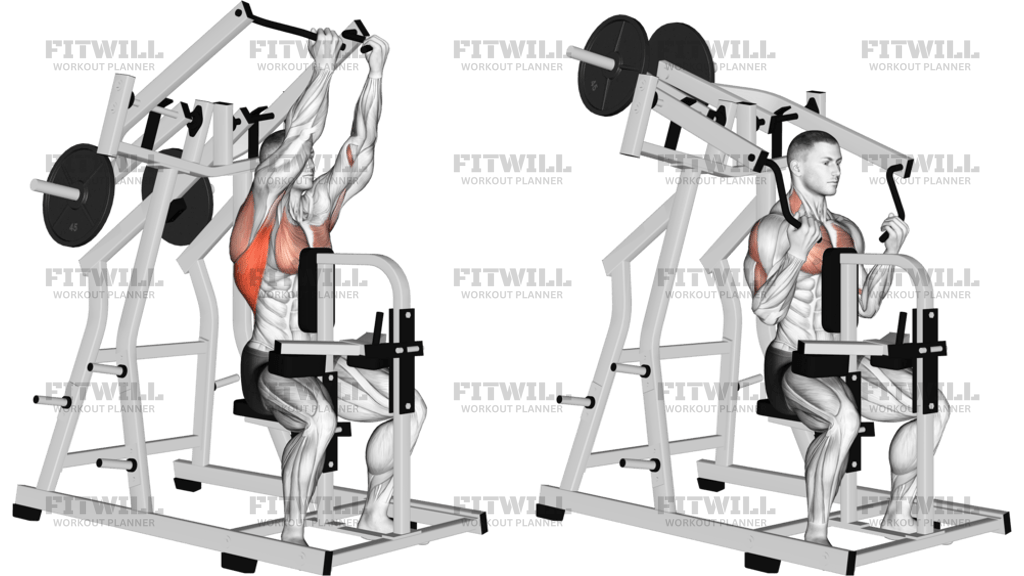
The Lever Seated Upper Back Row is a machine-based rowing exercise performed on a plate-loaded leverage machine while you sit facing the apparatus with your chest braced against the support pad. You grip the horizontal handles with a wide, overhand grip and pull them back toward your torso, keeping your elbows flared out to the sides rather than tucked in. That wide elbow path is what separates this from a standard seated row and shifts the emphasis from the lats to the upper back — the rhomboids, mid traps, and rear delts do the bulk of the work.
This movement is especially useful for anyone whose upper back lags behind the rest of their physique, or who spends long hours sitting at a desk with shoulders rolled forward. Because the machine stabilizes your torso and fixes the movement path, you can focus entirely on squeezing the shoulder blades together without worrying about balancing a barbell or stabilizing your spine. That makes it a solid choice for beginners learning what a scapular retraction feels like, and equally valuable for experienced lifters who want to load the upper back hard without lower back fatigue.
Setup matters more than people expect on this machine. The seat height determines where the handles line up with your shoulders and how well your chest sits against the pad. If the seat is too low, your arms drift upward and the pull turns into a shrug-heavy movement; too high and you lose range at the bottom. Adjust the seat so the handles sit roughly at mid-chest to shoulder height and your chest stays firmly in contact with the pad through every rep.
To execute it well, think of driving your elbows back and up slightly, not just dragging the handles with your arms. Pull until your hands are roughly in line with your torso and your shoulder blades are pulled fully together, pause for a beat, then let the arms extend under control until you feel a stretch across the upper back. The chest pad is there to keep your torso honest — if you find yourself pressing hard into it or bouncing off it to move the weight, the load is too heavy.
You will most often see this exercise programmed as a primary upper back builder on pull days, or as a finisher after heavier free-weight rows when you want extra volume with less systemic strain. It also pairs well with pressing movements, since strengthening the retractors and rear delts helps balance out all the horizontal pushing most training programs contain. Keep the reps deliberate, the squeeze honest, and the weight modest enough that your chest never leaves the pad.
[ Workout Log & Planner ]
Put your next workout in Fitwill
Keep your plan and training log ready when you are.


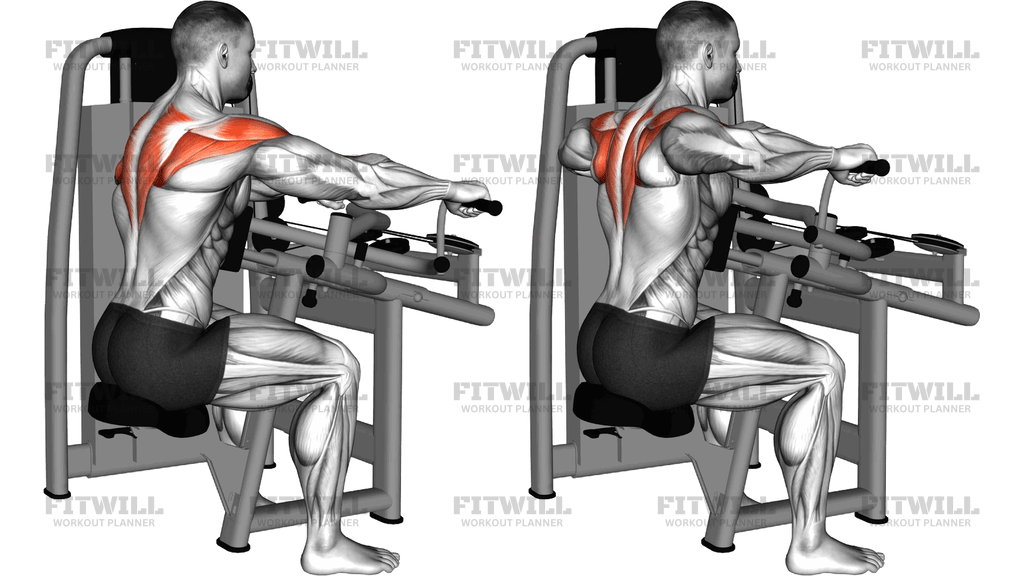
Instructions
- Adjust the seat height so the machine's handles line up with your mid-chest to shoulder level and your feet sit flat on the floor.
- Sit facing the machine with your chest pressed firmly against the front support pad and grab the wide handles with an overhand, slightly wider-than-shoulder grip.
- Straighten your arms and let your shoulders drift forward slightly to set a full stretch across the upper back before starting.
- Brace your core and keep your neck in a neutral position, eyes forward, so your torso stays anchored to the pad.
- Pull the handles back by driving your elbows out wide and up toward the sides of your ribcage, keeping them above forearm height throughout the pull.
- Continue pulling until your hands are alongside your torso and your shoulder blades are squeezed fully together; hold that contracted position for a second.
- Extend your arms slowly back to the starting position, allowing your shoulder blades to spread and your upper back to stretch without letting the weights slam down.
- Exhale as you pull the handles back and inhale as you return to the stretched position.
- Complete your set, then release the handles one at a time with your arms fully extended before standing up from the seat.
Tips & Tricks
- Keep your chest glued to the pad for the entire set. If you push into it or lift off it to start the pull, the weight has become a body-English row instead of an upper back row.
- Aim your elbows at the ceiling slightly rather than straight back — this wide, upward path is what keeps the rhomboids and rear delts involved instead of turning it into a lat-dominant row.
- Do not shrug your shoulders toward your ears at the top of the pull; if your upper traps take over, reduce the weight and focus on drawing the shoulder blades down and together first.
- Use a one-second pause at full contraction. The machine removes the need to balance the load, so the squeeze is where most of the benefit lives.
- Control the negative for two to three seconds instead of letting the lever arms yank your arms forward. The stretch under load is a major part of what this exercise trains.
- If your shoulders roll forward at full extension, shorten the range slightly — extend until you feel a stretch, not until the weights touch.
- Grip the handles loosely with your fingers rather than squeezing hard; an overly tight grip shifts tension into the forearms and biceps and out of the upper back.
- Set your feet flat and slightly forward so your legs stay quiet — driving through your feet to heave the weight back defeats the chest-supported setup.
Frequently Asked Questions
Which muscles does the Lever Seated Upper Back Row work?
The primary targets are the rhomboids and middle trapezius, which pull your shoulder blades together. The rear delts, lats, and biceps assist, and your grip works to hold the handles.
How is the Lever Seated Upper Back Row different from a regular seated cable row?
The cable row usually uses a narrower grip with elbows kept low, which shifts work toward the lats. This machine version uses a wide grip with flared elbows and a chest pad, directing the effort into the upper back and rear delts while removing lower back and torso involvement.
Why does the machine have a chest pad, and should I press into it?
The pad stabilizes your torso so the pulling muscles do the work instead of your lower back. Rest against it lightly, but do not use it as a launching pad — pushing into it to move heavy weight defeats the purpose of the setup.
Is this exercise suitable for beginners?
Yes, it is one of the more beginner-friendly ways to train the upper back. The fixed path and chest support teach what a proper shoulder blade retraction feels like without requiring full-body coordination.
What is the most common mistake on the Lever Seated Upper Back Row?
Loading too heavy and turning the pull into a partial shrug, with shoulders creeping toward the ears and the chest bouncing off the pad. Cut the weight and prioritize a full squeeze with the elbows wide.
What seat position should I use if the handles feel too high or too low?
Raise or lower the seat until the handles sit at mid-chest to shoulder height with your arms nearly straight at the start. A wrong seat height shifts the pull toward your shoulders or lats and shortens your range.
What can I use if my gym does not have this leverage machine?
A wide-grip seated cable row with the pulley set high, or a chest-supported dumbbell row on an incline bench with elbows flared, both recreate the same wide elbow path and upper back emphasis.
How many sets and reps work best for this exercise?
Three to four sets of 8 to 15 reps fits most goals, with the pause at contraction keeping moderate loads effective. Because the chest support limits cheating, you can push close to technical failure safely.
Is it safe for people with lower back discomfort?
The chest pad supports the torso, so there is far less spinal loading than in bent-over barbell rows. Still, set the seat correctly and avoid heavy weights that force you to press into the pad, and stop if anything aggravates your symptoms.
Should my elbows stay tucked or flare out during the pull?
Flare them out and slightly up, roughly in line with or above your hands. Tucking the elbows turns this into a lat exercise and takes the rhomboids and rear delts out of the movement.