Side Sitting Inner Thigh Tap
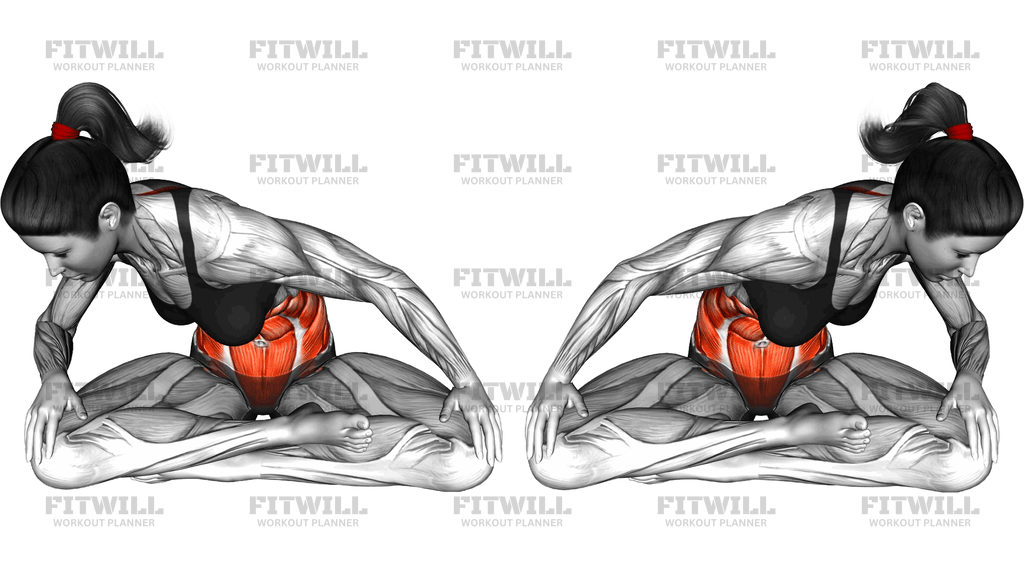
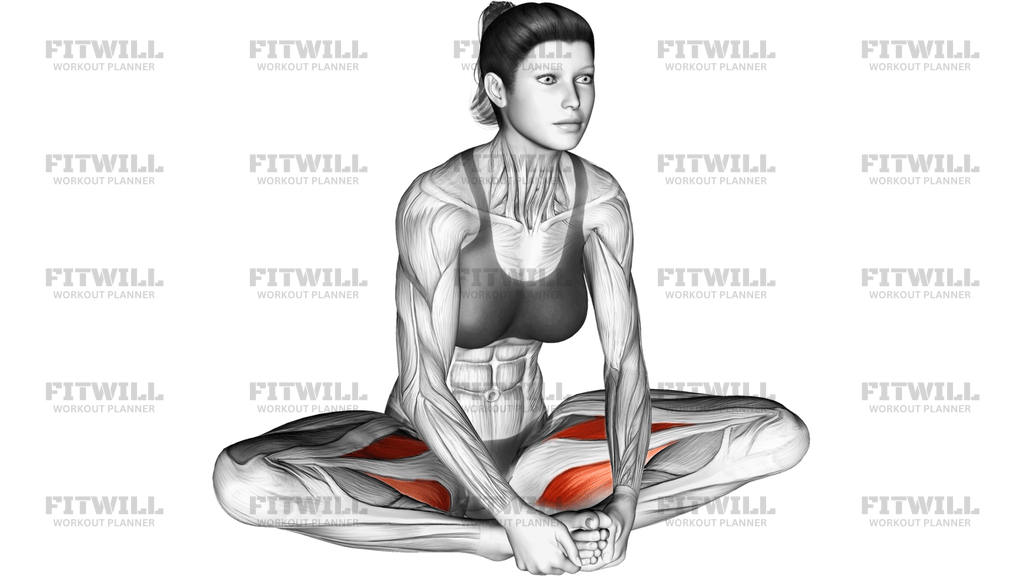
The Side Sitting Inner Thigh Tap is a floor-based body weight exercise that starts from a side-sitting position with both legs bent and stacked to one side, then works the top leg through a lift-and-tap pattern while the opposite arm reaches overhead. It comes from the mat work tradition, where side-lying and side-sitting positions are used to isolate one hip at a time, and it places the inner thigh muscles in a role they rarely get in standard leg training: lifting the leg against gravity rather than squeezing it inward against resistance.
Because you sit upright on one hip with the legs folded to the side, the position itself already demands something. Your torso has to stay tall and centered over your sit bones, which wakes up the obliques and deep core on the side you are sitting on. When you extend the top leg and begin tapping it down and lifting it back up, the adductors along the inner thigh and the hip stabilizers on the underside of the pelvis share the work. The overhead reach with the top arm lengthens the whole side of the body and keeps the trunk from collapsing as the leg moves.
This movement suits people who spend a lot of time sitting and feel stiff or weak through the hips, anyone building a balanced home routine without equipment, and lifters or runners who train the outer hips heavily but neglect the inner thigh. It is also a practical warm-up drill before squats, lunges, or lateral work, since it takes the hip through adduction, abduction, and rotation in one controlled pattern.
Setup matters more here than in most floor exercises. If you slump back onto your hand or let the pelvis tip backward, the inner thigh stops doing the lifting and the lower back takes over. Sit as close to the middle of your hip as your flexibility allows, keep the supporting hand light on the mat, and think of the torso as a pillar that the leg moves around, not the other way round.
To perform it well, keep the tap quiet and the lift deliberate. The foot should kiss the floor and rise back up under muscular control, not drop and swing. Move at a pace where you can feel the inner thigh working on every single rep, usually somewhere between slow and medium. If you cannot sit upright comfortably on your hip at first, that is normal; a small cushion under the bottom hip will buy you the height you need while your hip mobility improves.
The main safety points are simple. Keep weight out of the supporting wrist by staying actively tall through the spine, and stop the side bend or leg range if you feel pinching at the hip or a strain along the inner thigh. Because one side usually moves better than the other, do the tighter or weaker side first and match its reps on the second side so the difference gradually evens out.
[ Workout Log & Planner ]
Put your next workout in Fitwill
Keep your plan and training log ready when you are.


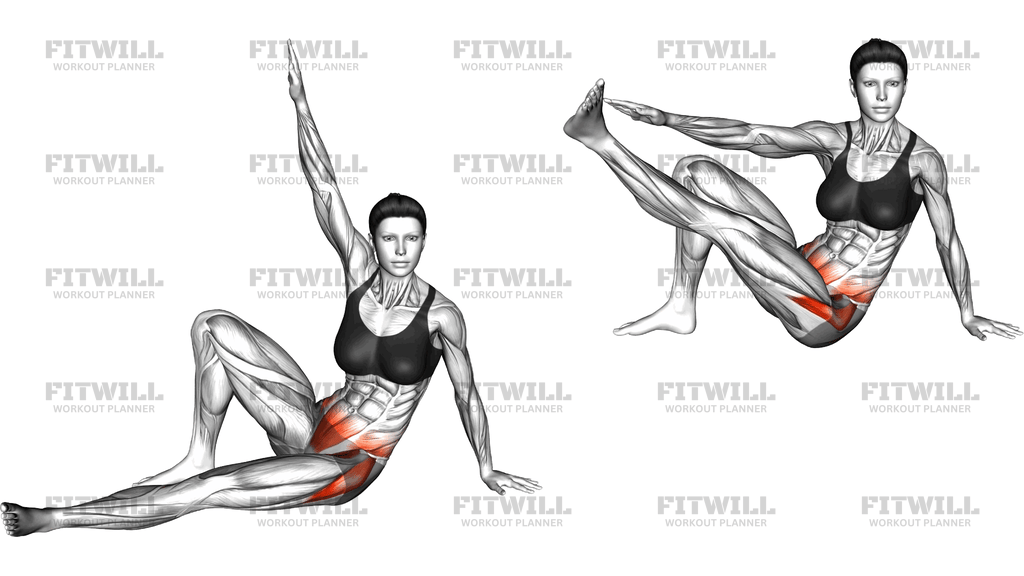
Instructions
- Sit on an exercise mat with both knees bent and stacked toward one side, so your bottom leg is folded in front of you and your top leg rests behind it in a side-sitting position.
- Place your lower hand flat on the mat beside your hip with the arm mostly straight, and reach your top arm up toward the ceiling so the shoulders stack over the pelvis.
- Draw your belly in gently, sit tall over your bottom hip, and pull the crown of your head up so the spine is long before the leg moves.
- Extend your top leg out to the side at roughly hip height, keeping the knee soft and the foot relaxed or flexed.
- Lower the extended leg with control until the inner thigh or foot lightly taps the mat beside your bottom leg.
- Lift the leg back up to hip height by drawing it up with the inner thigh, keeping the torso tall and the hips square.
- Reach the top arm overhead and slightly across as the leg lifts, feeling a lengthening along the side of the waist without letting the ribs flare.
- Exhale as the leg lifts, inhale as it lowers, and keep the breath steady rather than holding it.
- Complete all repetitions on one side, then restack the legs to the opposite side, switch your supporting hand, and repeat.
- Between sets, sit back and gently shake out the hips before resetting to the side-sitting position.
Tips & Tricks
- If your bottom hip will not let you sit upright, place a folded towel or small cushion under that hip rather than leaning away from the supporting hand, which keeps the inner thigh in the working position.
- The most common fault is sinking into the wrist. Keep the supporting arm long but light, as if the hand is only balancing you, so the leg muscles do the work instead of the shoulder.
- Do not swing the top leg. The tap should be a soft touch and the lift should be slower than the lowering; if momentum is needed, shorten the range.
- Watch for the pelvis rolling backward as the leg lowers. Press the bottom sit bone into the mat to keep the hips square while the leg moves.
- Let the top arm reach with the ribcage staying stacked; if the ribs splay forward during the overhead reach, you are borrowing from the lower back instead of the obliques.
- Flex the foot of the working leg toward your face to feel the inner thigh more clearly, or point it for a smoother, more lengthened line if the adductors cramp.
- If the inner thigh cramps, which is common when the adductors are weak, reduce the leg height and do fewer reps rather than pushing through the cramp.
- Match sides by reps, not by effort. Do the stiffer side first and copy that number on the easier side so the imbalance slowly narrows.
- Keep the movement small at the start of each set and grow the range only as the hip warms up, since a large first rep from cold often produces a pinch at the front of the hip.
Frequently Asked Questions
Which muscles does the Side Sitting Inner Thigh Tap work?
The primary workers are the inner thigh muscles, the adductors, which lift and control the top leg. The obliques and deep core stabilize the side-sitting torso, and the glute medius on the bottom hip steadies the pelvis throughout.
Is the Side Sitting Inner Thigh Tap suitable for beginners?
Yes, it is body weight and easy to scale. Beginners can place a cushion under the bottom hip, reduce the leg height, and do fewer reps until sitting tall on one hip feels comfortable.
Why do I sit with both legs to one side instead of side-lying for this exercise?
The side-sitting position makes the torso hold itself upright, so the obliques and hip stabilizers work alongside the inner thigh. It also lets the top leg tap down to the mat and lift freely, which is harder to do cleanly when lying flat.
What does the overhead arm reach contribute in the Side Sitting Inner Thigh Tap?
The reach lengthens the working side of the waist and gives the trunk a counterbalance as the leg moves. It also discourages collapsing into the supporting hand, which is the most common form break in this setup.
How many reps and sets should I do?
Start with 8 to 12 controlled taps per side for 2 to 3 sets. Because the inner thigh often cramps when it is untrained, it is better to finish sets feeling controlled than to chase high numbers.
My inner thigh cramps during the tap. What should I change?
Cramping usually means the adductors are working at a height or volume they are not used to. Lower the leg range, slow the tempo slightly, and stop the set before the cramp rather than stretching it out mid-rep.
Can I do the Side Sitting Inner Thigh Tap every day?
Since it is low-load body weight work, daily practice is reasonable for mobility purposes. If you are training it as strength, treat it like any other strength exercise and give the hip a day of recovery between harder sessions.
What can I use instead of a mat if I do not have one?
Any firm but padded surface works, such as carpet or a folded blanket. The important thing is that the supporting hand does not slip and the bottom hip is comfortable enough to let you sit tall.
Should my bottom leg stay bent and folded the whole time?
Yes, the bottom leg stays folded in front with the weight resting through that hip. Moving it takes support away from the pelvis and usually causes the torso to twist or sink.
Is this exercise safe if I have hip pain?
Discomfort deep in the hip or a pull along the inner thigh means the range is too large for now; reduce the height and side of the movement or skip it. Persistent pain should be checked by a qualified professional before continuing.