Resistance Band Overhead Shoulder Press (Version 2)
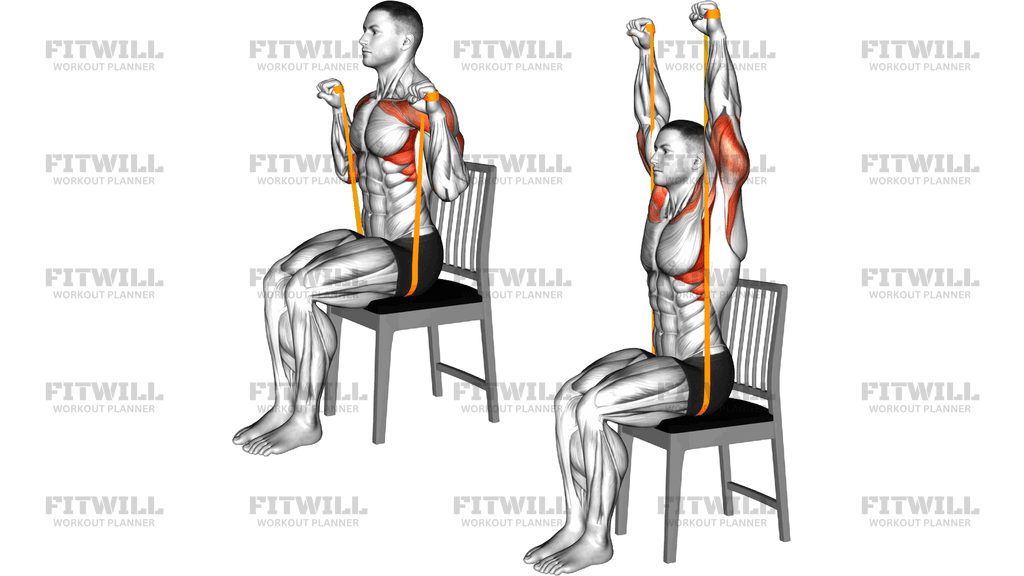
The Resistance Band Overhead Shoulder Press (Version 2) is a standing press performed with a flat resistance band rather than handles or a bar. You grip the band slightly outside shoulder width, hold it at collarbone level behind the front of your shoulders, and press upward until your arms are fully extended overhead. Because the band is anchored under your hands and feet are free to stabilize, the resistance peaks as your arms approach lockout, which closely matches how force is produced in a real overhead movement.
This version works well for home training, travel workouts, or as a warm-up before barbell or dumbbell pressing. The band provides a smooth, joint-friendly resistance curve, so it suits lifters who find free-weight overhead pressing uncomfortable at the bottom range. It is also an efficient choice for anyone short on time or equipment who still wants a genuine vertical pressing stimulus.
The main work comes from the front and side shoulders, with the triceps extending the elbows through the top half of the press. The upper traps and serratus anterior assist as the shoulder blades upwardly rotate, and the core stays engaged the entire set to keep your ribs stacked over your hips. Because you are standing, your legs, glutes, and trunk act as the foundation, which is something seated machine presses never ask of you.
Setup matters more than people expect with a band press. Your hand position controls both the starting tension and whether your wrists stay neutral. Standing with feet about hip to shoulder width and gripping the band just outside your shoulders keeps the elbows stacked under the hands, so the band pulls your arms into a straight vertical path instead of dragging them forward or backward.
To execute well, drive the band straight up until your biceps finish near your ears, pause briefly with arms extended, then lower under control back to collarbone level. Avoid leaning your torso back to finish reps; if you feel your lower back arching as fatigue sets in, brace harder or switch to a lighter band. Full extension at the top is where the band's resistance is greatest, so own that position rather than rushing through it.
A practical safety note: check the band for small tears before every session, and keep your hands firmly wrapped around it so it cannot slip. If the band loses tension at the top of the press, it is too light; if you cannot reach full lockout without your wrists collapsing, move to a thinner band and rebuild the pattern first.
[ Workout Log & Planner ]
Put your next workout in Fitwill
Keep your plan and training log ready when you are.


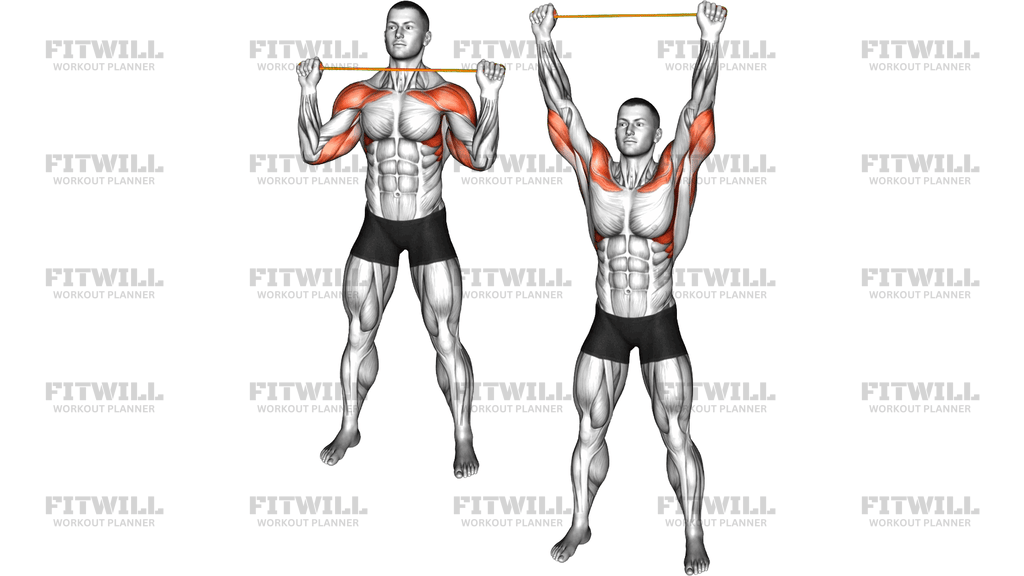
Instructions
- Stand with feet hip to shoulder width apart on the middle-free setup: hold the band with both hands using an overhand grip, hands slightly wider than your shoulders.
- Raise the band to collarbone height so it rests across the front of your shoulders, with elbows tucked down and slightly in front of your ribs and wrists stacked straight over your elbows.
- Stand tall, pull your chin back slightly to a neutral position, and brace your abdominals as if preparing for a light push to the midsection.
- Exhale and press the band straight overhead, keeping the bar path vertical so your hands finish directly over your shoulders, not in front of them.
- Continue until your elbows are fully extended and your biceps end up close to your ears, then pause for a beat in the locked-out position.
- Inhale and lower the band slowly back to your collarbones, letting the elbows drop back under the hands rather than letting the band collapse onto your chest.
- Keep your ribs down and glutes lightly squeezed throughout so your lower back does not arch as the press gets harder near lockout.
- Complete all repetitions at one tempo, roughly one second up and two seconds down, then step the band down carefully and shake out your shoulders before the next set.
Tips & Tricks
- If your wrists bend backward at the top, your grip is too wide or the band is too heavy; narrow your hands slightly or drop to a lighter band so the knuckles stay aligned with the forearm.
- A common mistake is letting the band pull the elbows out in front of the body on the way down, which turns the movement into a front raise hybrid; consciously pull the elbows back under the wrists each rep.
- If you feel the band slipping on your back or shoulders at the start position, wrap it once around each palm instead of gripping it flat.
- Do not stand on the band to add tension unless you shorten it deliberately; extra tension that prevents full lockout trains a partial press and defeats the point of the overhead range.
- Squeeze your glutes at the top of each rep if you notice your hips drifting forward or your back arching; this locks the pelvis under the ribcage.
- Keep your head neutral rather than jutting your chin up as the band passes near your face; look straight ahead throughout the press.
- Push your hands slightly apart against the band at lockout to keep it from sagging in the middle, which maintains even tension on both arms.
- If one side fatigues faster, check that both hands are gripping at equal distances from center; uneven grip width is the usual culprit, not a strength imbalance.
- Bands lose elasticity over time; if the top position suddenly feels easy compared with a few weeks ago, replace the band rather than adding reps indefinitely.
Frequently Asked Questions
Which muscles does the Resistance Band Overhead Shoulder Press (Version 2) work?
The front and side shoulders do most of the pressing, supported by the triceps as the elbows extend. The upper traps and core stabilize and control the shoulder blades and trunk throughout.
Why does this version use a flat band instead of handles or a bar attachment?
The flat band lets you set your own grip width and keeps the setup minimal, which is ideal for home or travel training. It also lets you fine-tune starting tension simply by widening or narrowing your hands.
How wide should my hands be on the band?
Grip slightly wider than your shoulders so the band sits across the front of your deltoids and your elbows can stay stacked under your wrists. If your wrists bend back or the elbows flare too far out, narrow your grip.
Is the Resistance Band Overhead Shoulder Press (Version 2) good for beginners?
Yes, it is one of the friendliest ways to learn a vertical press because the band's resistance is lightest when your arms are at shoulder height. Start with a light band and focus on a straight vertical path before progressing.
Why does the resistance feel much harder at the top of the press?
A band's tension increases as it stretches, and it is stretched most when your arms are fully extended overhead. Expect the final few inches before lockout to be the most demanding part of every rep.
My lower back arches when I press overhead. How do I fix it?
Squeeze your glutes, brace your abs, and think about keeping your ribs stacked over your pelvis. If you still arch near lockout, the band is too heavy or your shoulder mobility needs work before loading this pattern further.
Can I substitute dumbbells for this exercise?
A standing dumbbell overhead press is the closest substitute and provides constant resistance instead of band tension. The band version remains easier on the joints at the bottom and more portable overall.
Should I stand on the band to increase the difficulty?
Not for this version. Adding foot tension makes the start position heavier and often prevents a full lockout, so progress by using a thicker band or slowing the lowering phase instead.
How many sets and reps should I do?
Two to four sets of 10 to 15 reps works well for strength-endurance with bands. Choose a band that lets you reach full lockout on every rep while the last two or three feel genuinely challenging.
How do I check my band for safety before training?
Lay it flat and run your hands along the full length looking for small cracks, thin spots, or nicks, paying extra attention to areas that have been stretched frequently. Replace any band showing wear rather than risking a snap at face level.