Standing Pronated Grip Inverted Row
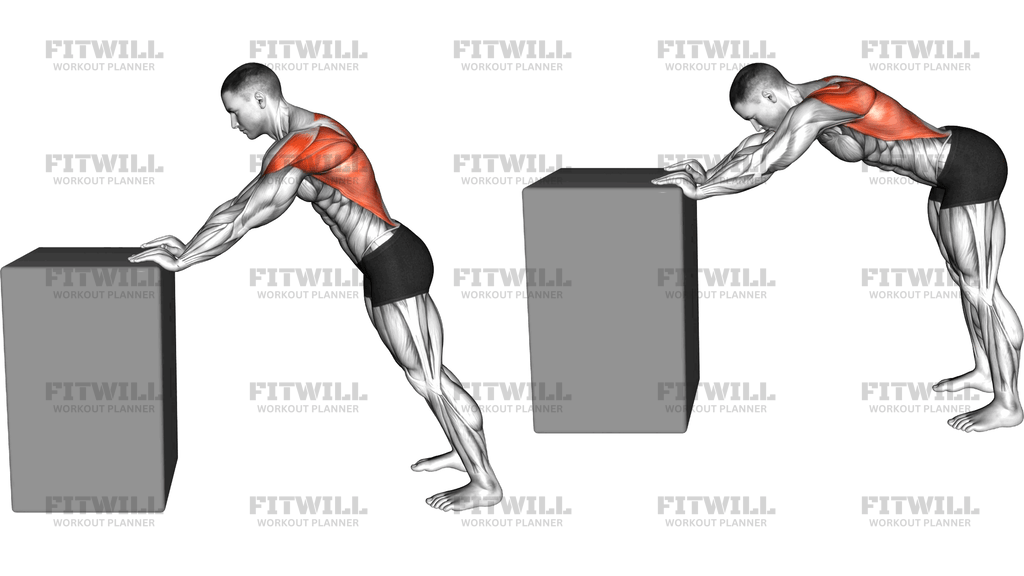
The Standing Pronated Grip Inverted Row is a bodyweight pulling exercise performed against a wall-mounted bar or ladder rack. You stand facing the bar, take an overhand (pronated) grip on a rung at roughly chest height, and lean back with your arms extended so your body forms a straight, inclined line from head to heels. From there you pull your torso toward the bar until your chest comes close to your hands, then lower yourself back under control. Because your feet stay on the floor, the angle of your body — not a loaded weight — determines how hard the pull is.
This exercise primarily trains the upper back, especially the mid-traps and rhomboids that pull the shoulder blades together, along with the rear shoulders and the lats. The biceps assist on every rep, and your forearms and grip work the entire time to hold onto the bar. Your core and legs stay engaged isometrically to keep the body rigid as it pivots from the feet, which makes this a surprisingly full-body demand even though the focus is the pull.
The standing setup is what makes this variation so accessible. Compared to a low-bar inverted row where you hang underneath a barbell or rings, the steeper, more upright angle here reduces the share of bodyweight you have to move. That makes it an excellent starting point for beginners building their first pulling strength, a warm-up for heavier rowing or pull-up work, or a high-rep finisher for more experienced lifters. Adjusting your foot position — stepping your feet closer to or farther from the base — scales the difficulty up or down instantly.
Setup matters because the angle IS the load. If your feet are too close to the bar, the movement becomes nearly trivial; if you step back and increase the lean, it becomes substantially harder. A straight-body line is equally important: if your hips sag or your knees bend to cheat the lean, you lose the consistent resistance that makes progress measurable.
To execute it well, keep your elbows driving back and slightly out as you pull, and think about leading with your chest rather than your chin. Squeeze the shoulder blades together at the top, pause briefly, then resist the way down instead of letting gravity dump you back to the start. The return is where most of the upper-back benefit is earned, so treat the lowering phase as part of the rep.
A few practical points keep this safe and productive. Keep the bar at a height where your hands land around mid-chest and your body can lean without your head passing under the bar. Make sure the bar or rung is securely anchored before loading it. If your grip gives out before your back does, reset rather than fighting through slippery hands. As you get stronger, simply walk your feet back or elevate them slightly to keep the exercise challenging without adding equipment.
[ Workout Log & Planner ]
Put your next workout in Fitwill
Keep your plan and training log ready when you are.


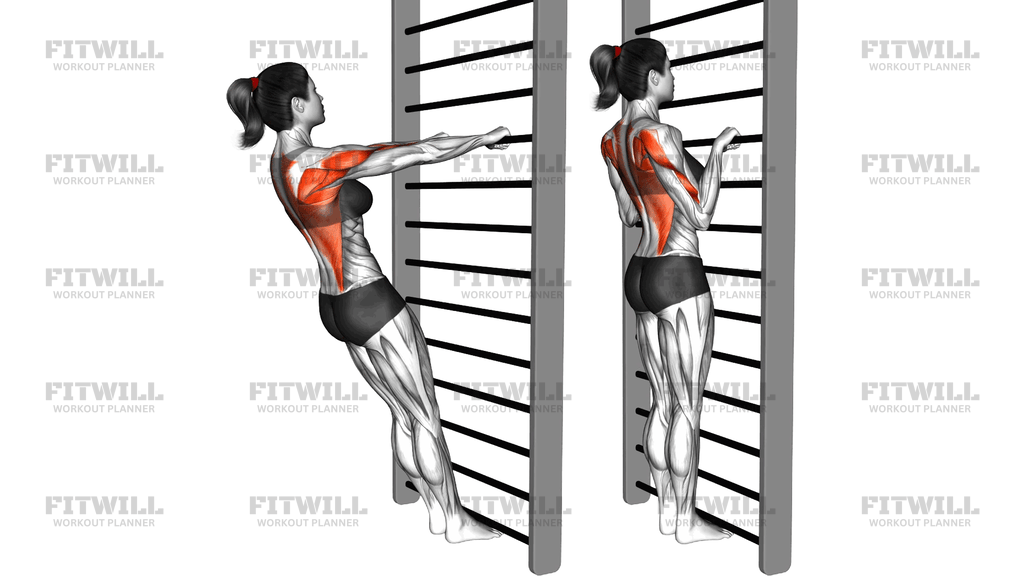
Instructions
- Stand facing a wall-mounted bar or ladder rack and choose a rung at about mid-chest height.
- Take a pronated (overhand) grip on the bar with hands roughly shoulder-width apart, thumbs wrapped around the bar.
- Walk your feet toward the bar until your arms are fully extended and your body leans back as one straight line from head to heels, weight on your heels and mid-foot.
- Brace your abs and squeeze your glutes so your hips do not sag or your knees do not bend as you lean.
- Pull by driving your elbows back and down, leading with your chest toward the bar rather than lifting your chin.
- Continue pulling until your chest is close to your hands and your shoulder blades are squeezed together; hold that top position for a beat.
- Lower yourself slowly and under control back to the extended, inclined start position instead of dropping back.
- Exhale as you pull in, inhale as you lower back to the start.
- Complete your reps, then stand upright and release your grip one hand at a time.
- To progress, step your feet slightly farther from the bar to increase the lean; to regress, step closer.
Tips & Tricks
- If your hips sag or your belly juts toward the bar as you pull, shorten the range or step your feet closer — the straight-body line is worth more than an extra inch of range.
- Check your elbow path: they should travel back toward your ribs and slightly out, not flare straight out to the sides, or your shoulders will take over from your upper back.
- Avoid shrugging your shoulders up toward your ears at the top; keep them pulled down as the blades come together.
- A chin that leads the movement usually means the chest is stopping short — cue yourself to touch the bar with your sternum, not your face.
- If your grip fails before your back does, use a full thumb wrap and reset between sets rather than half-gripping the bar.
- The lean angle is your weight scale: each step your feet take away from the base adds load, so change one variable at a time.
- Do not let the lowering phase collapse — a two-count descent with tension kept in the arms builds far more upper-back strength than a fast drop.
- Keep a slight bend in the knees only if your hamstrings are tight; do not bend them to make the pull easier.
- If the bar sits too high and your head must duck under it, move to a lower rung so the pull stays in front of your chest.
Frequently Asked Questions
What muscles does the Standing Pronated Grip Inverted Row work?
It primarily targets the upper back — the mid-traps and rhomboids — with strong assistance from the rear shoulders and lats. The biceps help with the elbow bend, and the core and legs work to hold your body in the leaning position.
Is the Standing Pronated Grip Inverted Row good for beginners?
Yes, it is one of the most beginner-friendly pulling exercises because your feet stay on the floor and the steep angle means you are only moving part of your bodyweight. Stepping your feet closer to the bar makes it even easier while you build strength.
How does the pronated grip change the exercise compared to an underhand grip?
With palms facing away, the biceps contribute slightly less and the upper-back and rear-shoulder emphasis increases, so the row feels harder at the same body angle. An underhand grip lets most people pull a bit more comfortably through the elbow bend.
How high should the bar be for the Standing Pronated Grip Inverted Row?
A rung at roughly mid-chest height works best, so your arms extend straight out at shoulder level as you lean back. If the bar is much higher, your head ends up under it and the pulling path gets awkward.
Why do I feel this more in my biceps than my back?
That usually means your elbows are drifting forward or your shoulder blades are not retracting. Focus on driving the elbows back and squeezing the blades together at the top, and lighten the angle by stepping your feet closer until the back does the work.
How do I make the Standing Pronated Grip Inverted Row harder?
Step your feet farther from the base to increase the lean, which raises the percentage of bodyweight you pull. You can also slow the lowering phase to three or four counts, or elevate your feet slightly on a low step once the steeper angle feels easy.
What is the most common mistake in this exercise?
Losing the straight-body line — hips sagging, knees bending, or the torso collapsing on the way down. These turn a clean upper-back row into a partial, momentum-driven pull, so brace the core and treat the lean as part of every rep.
Can I use this exercise to work toward pull-ups?
Yes, it builds the horizontal pulling strength, grip, and scapular control that carry over well to vertical pulling. As the standing version gets easy, progress to lower bar angles or a classic inverted row to close the gap toward bodyweight pull-ups.
Is it safe to do this on a wall-mounted ladder rack?
It is safe as long as the rack is securely anchored and the rung you grip is solid before you lean your bodyweight onto it. Test the bar with a firm pull before starting your set, and release one hand at a time when you finish.