Standing Isometric Hold Calf Raise
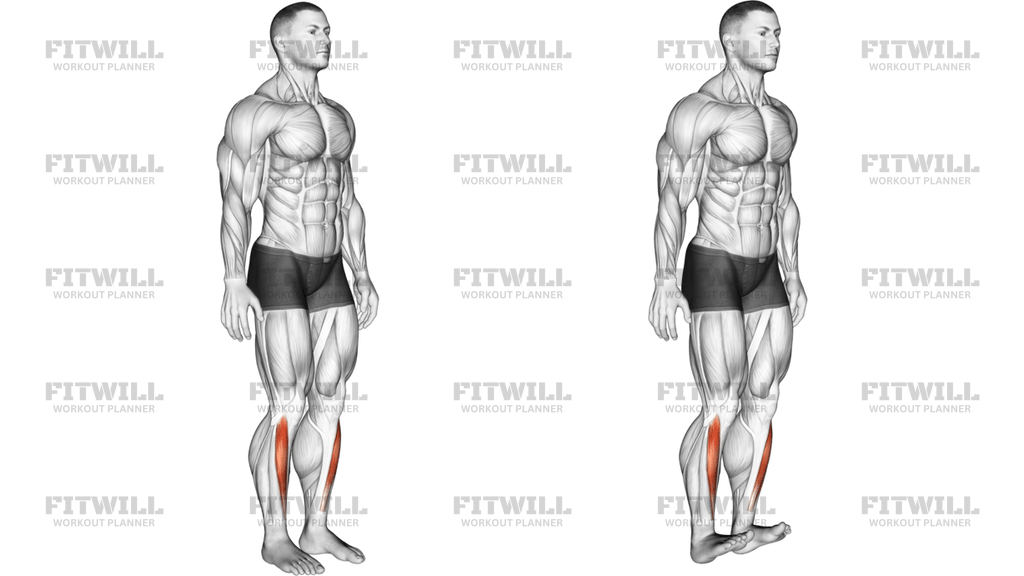
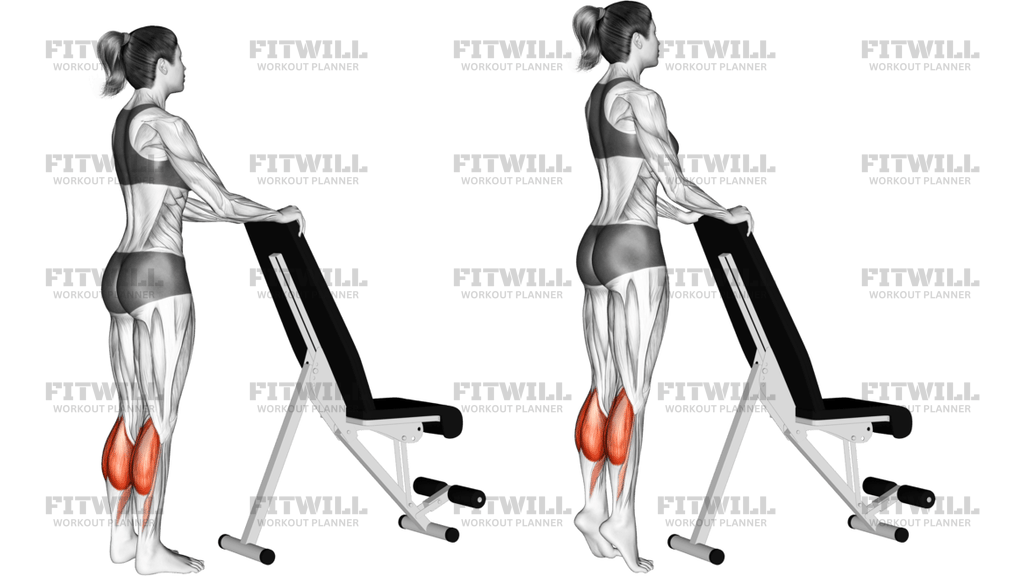
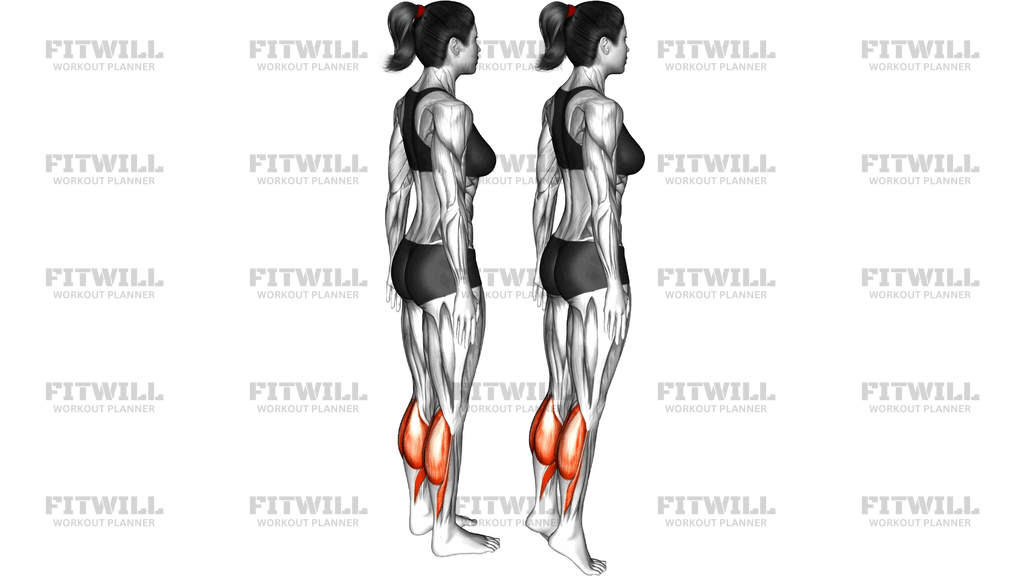
The Standing Isometric Hold Calf Raise is a simple bodyweight exercise where you rise onto the balls of your feet and hold the top position without lowering. Instead of repeating reps up and down, you create one sustained contraction at the peak of the calf raise, which is exactly where the calves work hardest. The image shows the two key positions: standing tall with feet flat, and the held position up on the toes with the heels lifted as high as they will go.
This movement targets the gastrocnemius, the visible two-headed muscle that gives the calf its shape, along with the soleus underneath it. Because you are standing with straight legs, the gastrocnemius does most of the work, while the smaller stabilizing muscles around the ankle keep you balanced on the balls of your feet. The isometric hold also trains your tendons to tolerate load at long contraction lengths, which is useful for anyone building calf strength or supporting ankle resilience.
Setup matters more than it seems for such a basic-looking drill. Stand with your feet about hip-width apart, weight spread evenly, and your body tall without locking the knees back hard. If balance is a challenge, stand near a wall or sturdy chair and rest a fingertip on it for light support only. Rising with a rounded back or letting the ankles roll outward shifts work away from the calves and can irritate the ankle joint, so keep the feet neutral and the ankles stacked over the toes.
To execute the hold well, press through the balls of the feet and lift your heels as high as your range allows, then pause there and stay tall. Breathe steadily rather than holding your breath, and aim to keep the lift near its maximum for the whole duration. A common starting point is 15 to 30 seconds per hold for 2 to 4 rounds, resting about a minute between holds. As this becomes easy, you can extend the hold, slow the lowering phase at the end, or move to a single-leg version.
This exercise suits beginners learning to feel their calves, lifters who want a low-fatigue finisher after leg training, and people rehabilitating or strengthening the ankle who need controlled loading without impact. Runners, jumpers, and hikers also benefit because strong calves absorb ground force during every stride and landing. It needs no equipment and almost no space, so it travels well and fits into warm-ups, cooldowns, or short daily movement breaks.
Keep a few safety points in mind: move into the top position under control, avoid bouncing at the start of the hold, and come down slowly rather than dropping the heels. If you feel a sharp pain in the Achilles or the back of the ankle, shorten the hold or reduce the height of the raise. Mild muscle burning in the calf is expected; joint pain is a signal to stop and adjust.
Fitwill
Log Workouts, Track Progress & Build Strength.
Achieve more with Fitwill: explore over 9600 exercises with images and videos, access built-in and custom workouts, perfect for both gym and home sessions, and see real results.
Start your journey. Download today!




Instructions
- Stand upright with your feet hip-width apart and your weight evenly spread across both feet, arms relaxed at your sides.
- If you need balance support, stand within arm's reach of a wall or sturdy chair and place one or two fingertips on it, keeping most of your weight in your own feet.
- Lengthen your spine, look straight ahead, and brace your core lightly so your torso stays tall and still throughout the hold.
- Press through the balls of both feet and lift your heels straight up as high as your ankle range allows, keeping the knees soft but extended.
- At the top, keep the big toe and little toe side of each foot pressing down evenly so the ankles do not roll inward or outward.
- Hold this peak position with steady breathing in through the nose and out through the mouth; do not hold your breath.
- Keep the lift at or very near your maximum heel height for the full duration, typically 15 to 30 seconds to start.
- Lower the heels slowly and under control to the floor instead of dropping down at the end of the hold.
- Rest for 45 to 60 seconds, shake out the ankles, and reset your stance before starting the next hold.
Tips & Tricks
- A frequent mistake is lifting only halfway and then holding a weak position; drive the heels as high as possible before starting the clock, because a near-maximal lift is what makes the hold effective.
- Watch for the ankles wobbling side to side as fatigue builds. Spread your toes, keep pressure over the big toe, and use the wall only as a light touch point rather than leaning on it.
- Do not let the knees bend to help you stay up. Straight but unlocked legs keep the tension on the gastrocnemius instead of letting the quads take over.
- If your heels rise unevenly, one calf may be tighter or weaker. Slow down and film yourself from behind to spot the imbalance, then add short single-leg holds on the weaker side.
- Avoid bouncing up into position with momentum. Lift in about one second, settle at the top, and let the muscle, not momentum, hold you there.
- Counting breaths instead of seconds often keeps the hold calmer; try five to six slow breaths per round so your shoulders and jaw stay relaxed.
- If your toes cramp, shorten the raise height slightly and make sure you are pressing through the whole forefoot, not just curling the toes into the floor.
- Finish each hold with a slow 3-second lowering phase. The controlled descent adds useful loading for the Achilles and calves without needing extra equipment.
Frequently Asked Questions
Which muscles does the Standing Isometric Hold Calf Raise work?
The gastrocnemius, the large visible calf muscle, does the primary work because the knees stay straight. The soleus beneath it and the small ankle stabilizers assist to keep you balanced on the balls of your feet.
Is an isometric hold better than doing regular calf raise reps?
They serve different purposes. The hold builds strength and endurance at the top of the range with minimal equipment and joint stress, while full reps train the muscle through its whole range, so many people use both.
How long should I hold the Standing Isometric Hold Calf Raise?
Start with 15 to 30 seconds per hold for 2 to 4 rounds, resting about a minute between holds. Progress by extending the hold toward 45 to 60 seconds or by moving to a single-leg version.
Can beginners do this exercise?
Yes, it is one of the most accessible calf exercises because it uses only body weight. Beginners should use a wall or chair for light fingertip balance support and focus on a full, steady heel lift before extending hold times.
Should my knees be locked during the hold?
Keep the knees extended but not jammed backward. A slight soft knee protects the joint while still keeping the gastrocnemius in its strongest working position.
Why do my feet or toes cramp when I hold the top position?
Cramping usually comes from gripping the floor with the toes or standing with the weight too far forward. Press through the entire ball of the foot, keep the toes relaxed, and slightly reduce the lift height until the cramping settles.
Can I do the Standing Isometric Hold Calf Raise on one leg?
Yes, the single-leg version is a natural progression and roughly doubles the load on each calf. Hold the wall for balance and start with shorter holds of 10 to 20 seconds per side.
Is this exercise safe for the Achilles tendon?
Controlled isometric holds are generally well tolerated by the Achilles, but you should ease in with short holds and moderate lift heights. If you feel sharp pain at the back of the ankle, stop and consult a qualified professional before continuing.
What can I use if I have nothing to hold for balance?
You can stand with your back and heels near a wall, or perform the exercise next to a countertop. The support should only take a fingertip of pressure; leaning on it reduces the demand on the calves and balance.