Lever Standing Hip Thrust
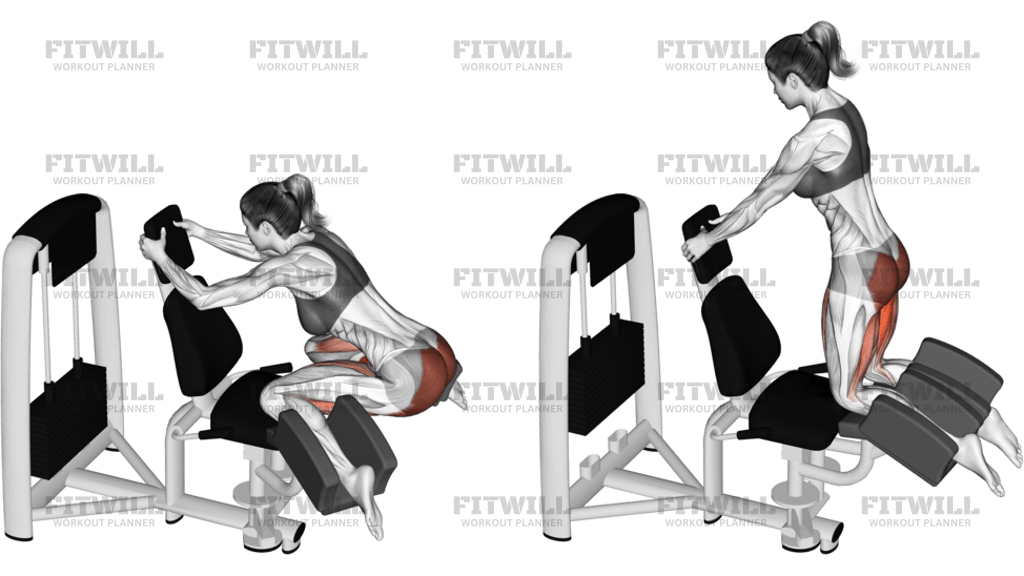
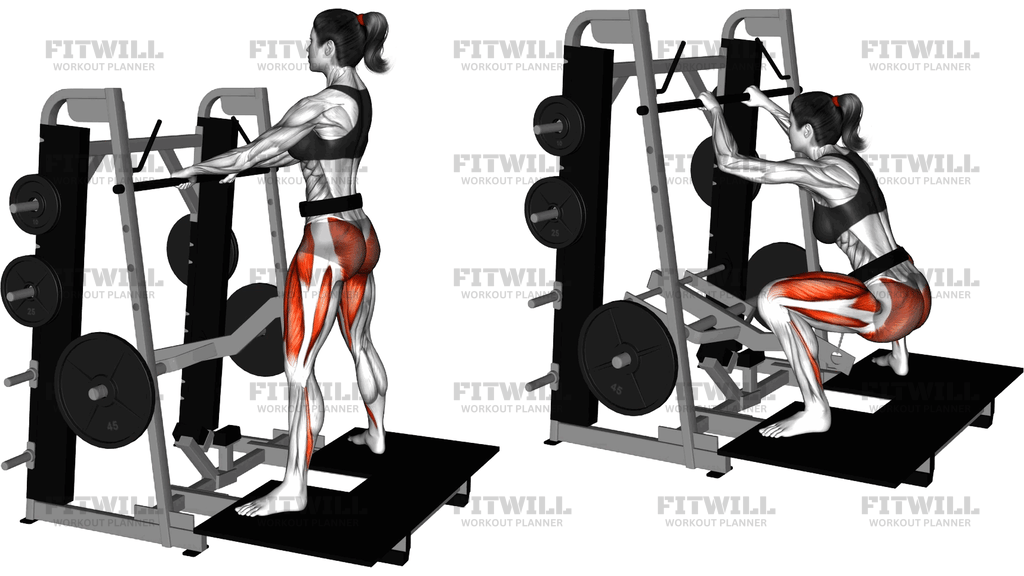
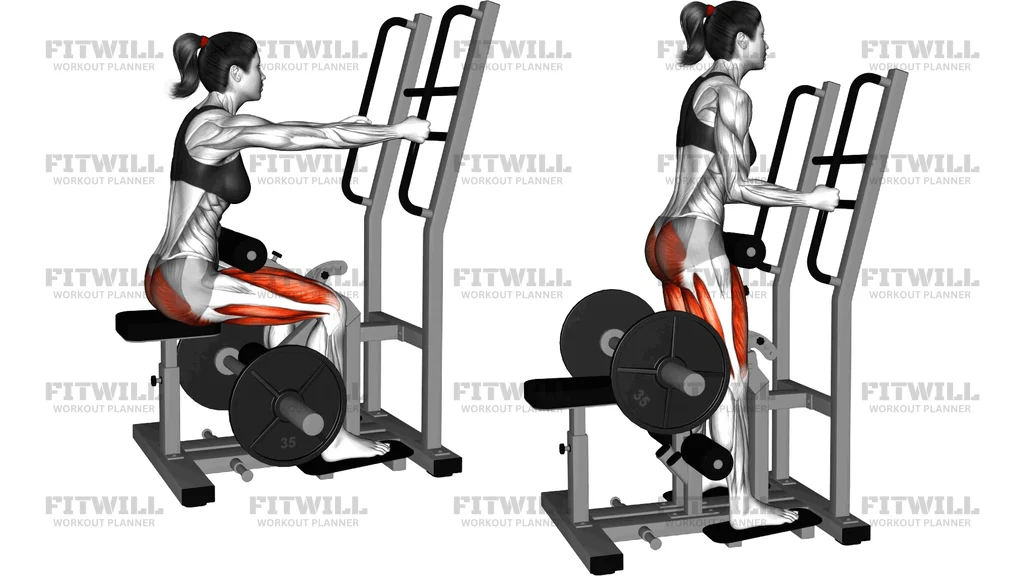
The Lever Standing Hip Thrust is a plate-loaded machine exercise that trains hip extension from a flexed, semi-seated position to a full standing lockout. You brace your hands on the machine's front handles, place your feet on the foot platform, and drive your hips forward against a padded lever that rides behind your pelvis. The weight stack on the lever arm provides the resistance, so the load stays smooth and controlled through the entire range instead of spiking at the bottom like a free-weight barbell hip thrust can.
This movement is a strong option for anyone who wants focused glute and hamstring work without loading the spine with a bar. Because the machine guides the path and supports your upper body through the arms, you can concentrate on squeezing the glutes at the top rather than stabilizing a barbell across your hips. It suits lifters new to hip thrust patterns, people rehabbing around back discomfort who still want heavy hip extension work, and experienced trainees looking for a high-volume glute finisher.
The main muscles worked are the glutes, with the hamstrings assisting as you extend the hip and the quads helping you straighten the knees from the lowered position. Your core and lower back work isometrically to keep the torso tall and prevent the ribcage from flaring as you press the hips forward. The visible range in the movement runs from a deep hip-flexed start, similar to a low squat position, all the way to a tall stance with the hips fully open and the glutes contracted.
Setup quality determines everything on this machine. The pad should sit squarely across the crease of your hips, your feet should be flat and centered on the platform, and your grip on the handles should let you keep a proud chest without leaning all your bodyweight onto your arms. If the pad rides too high on your waist or too low on your thighs, the resistance either does not reach the glutes or compresses the hip crease awkwardly at the bottom.
Execution is simple to learn but easy to rush. Push the floor away with your legs, drive the hips forward and up into the pad, and finish tall with the glutes squeezed hard. Lower under control until you are back near the starting depth, and keep tension in the hips rather than collapsing onto the stack between reps. Breathe in on the way down, exhale as you drive up, and reset your brace if you feel your lower back taking over.
Common use cases include glute-focused lower body days, accessory work after squats or deadlifts, and standalone hip sessions on machines during busy gym hours. Because the resistance curve is smooth and the setup is quick, it also works well for higher-rep sets in the 12 to 20 range where barbell hip thrusts become cumbersome to load and unload.
Fitwill
Log Workouts, Track Progress & Build Strength.
Achieve more with Fitwill: explore over 9600 exercises with images and videos, access built-in and custom workouts, perfect for both gym and home sessions, and see real results.
Start your journey. Download today!




Instructions
- Load the weight plates onto the lever arm's sleeve and adjust the seat or platform so the hip pad lines up with the crease of your hips when you sit back.
- Place both feet flat on the foot platform about hip-width apart, with your knees tracking over your toes and your heels firmly planted.
- Grip the front handles with both hands, arms mostly straight, and sit back into the start position with your hips flexed and the pad resting behind your pelvis.
- Brace your core, lift your chest, and keep your shoulders down and back so your torso stays tall throughout the set.
- Drive your feet into the platform and push your hips forward and up against the pad, extending the hips and knees together.
- Finish the rep standing tall with your hips fully open, glutes squeezed hard, and knees straight but not locked hard back.
- Lower slowly by letting the hips travel back and down, keeping your feet planted and the pad in contact with your hips the whole way.
- Inhale as you descend and exhale forcefully as you drive up into the lockout.
- Stop just short of letting the weight stack fully settle between reps so tension stays on the glutes.
- After your final rep, guide the lever back with control, release the handles, and step off the platform before unloading or changing plates.
Tips & Tricks
- If your lower back arches at the top, you are overextending instead of extending the hips. Stop short of leaning back and finish each rep with a deliberate glute squeeze rather than pushing the chest backward.
- A common mistake is pulling with the arms to start the movement. The handles are for bracing only, so think about pushing the floor away with your legs and letting the hips do the lifting.
- Rising onto the toes shifts work toward the quads and calves. Keep your heels glued to the platform for the full set.
- If the pad chafes or pinches your hip crease at the bottom, you are likely descending too deep. Shorten the range slightly so the pad stays comfortable and tension remains on the glutes.
- Knees caving inward on the drive up points to weak glute engagement. Cue your knees out over your pinky toes as you press up.
- Do not fully slam the stack down between reps. Letting the weight settle removes tension and turns the set into a series of small deadlifts off the rest.
- Start lighter than you think you need for the first session. The lever arm has its own weight, and the guided path lets you feel the glutes working at loads that would seem trivial with a barbell.
- Pause for one full second at the top of each rep if you struggle to feel the glutes. The pause forces the glutes, not momentum, to finish the lockout.
- Keep your ribcage stacked over your pelvis. Thrusting the chest up and back at the top turns a glute exercise into a lower back exercise.
Frequently Asked Questions
What muscles does the Lever Standing Hip Thrust work?
The glutes are the primary movers, with the hamstrings and quads assisting through the drive. The core and lower back stabilize the torso isometrically from start to finish.
How is the Lever Standing Hip Thrust different from a barbell hip thrust?
The machine supports your torso through the handles and guides the resistance along a fixed path, so there is no bar across your hips and no balance demand. This makes it easier to focus purely on squeezing the glutes and lets you transition between sets faster.
Where should the pad sit on my body?
The pad should rest across the crease of your hips, right where your thigh meets your pelvis, so it stays in contact through the whole range. If it rides up onto your waist or down onto your thighs, adjust the platform height before starting.
Is the Lever Standing Hip Thrust good for beginners?
Yes, it is one of the friendliest ways to learn the hip extension pattern because the machine controls the path and your hands give you extra stability. Start with a light load and master the tall, glute-squeezed finish before adding plates.
How deep should I lower on each rep?
Lower until your hips are flexed and your knees are bent to roughly the starting depth shown on the machine, but stop before the weight stack fully settles. If the pad pinches your hip crease, reduce the depth slightly rather than pushing through discomfort.
Why do my lower back and not my glutes feel this exercise?
This usually means you are overextending at the top by arching backward instead of extending the hips forward. Finish each rep standing tall with the ribs down and consciously clamp the glutes, and the tension should shift to the right place.
How many sets and reps should I do on the Lever Standing Hip Thrust?
It works well for 3 to 4 sets of 10 to 15 reps as a main glute movement, or 2 to 3 sets of 15 to 20 as a finisher after squats or deadlifts. The smooth resistance curve makes higher reps comfortable compared to heavily loaded barbell versions.
What can I use if my gym does not have this machine?
A barbell hip thrust with a bench and bar pad trains the same pattern, and cable pull-throughs or banded glute bridges are solid lower-load substitutes. Each option changes the setup, but the goal of driving the hips into full extension stays the same.
Is it safe to load this movement heavily?
The machine's guided path and the absence of a spinal bar load make it relatively joint-friendly, but heavy sets still demand a solid brace and controlled reps. Keep your heels down, avoid slamming the stack, and progress the weight only when the top-of-rep glute squeeze feels crisp.