Half Burpee
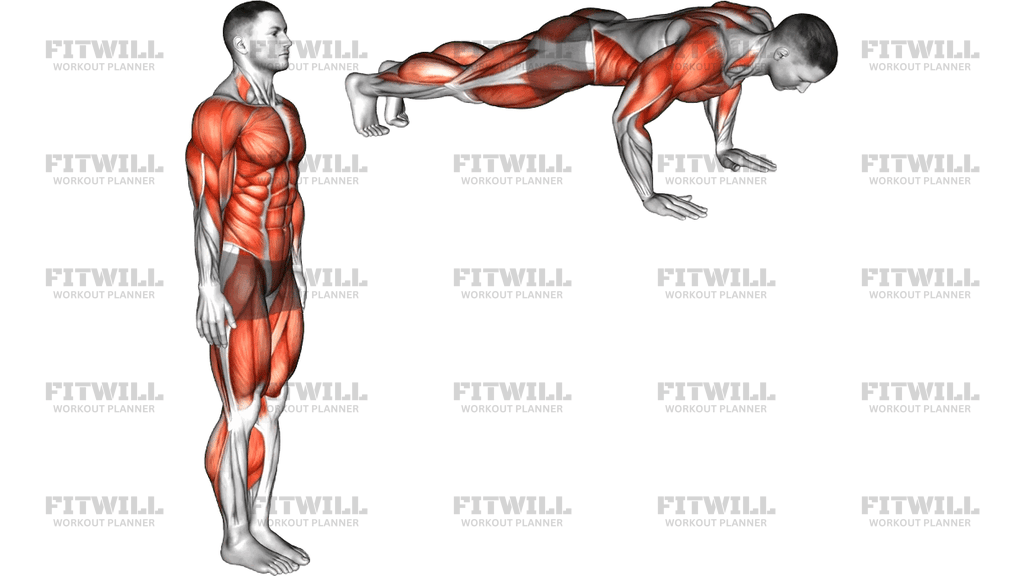
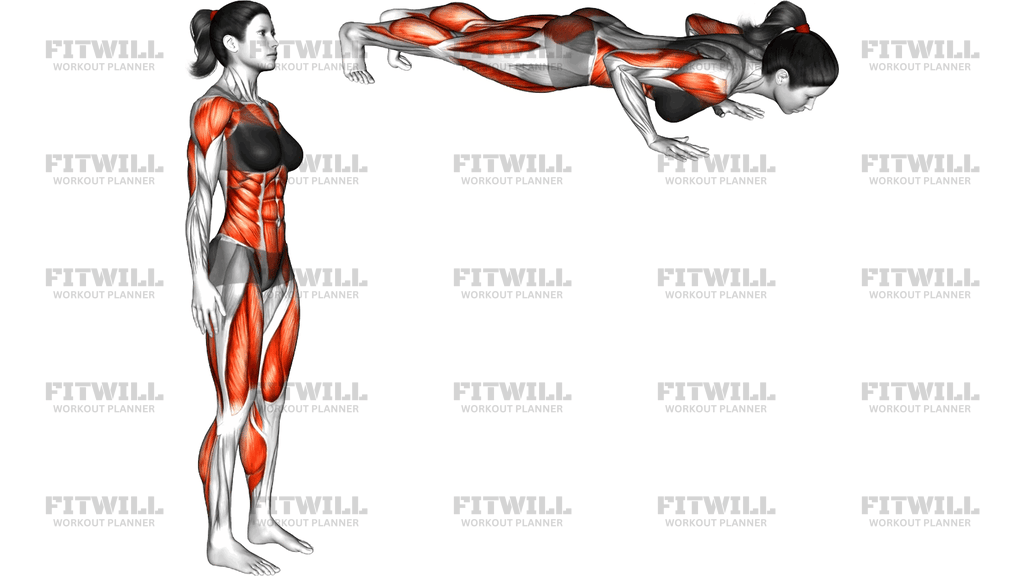
The Half Burpee is a simplified version of the classic burpee that removes both the push-up at the bottom and the jump at the top. You start from standing, squat down to place your hands on the floor, kick your feet back into a plank position, then bring them forward again and stand all the way up. It keeps the full-body, floor-to-standing pattern that makes burpees effective, but at a pace and impact level most people can sustain.
This movement is a great entry point for anyone building toward full burpees, and it also works well as a lower-impact conditioning option for experienced trainees on higher-volume days. Because you control the tempo, you can focus on keeping the plank position solid instead of scrambling through it. The repetitive stand-up and squat-down drives the legs, while holding the plank challenges the shoulders, chest, and core to stay braced.
The setup matters more than most people expect. Where you place your hands and how you manage your hips during the kick-back determine whether the movement feels smooth or awkward. Hands should go flat on the floor about shoulder width, and the transition back to plank should happen through a controlled hip hinge rather than a flop. Rushing this section is the most common reason the lower back takes unnecessary stress.
To execute the Half Burpee well, think of it as two clean positions connected by two transitions: standing tall, then squatting to the floor, then a firm plank, then back through the squat to stand. Keep your weight distributed across the whole hand during the plank, squeeze your glutes and brace your abs so your hips do not sag, and step or hop your feet forward to land just outside your hands.
Practically, this exercise slots into circuit training, warm-up ramp-ups, home workouts with no equipment, and conditioning intervals where you want a full-body effort without the joint impact of jumping. It is also a useful teaching tool: once you can move through twenty clean reps with a tight plank and an upright stand, the full burpee becomes a short step away rather than a leap.
For safety, keep your spine long as you reach for the floor instead of rounding heavily through the lower back, and if your wrists are sensitive, spread your fingers and press the floor away rather than sinking into the joints. Move at a pace you can repeat with consistent positions, and slow down or step your feet back instead of hopping whenever form starts to slip.
Fitwill
Log Workouts, Track Progress & Build Strength.
Achieve more with Fitwill: explore over 9600 exercises with images and videos, access built-in and custom workouts, perfect for both gym and home sessions, and see real results.
Start your journey. Download today!




Instructions
- Stand upright with your feet about hip width apart and your arms relaxed at your sides.
- Hinge at the hips and bend your knees to squat down, placing both palms flat on the floor just outside your feet.
- Shift your weight into your hands and kick or step both feet straight back so your body forms a straight line from head to heels in a plank position, shoulders stacked over your wrists.
- Brace your abs and squeeze your glutes so your hips stay level and your lower back does not sag.
- Hold the plank briefly, keeping your neck neutral and your weight spread across your palms and fingertips.
- Jump or step your feet forward to land just outside your hands, returning to a low squat with your chest up.
- Drive through your heels to stand all the way up, finishing tall with your hips fully open.
- Exhale as you kick back into the plank and inhale as you come forward and rise to standing.
- Reset your stance if your feet drift, then begin the next repetition at a steady, repeatable rhythm.
Tips & Tricks
- If your hips drop or your lower back arches during the plank phase, shorten the kick-back by stepping one foot at a time until you can hold a straight line.
- Land your feet forward just outside your hands, not deep underneath your torso, so the return to standing does not require a shuffling reset.
- Press the floor away with your hands rather than letting your shoulders sink toward your ears during the plank to protect your wrists and keep the shoulders active.
- Keep the squat between transitions honest: heels down, chest up. Skipping it and lunging up from the floor throws off your balance and stresses the knees.
- Control the tempo of the stand-up instead of snapping forward; the standing portion is where your quads and glutes do most of the work.
- If your wrists bother you, place your hands on an exercise mat or make fists with your knuckles down on a firm surface.
- On soft flooring or grass, the hand placement can feel unstable, so check that your palms are on a flat, secure area before starting a set.
- Scale intensity by pace, not by sloppy reps. Faster Half Burpees raise the heart rate, but a faster plank-to-squat transition is where form usually breaks first.
- Breathe on a rhythm rather than holding your breath, especially during the plank hold, so you can sustain longer intervals.
Frequently Asked Questions
What muscles does the Half Burpee work?
The Half Burpee primarily targets the quads and glutes through the squat and stand-up, while the plank position works the shoulders, chest, and abs. The calves and hamstrings assist during the kick-back and forward transitions.
Is the Half Burpee good for beginners?
Yes, it is one of the best starting points for burpee-style conditioning. Removing the push-up and the jump lets beginners learn the floor transition and build the necessary shoulder and core stability before progressing.
What is the difference between a Half Burpee and a full Burpee?
A full Burpee adds a push-up at the bottom of the plank and an explosive vertical jump at the top. The Half Burpee stops at the plank and finishes with a controlled stand, making it lower impact and easier to sustain.
Should I jump my feet back or step them back?
Either works. Stepping back is lower impact and easier on the wrists and lower back, while a hop increases the cardiovascular demand. Step back whenever your plank position starts to sag or your form deteriorates.
Why do my lower back and hips ache after Half Burpees?
This usually means your hips are dropping into an overarched position during the plank. Squeeze your glutes and brace your abs before kicking back, and check that your shoulders stay stacked over your wrists rather than drifting behind them.
Can I do the Half Burpee if I have sensitive wrists?
You can reduce wrist stress by spreading your fingers, pressing the floor away, and using an exercise mat or folded towel under your palms. If that is still uncomfortable, an incline version with hands on a bench keeps the same pattern with less load on the wrists.
How many Half Burpees should I do per set?
Start with 8 to 12 repetitions per set and focus on keeping the plank straight and the stand-up tall. Once you can hold consistent form, build to longer intervals such as 30 to 45 seconds of continuous work.
What can I use instead of the Half Burpee?
Squat thrusts with a step-back plank are essentially the same movement, and a squat plus walkout to plank combination covers the same pattern. For lower impact still, a body weight squat supersetted with a plank hold is a reasonable substitute.
Does the Half Burpee count as cardio or strength training?
It sits between the two. Performed in longer sets or intervals, it drives your heart rate up like cardio, while the controlled squat and plank still build muscular endurance in the legs, shoulders, and core.
How do I progress from the Half Burpee to a full Burpee?
First make sure you can hold a clean plank for the full transition without your hips sagging. Then add a push-up at the plank position, and finally replace the stand-up with a small vertical jump once the push-up feels controlled.