Resistance Band Single Leg Bridge
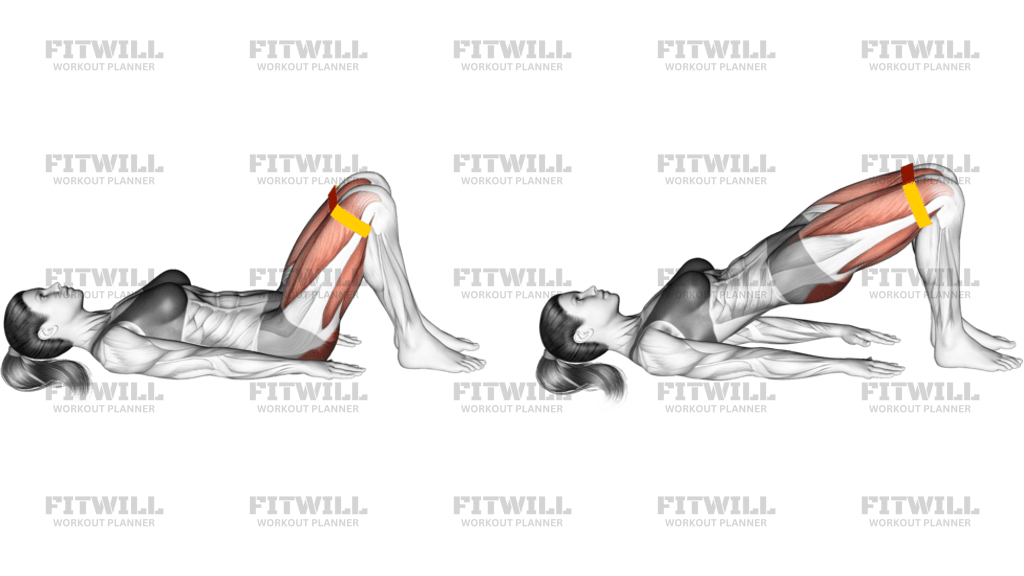
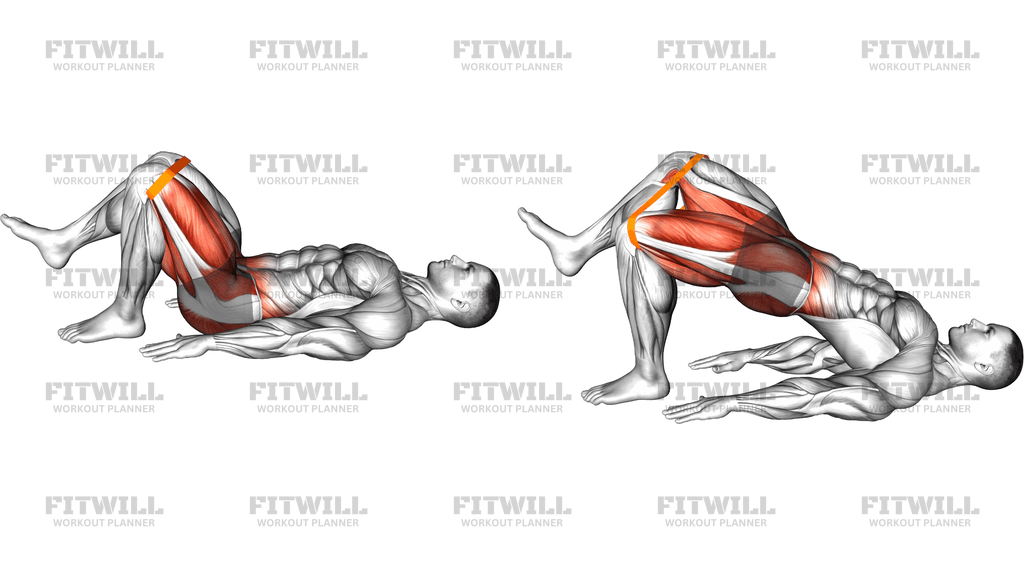
The Resistance Band Single Leg Bridge is a floor-based hip extension exercise where you lie on your back with a loop band placed around your thighs just above the knees, one foot planted, and the other leg extended so all the lifting work goes through a single side of the body. The band is the key detail: it constantly pulls your knees toward each other, so you have to actively press your working knee outward to keep your hips level and open. That combination of single-leg loading and outward knee pressure trains the gluteus maximus for hip extension and the gluteus medius for hip stability at the same time.
This movement is useful for almost anyone who spends long hours sitting, because prolonged sitting tends to leave the glutes underactive and the hips tight. It is a common choice in warm-ups before squats, deadlifts, and running, and it works well as a main glute exercise for beginners or as a higher-rep accessory for advanced lifters. Because one leg does the work, the demand on the working side is roughly double what you get from a standard two-legged bridge at the same body weight, yet the position stays low-skill and joint-friendly.
Setup matters more here than in most floor exercises. Your planted foot should sit close enough to your hips that you can push the ground away without arching your lower back, and the extended leg should stay in line with the opposite thigh rather than dangling or swinging. If the foot is too far away, the hamstrings and lower back take over; if the band sits too low or too loose, you lose the outward knee drive that makes the side-glute work meaningful. Taking ten seconds to position the band and foot correctly changes the entire feel of the exercise.
To execute it well, brace your ribs down over your pelvis, drive the planted heel into the floor, and lift your hips until your torso and working thigh form a straight line. At the top, press both knees outward against the band without letting your hips rotate or drop toward the extended-leg side. Lower with control until your hips hover just above the floor, then repeat. The lift should feel like it comes from the back of the hip, not from the lower back pushing upward.
A few practical points keep this safe and productive. Keep your hands flat on the floor at your sides for balance, and resist the urge to push off with them, since that steals work from the hips. Expect the working hip to want to shift toward the planted foot; correcting that drift is exactly the stability training this exercise provides. If you cramp in the hamstring or calf, shorten the range slightly and squeeze the glute deliberately at the top rather than forcing more height.
[ Workout Log & Planner ]
Put your next workout in Fitwill
Keep your plan and training log ready when you are.


Instructions
- Lie on your back on the floor with your arms relaxed at your sides and your palms facing down.
- Slide a loop resistance band up to your thighs just above both knees, then bend your right knee and plant that foot flat, close enough that your shin is roughly vertical at the top of the bridge.
- Extend your left leg so it hovers in the air, knee and hip roughly straight, thigh in line with the right thigh.
- Brace your core and pull your ribs down so your lower back is not already arched before you lift.
- Press both knees outward against the band to create steady tension, then drive the planted heel into the floor and lift your hips up.
- Stop when your torso and the extended thigh form a straight line from shoulder to knee, and squeeze the glute of the working leg at the top for a beat.
- Lower your hips slowly until they hover just above the floor, keeping tension in the band and keeping the extended leg from dropping.
- Exhale as you lift and inhale as you lower, keeping the breath steady rather than holding it.
- Complete all repetitions on one side, then reset the band, switch the planted leg, and match the reps on the other side.
Tips & Tricks
- If your hips tilt toward the extended leg at the top, reduce the height of the lift until you can keep your belt line perfectly level for every rep.
- Cramping in the planted-side hamstring usually means the foot is too far from your hips or the glute is not doing its job; slide the heel closer and deliberately squeeze the glute before lifting.
- Do not let the knees cave inward toward the band's pull — the outward press against the band is half the exercise, and losing it turns this into a plain bridge.
- Keep the extended leg as a rigid extension of the working thigh; a limp or swinging free leg leaks tension and makes the top position unstable.
- A slightly higher band placement just above the knee is more comfortable for most people and still provides strong outward-knee tension.
- Pause for a full second at the top instead of bouncing at the bottom; the pause is where the single-leg control is actually built.
- Push lightly through the whole planted foot rather than only the toes, which helps prevent the calf from cramping and keeps the heel driving the lift.
- If your ribs flare and your lower back arches at the top, you are lifting higher than your hip range allows — stop at the point where the glute squeeze peaks, not where your back takes over.
Frequently Asked Questions
What muscles does the Resistance Band Single Leg Bridge work?
The gluteus maximus drives the hip extension, while the band's inward pull forces the gluteus medius and other outer-hip muscles to press the knees out. The hamstrings assist the lift and the core works to keep the pelvis level on one leg.
Why is the band placed above the knees in this exercise?
Above the knees is where the loop can pull the thighs toward each other most effectively, which forces you to actively abduct the hips during the bridge. That outward knee press is what separates this from a regular single-leg bridge.
Is the Resistance Band Single Leg Bridge good for beginners?
Yes, it is a good early single-leg exercise because the floor supports your back and the band gives instant feedback when your knees cave in. Beginners can start with a light band and a slightly smaller range of motion.
How far should my planted foot be from my hips?
Close enough that your shin is roughly vertical when your hips are lifted. If the foot drifts too far forward, the hamstrings and lower back compensate and the glute loses its leverage.
Why do my hips tilt or rotate during the bridge?
With one leg loaded, the pelvis naturally wants to drop or twist toward the unsupported side, especially as fatigue sets in. Reduce the range or the reps until you can keep your belt line level, since controlling that tilt is the stability benefit of the exercise.
What can I use instead of a resistance band?
You can do a plain single-leg bridge without the band, though you lose the outward-knee drive. A light mini loop or even a towel looped above the knees with self-created outward tension is a reasonable substitute.
Should I complete all reps on one side before switching legs?
Yes, finishing one side before switching makes it easier to keep count and to notice how the working hip behaves under fatigue. Rest briefly between sides so the second leg gets the same quality of work.
Is it safe for my lower back?
For most people it is a back-friendly exercise because you lift from the hips on a supported floor. Keep the range to a straight line from shoulder to knee, brace your ribs down, and stop the set if you feel the work shifting into your lower back.
How many reps and sets should I do of the Resistance Band Single Leg Bridge?
Two to three sets of eight to twelve reps per side works well as a warm-up primer or strength accessory. If your hips shake or your pelvis starts tilting before you reach that range, do more sets with fewer reps instead.