Resistance Band Glute Bridge Walk
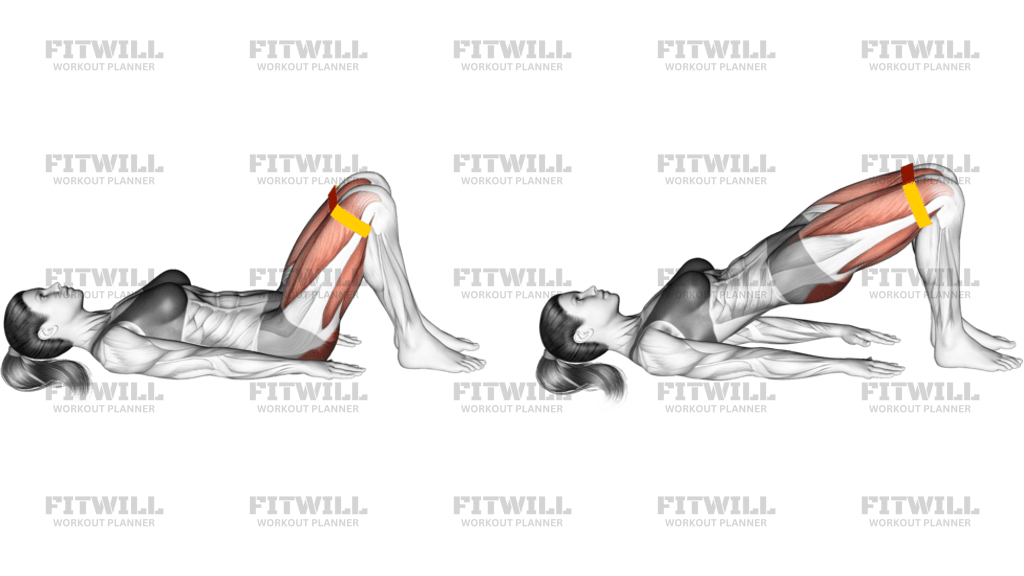
The Resistance Band Glute Bridge Walk takes a familiar glute bridge and turns it into a moving challenge. You lie on your back with a looped resistance band around your thighs just above the knees, drive your hips up into a bridge, and then walk your feet in small steps away from your hips and back again while keeping your hips lifted the entire time. The band forces you to press outward against it with your knees, which wakes up the outer hip muscles at the same time the bridge position loads the glutes themselves.
This exercise is a good fit for people who want more from their glute work without adding weight. Because your feet are walking while your hips stay elevated, your glutes and hamstrings have to hold you up under constantly changing leverage. Every step shifts your base of support, so the stabilizing muscles around the hips have to work to stop your pelvis from tipping or dropping. It also challenges your core, since you need steady trunk tension to keep your body in a straight line from shoulders to knees while your feet move.
The setup matters more here than in a standard bridge. If the band sits too low or too loose, you lose the outward knee pressure that trains the gluteus medius, and if your feet start too close to your hips, the walk-outs become unstable before you get any benefit. A flat, cushioned surface like a mat helps protect your upper back and heels. Your arms stay down at your sides with palms on the floor, giving you a stable base you can press into when a step feels wobbly.
Execution is about patience. Lift the hips first, hold that bridge height, and only then begin walking in small steps. The most common error is letting the hips sag toward the floor with each step, or letting the knees cave inward and lose tension on the band. Move slowly enough that you can feel both things at all times: knees pressing out and hips staying high. When the walk gets shaky, that is the signal to finish the set rather than push through with poor positions.
You will see this movement used in glute-focused sessions, as a warm-up activation drill before squats or deadlifts, and in lower-body routines where floor work with a band replaces loaded hip thrusts. It also suits home training well, since a single loop band and a bit of floor space are all you need. Treat it as a controlled strength and stability exercise rather than a cardio move, and prioritize smooth hips over the number of steps you take.
[ Workout Log & Planner ]
Put your next workout in Fitwill
Keep your plan and training log ready when you are.


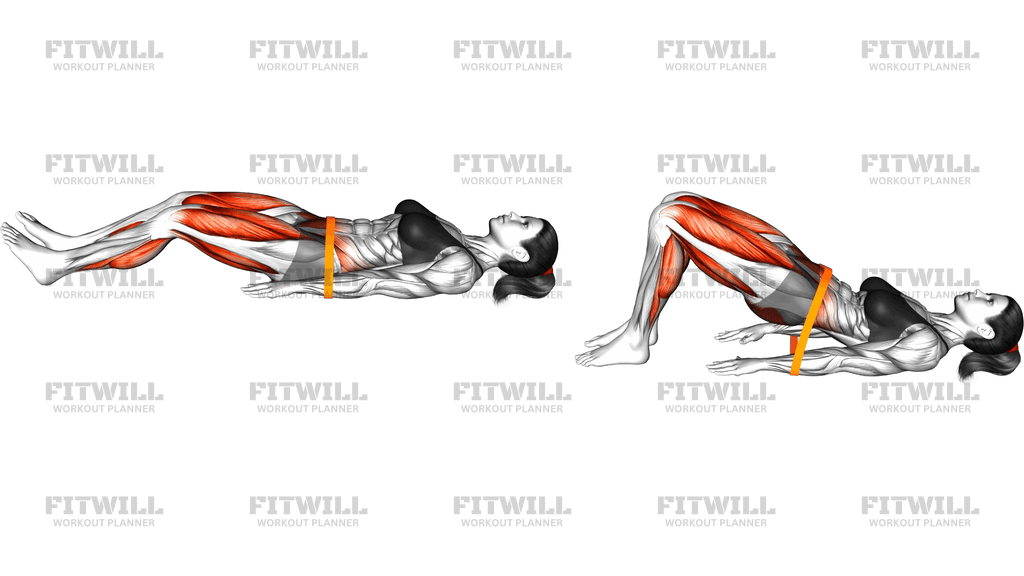
Instructions
- Lie on your back on an exercise mat with your arms at your sides and palms flat on the floor.
- Loop a resistance band around both thighs just above your knees and let it sit flat against your skin or leggings.
- Bend your knees and plant your feet flat on the floor, about hip-width apart, with heels roughly a hand's length from your glutes.
- Press your knees outward against the band until you feel steady tension, and brace your abdominal muscles so your lower back is neither arched nor pressed hard into the floor.
- Exhale and drive through your heels to lift your hips until your body forms a straight line from shoulders to knees, squeezing your glutes at the top.
- Keeping your hips at that height, take a small step with one foot, then the other, walking both feet a few steps away from your hips.
- Once you reach the end of your walk-out, reverse direction and walk your feet back to the starting heel position, still holding the bridge.
- Lower your hips back to the floor with control, rest briefly, then reset your feet and brace again before the next repetition.
- Breathe steadily throughout: exhale as you lift the hips, and keep breathing in a calm rhythm while stepping rather than holding your breath.
Tips & Tricks
- If your hips drop with every step, shorten your walk-out. Two small steps with a high, steady bridge beat six wobbly ones.
- Watch for the knees drifting inward toward each other as your feet move. Keep constant outward pressure into the band, because losing that tension removes most of the outer hip work.
- Press your upper arms and palms into the floor for balance. Many people let the arms go slack, then wonder why the bridge feels unstable.
- Point your knees and toes in the same forward direction instead of letting one foot rotate outward as it steps. This keeps the hip loading even on both sides.
- Keep the lift coming from the glutes, not from arching your lower back. At the top you should feel the squeeze in your buttocks, not a pinch in your spine.
- Choose a band with light to moderate resistance. A band that is too strong will drag your knees together the moment one foot leaves the floor.
- Keep your head relaxed on the mat and your neck neutral. Craning forward to watch your feet is a common habit that adds unnecessary neck strain.
- If one side feels weaker, walk leading with that leg on your first set so it gets practice while you are fresh.
- Stop the set when your form changes, not when your muscles completely fail. This exercise rewards controlled repetitions far more than exhausted ones.
Frequently Asked Questions
Which muscles does the Resistance Band Glute Bridge Walk work?
The glutes are the main movers, with the hamstrings helping hold the bridge. The band around the knees also recruits the outer hip muscles, and your core stays active to keep the trunk steady while your feet walk.
Where should I place the resistance band for this exercise?
Place the loop around both thighs just above the knees. That position lets you press outward with your knees throughout the bridge and the walk, which is what trains the outer hips alongside the glutes.
How far should I walk my feet out during the Resistance Band Glute Bridge Walk?
Walk only as far as you can keep your hips high and your knees pressing into the band, usually two to four small steps. If your hips start sagging or your heels slide, you have gone too far.
Is the Resistance Band Glute Bridge Walk suitable for beginners?
Yes, as long as you start with a light band and a short walk-out. Beginners often benefit from mastering a plain glute bridge first, then adding the band, and only then adding the walking steps.
Why do my hips drop when I start walking?
This usually means the steps are too big, the band is too heavy, or your glutes are not staying engaged at the top. Slow down, shorten the walk-out, and focus on squeezing the glutes to hold the bridge height before each step.
My knees keep caving inward against the band. How do I fix that?
Actively push both knees outward the entire time, even while a foot is mid-step. If the band is so strong that you cannot hold that pressure, switch to a lighter band and build back up.
Can I do the Resistance Band Glute Bridge Walk without a mat?
You can, but a mat is worth using. It cushions your upper back, shoulders, and heels, and it gives your palms a non-slip surface to press into while you walk.
What can I substitute if I don't have a resistance band?
A plain glute bridge with slow walk-outs still trains the glutes and hamstrings, though the outer hip involvement is reduced. You can also do standard glute bridges and add a brief hold at the top to increase the challenge.
How many repetitions and sets should I do?
Start with two to three sets of four to six walk-outs, meaning you walk out and back once per repetition. Increase steps or band tension only when you can complete every rep with your hips level and knees pressing out.
Is it safe for my lower back?
When done with control, the movement is generally back-friendly because your spine stays supported on the floor. Lift with your glutes rather than arching, keep the range comfortable, and stop if you feel sharp or pinching sensations.