King Pigeon Yoga Pose
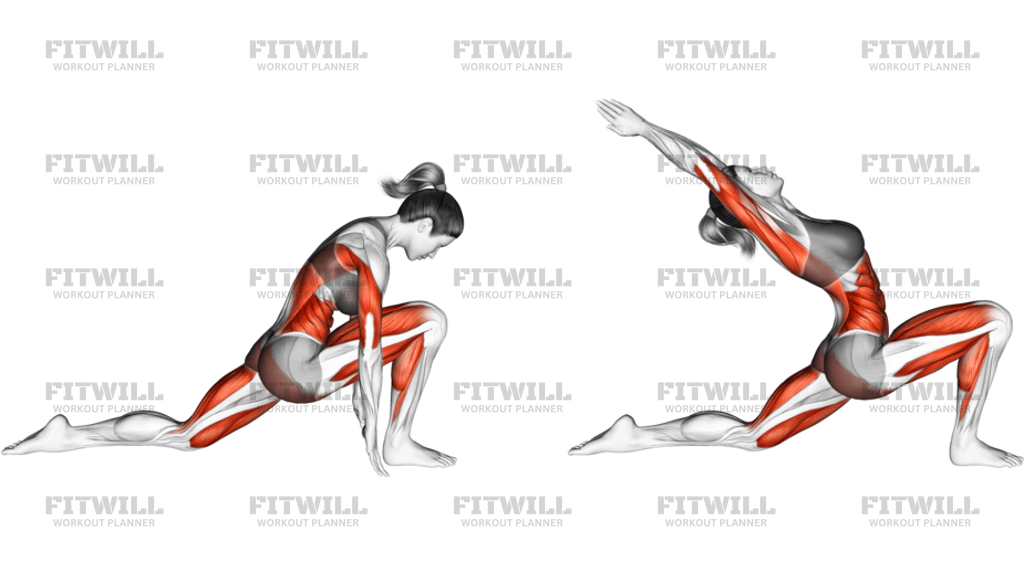
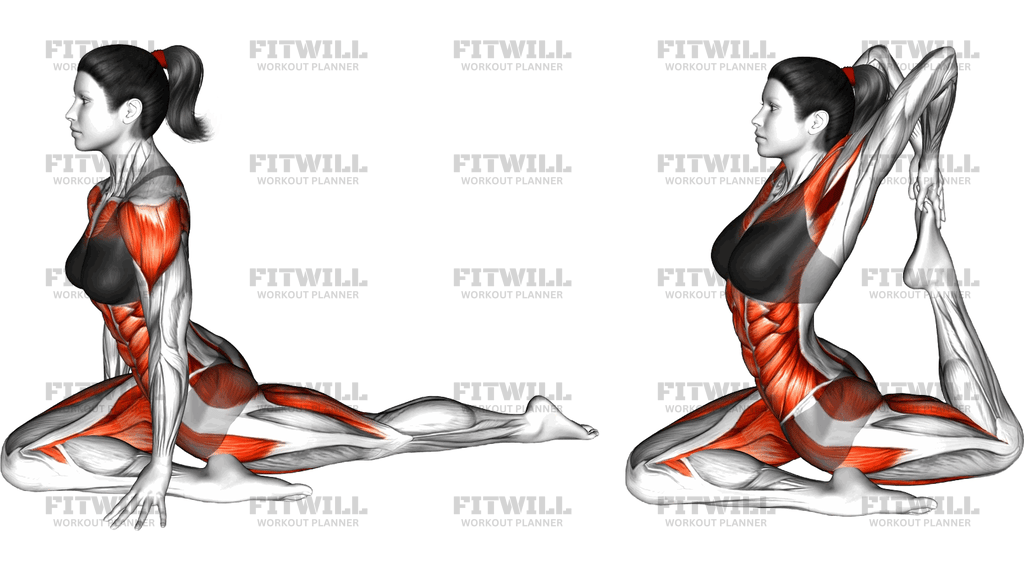
The King Pigeon Yoga Pose, known in traditional yoga as Eka Pada Rajakapotasana or One-Legged King Pigeon, is one of the most demanding hip openers in the practice. You start from a classic pigeon position with the front leg folded in front of you and the back leg extended behind, then bend the back knee and reach the same-side arm overhead and behind you to catch the raised foot. The full expression pulls the foot toward the back of the head, creating a deep backbend layered on top of the hip stretch.
This pose trains three things at once: external rotation and abduction of the front hip, a strong stretch through the hip flexors and quadriceps of the back leg, and an extension of the spine and shoulders. It is especially useful for people who sit for long hours and have chronically tight hip flexors, as well as for runners, cyclists, and lifters whose training loads the glutes and quads heavily without ever taking those tissues through end-range positions.
The setup matters more here than in most poses. Where the front shin sits determines how much stress lands on the front knee, and whether the back leg stays active or collapses decides whether the backbend happens in the spine or gets dumped into the lower back. Skipping the setup and dropping straight into the fold is the most common way people strain a knee or irritate the sacroiliac joint.
To execute it well, keep the hips square and level as you fold forward, and when you reach for the back foot, let the chest lift rather than sinking into the low back. The arm should rotate from the shoulder so the elbow points at the ceiling, drawing the foot in small increments over several breaths. Most practitioners need a strap or a wall for a long time before the hands-free version is appropriate.
A practical rule: work the preparatory pigeon pose and the quad-and-shoulder components separately for months before attempting the full bind. If the back foot cannot be reached without wrenching the shoulder or tilting the pelvis, stay with the strap version. The pose should feel like a spreading, intense stretch, never a pinch in the knee or a sharp catch in the spine.
[ Workout Log & Planner ]
Put your next workout in Fitwill
Keep your plan and training log ready when you are.


Instructions
- Start on an exercise mat in Downward Dog or on all fours, then slide your right knee forward toward your right wrist and set the right shin diagonally on the mat with the right foot roughly under the left hip.
- Extend the left leg straight back with the kneecap and top of the foot facing the floor, and settle both hips level and square toward the front of the mat, using a block or folded blanket under the right hip if it hovers off the floor.
- Place the hands on the floor on either side of the hips, press down to lengthen the spine, and take several breaths in the base pigeon position so the front hip has time to release.
- Bend the left knee and lift the left foot toward the ceiling, keeping the knee in line with the hip rather than letting it flare wide.
- Reach the left arm up and back, rotating the shoulder so the elbow points upward, and either hold the foot with the hand or loop a strap around it and grip the strap with both hands if the foot is out of reach.
- Draw the foot gradually toward the back of your head while lifting the chest and drawing the front ribs in, letting the backbend distribute along the whole spine instead of concentrating in the lower back.
- Hold the position for 5 to 8 slow breaths, releasing slightly on each exhale rather than forcing deeper into the stretch.
- Release the foot with control, lower the back leg back to the floor, and press the hands down to slide the front leg out of the fold before repeating the full sequence on the other side.
Tips & Tricks
- If the front knee complains when the shin angles toward the chest, straighten the shin closer to parallel with the front of the mat; a steeper shin angle puts rotational stress on the knee.
- A hovering front hip almost always means the backbend will collapse into the lower back. Sit the hip down onto a block or blanket until both hips are level before reaching for the foot.
- Keep the back leg actively pressing down and internally rotating slightly; a passive back leg lets the pelvis tilt and loses the quad stretch the pose is designed to create.
- Do not crank the head back to chase the foot. The head stays neutral and follows the curve of the spine; the foot moves toward the head, not the other way around.
- Warm up with low lunge, half splits, and a standing quad stretch first. Cold hip flexors and quads are the usual reason the foot cannot be reached.
- Using a strap is not a downgrade. It lets you keep the pelvis square and the shoulder safe, which is exactly what the hands-free version demands.
- If the shoulder pinches when the arm reaches overhead, widen the grip on the strap and focus on rotating the elbow toward the ceiling rather than swinging the arm behind the head.
- Come out of the pose as slowly as you went in. Releasing the foot abruptly while the spine is extended is when most lower back tweaks happen.
Frequently Asked Questions
What muscles does the King Pigeon Yoga Pose stretch?
It targets the hip flexors, especially the iliopsoas, and the quadriceps of the back leg, while the folded front leg opens the glutes and outer hip. The overhead reach adds a shoulder flexor and chest stretch.
Is King Pigeon Yoga Pose safe for beginners?
The base pigeon shape is suitable for beginners, but the full version with the overhead foot grab is advanced and usually takes months or years of preparation. Beginners should use a strap around the back foot or simply stay in the preparatory pigeon with a block under the front hip.
Why does my front knee hurt in King Pigeon Yoga Pose?
Knee discomfort usually means the front shin is angled too sharply toward the chest for the rotation your knee currently allows. Flatten the shin closer to parallel with the front of the mat, and if pain persists, switch to a reclined figure-four stretch instead.
I cannot reach my back foot in King Pigeon Yoga Pose. What should I do?
Loop a yoga strap around the back foot and hold it with one or both hands, or practice next to a wall and place the back foot against it while reaching overhead. Both options preserve the hip and spine position while your quadriceps and shoulder flexibility develop.
How long should I hold King Pigeon Yoga Pose?
Five to eight slow breaths per side is a solid working hold, with the intensity eased slightly on each exhale. Because the pose loads the knee and lower back at end range, shorter, attentive holds are better than long, sagging ones.
Should my hips be square in King Pigeon Yoga Pose?
Yes, the hips should stay level and square toward the front of the mat, which often requires a block or blanket under the front buttock. A tilted pelvis shifts the stretch out of the hip and creates torque at the knee and lower back.
What is the most common mistake in King Pigeon Yoga Pose?
Forcing the backbend from the lower back by letting the front ribs flare and the pelvis dump forward while yanking the foot. Keep the ribs drawn in and move the foot in small increments so the extension spreads along the whole spine.
Can I practice King Pigeon Yoga Pose every day?
Gentle preparatory pigeon work can be done most days, but the full backbending version is better reserved for three to four sessions per week. Deep end-range hip and spine stretches need recovery time just like any demanding physical skill.
What poses prepare me for the King Pigeon Yoga Pose?
Low lunge, half splits, standing quad stretch, camel pose, and bridge build the hip flexor, quad, and spine extension range you need. Reclined pigeon and regular pigeon prepare the front hip rotation.