Toe Squat Yoga Pose
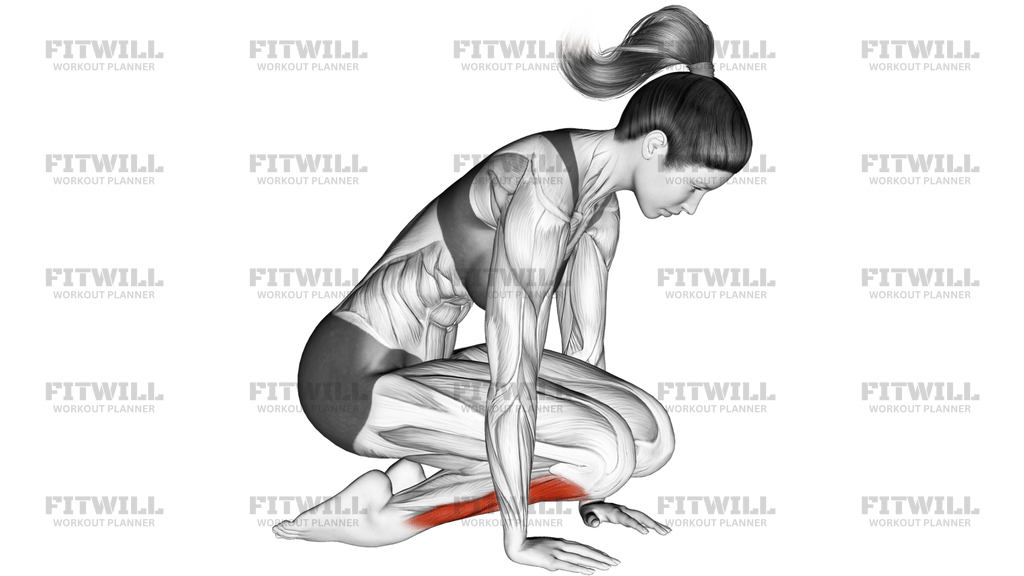
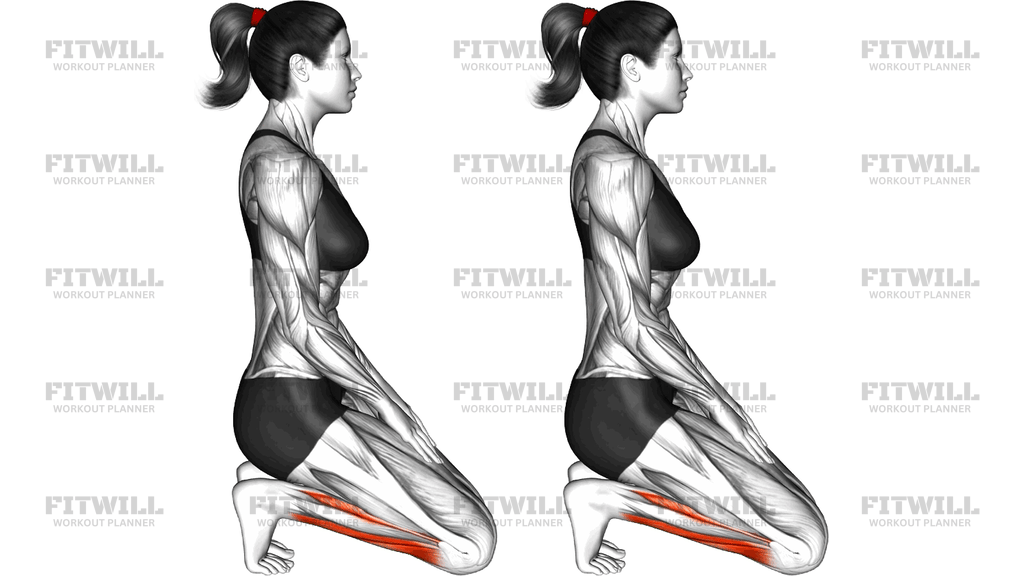
The Toe Squat Yoga Pose is a kneeling yoga position where you tuck your toes under and sit your hips back onto your heels, so your body weight presses the pads and balls of your toes into the floor. It looks deceptively simple, but anyone who spends the day in stiff shoes or cushioned trainers will feel it immediately across the soles of the feet and along the tops of the toes. The pose is a staple in many yoga sequences, often practiced near the start of a floor series to open the feet before deeper hip or knee work.
The main benefit is a deep stretch of the plantar fascia, the toe extensor tendons, and the small joints of the forefoot, all of which are areas that rarely get lengthened in daily life. Because the ankles are loaded in extreme dorsiflexion with the toes tucked, the pose also challenges the ankle stabilizers and the lower calf around the Achilles region. Runners, lifters working toward deep squats, and people with generally stiff feet tend to notice the carryover to balance and foot control fastest.
Setup matters more than it appears. Your knees should be about hip-width on a mat or soft surface, and your toes need to be fully tucked under so the toenails face away from the floor and the pads of all ten toes bear weight evenly. If the toes are only half-tucked, the pressure concentrates on a few joints and the pose turns uncomfortable very quickly. Sitting down onto the heels gradually, rather than dropping your weight at once, is what separates a productive stretch from a painful one.
To execute the pose well, keep your torso upright and your hands resting lightly on your thighs, letting gravity do the work instead of forcing your hips down. Breathe slowly through the nose and let the intensity of the stretch settle over the course of the hold. Most people need to start with the hands on the floor to shift some weight forward and shorten the hold to twenty or thirty seconds. Over a few weeks, the plantar tissue adapts and the full version with hands on the thighs becomes comfortable.
Common use cases include warming up the feet before running or lower-body training, restoring toe mobility after long days in shoes, and preparing the ankles for deep squatting positions in yoga or strength work. It is frequently paired with its counter-pose, sitting back with the tops of the feet flat on the floor, so the ankles move through both extremes.
A few safety points are worth respecting. The knees sit in deep flexion here, so anyone with knee discomfort can place a rolled towel behind the knees to reduce compression. Sharp pain in the toe joints or cramping in the arches is a signal to come out of the pose and reset rather than push through. Always release the pose by leaning forward and un-tucking the toes deliberately, since shaking a numb or cramped foot out under load is how strains happen.
[ Workout Log & Planner ]
Put your next workout in Fitwill
Keep your plan and training log ready when you are.


Instructions
- Kneel on an exercise mat with your knees about hip-width apart and your spine tall.
- Curl your toes under so all ten toes are tucked, with the pads and balls of the toes flat against the mat and the heels pointing up.
- Place your hands on the floor beside your hips and slowly begin shifting your weight back toward your heels.
- Keep your torso upright and your shoulders relaxed as you lower your hips, letting your body weight settle onto the toe pads gradually.
- Once you reach a tolerable stretch, rest your hands lightly on the tops of your thighs and hold the position.
- Breathe slowly and evenly through your nose, letting the stretch in the soles of your feet ease as the hold continues.
- Stay for 20 to 60 seconds, keeping your weight distributed evenly across both feet rather than favoring one side.
- To exit, lean forward, place your hands on the floor, lift your hips slightly, and release one foot's toes at a time.
- Shake out your feet and gently point and flex your ankles a few times before repeating or moving on.
Tips & Tricks
- If the stretch is overwhelming at first, keep your hands on the floor so some of your weight stays forward, and ease back only as the toes adapt.
- Make sure the toes are fully curled before you sit back. Half-tucked toes concentrate pressure on a couple of joints and cause sharp pinching instead of a spread-out stretch.
- Spread and lengthen the toes as you tuck them. Scrunched, overlapping toes are the usual reason people feel toenail pressure rather than a sole stretch.
- Watch that your ankles do not roll outward. Keep the weight even between the inner and outer edges of the forefoot so both feet stretch equally.
- If your knees feel compressed in deep flexion, slide a small rolled towel into the back of each knee crease before sitting down.
- Toe or arch cramping in the first few seconds is normal for beginners. Come out, flex and point the foot, then go back in rather than gritting through it.
- Do not drop your hips down quickly. The slow lowering is what teaches your toes and ankles to absorb load, which is the point of the pose.
- Practice it after runs or long days on your feet, when the plantar tissue is warm and responds better to stretching.
- Pair it with a counter-stretch where you kneel with the tops of the feet flat to move the ankles through the opposite range.
Frequently Asked Questions
What does the Toe Squat Yoga Pose stretch?
It primarily stretches the soles of the feet, including the plantar fascia and toe extensor tendons, while loading the ankles in deep flexion. The lower calves and the small muscles that stabilize the foot arch work to hold the position.
Is the Toe Squat Yoga Pose good for runners?
Yes, many runners use it because running stiffens the plantar tissue and toe joints, and this pose lengthens exactly those structures. Better toe extension also supports a stronger push-off and more stable foot placement.
Why do my toes cramp when I sit back onto my heels?
Cramping is common when the toe extensors and plantar muscles are not used to being lengthened under load. Come out of the pose, flex and point your foot a few times, and build up hold time gradually over a few weeks.
How is the Toe Squat Yoga Pose different from regular kneeling sitting (Vajrasana)?
In Vajrasana the tops of the feet rest flat on the floor and the stretch lands on the shins and ankles. In the Toe Squat Yoga Pose the toes are tucked under, so the stretch moves to the soles of the feet and the toe joints instead.
How long should I hold the Toe Squat Yoga Pose?
Start with 20 to 30 seconds and work up to 60 seconds or more as your feet adapt. Two or three repetitions in a session is plenty when you are beginning.
Can beginners do the Toe Squat Yoga Pose?
Yes, beginners just need to limit how much weight they shift onto the heels at first. Keeping the hands on the floor reduces the load on the toes, and the pose becomes more comfortable quickly with regular practice.
Is the Toe Squat Yoga Pose safe for the knees?
The knees sit in deep flexion, which is fine for healthy joints but can feel compressive if you have knee sensitivity. Placing a rolled towel behind the knees reduces the fold angle, and any sharp knee pain means you should skip the pose.
What can I use instead of the Toe Squat Yoga Pose if I cannot tuck my toes?
You can stretch the soles one foot at a time by kneeling on one knee with the other foot tucked, using a wall or chair for support. A standing calf and soleus stretch with the toes lifted against a wall covers some of the same ankle range.
How does the Toe Squat Yoga Pose help with deep squats?
Deep squats require the ankles to dorsiflex fully and the toes to extend under the body, and this pose trains both positions directly. Practicing it regularly makes the bottom position of a squat feel less restricted through the feet.
Should I feel numbness in my toes during the hold?
Mild tingling can happen as the toes are compressed, but if your toes go fully numb, come out of the pose and reset. Numbness that appears quickly usually means too much weight is sitting on one spot of the forefoot.