Lower Ab Swipe
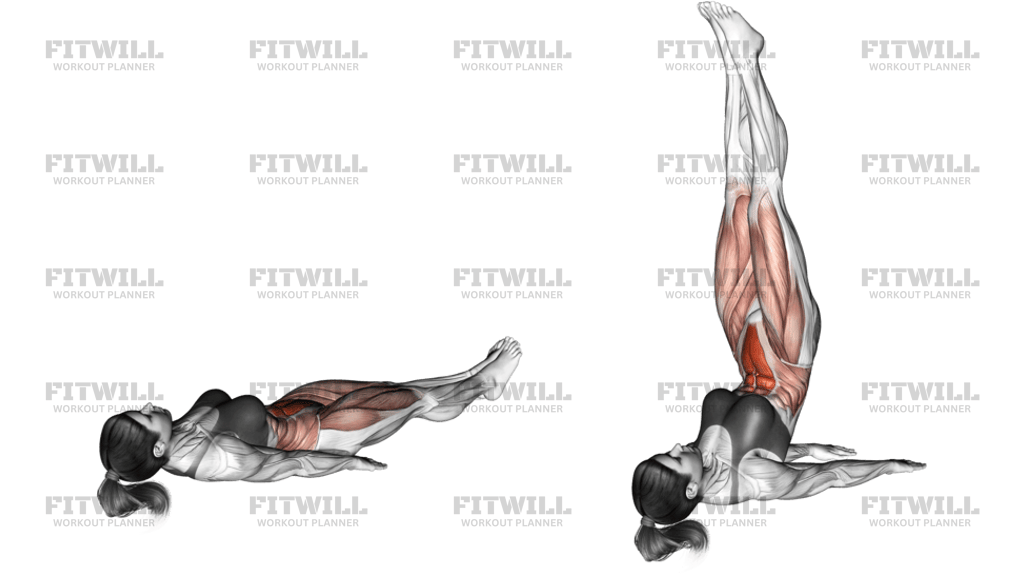
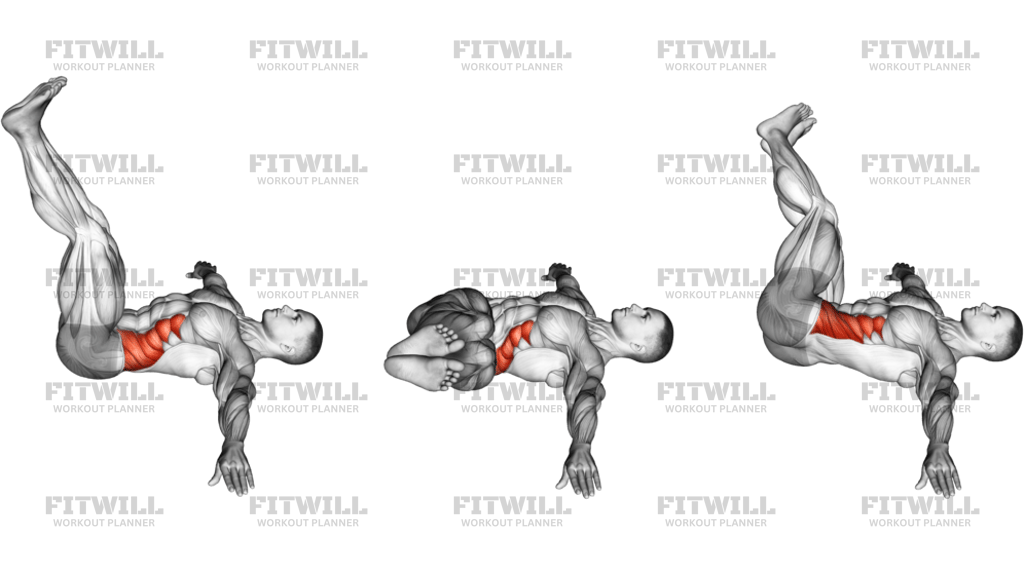
The Lower Ab Swipe is a floor-based bodyweight movement that targets the lower section of the rectus abdominis through a rolling hip-curl pattern. You lie flat on your back with your arms alongside your body, bend your knees to about 90 degrees, and then swipe your knees up and in toward your chest by peeling your hips and lower back off the floor. Unlike a standard leg raise, where the legs move but the pelvis stays put, this exercise demands that the pelvis actually curls upward, which is what shifts the workload into the lower abdominal region.
This movement is especially useful for anyone who feels their hip flexors taking over during conventional leg raises. Because the knees stay bent, the lever arm is shortened and the hip flexors have less leverage, forcing the abs to do the work of tilting the pelvis. It fits well at the start of an ab circuit when you are fresh, or as a finishing movement after heavier compound lifts when you want to fatigue the trunk without loading the spine.
Setup matters more than it looks. Your arms pressed into the floor act as stabilizers, your head and shoulders stay relaxed and down, and the knees should travel over the hips rather than swinging out in front of them. If the knees drift forward or the legs straighten mid-rep, momentum replaces muscular tension and the lower abs stop driving the movement. Keeping the knees folded at a consistent angle throughout the swipe is the difference between training the abs and just rocking your body.
Execution should feel like a curl, not a kick. Exhale as the hips lift, think about pulling your hip bones toward your ribs, and roll up only as high as your lower back can leave the floor under control. Pause briefly at the top, then lower slowly, letting one vertebra at a time return to the mat until your tailbone touches down again. The descent is where most people rush, and slowing it down dramatically improves the training effect.
A common use case is rehabilitation-style core work after lower back irritation, since the bent-knee position keeps the lumbar spine relatively neutral compared with straight-leg variations. It is also a progression stepping stone toward harder movements like hanging knee raises and toes-to-bar, because it teaches the same posterior pelvic tilt in a safer, supported position. Anyone who can lie down comfortably on a mat can attempt it, though total beginners should start with small hip lifts before chasing a full curl.
From a safety standpoint, move smoothly and never jerk the knees toward the face or drop the hips back down. If you feel strain in your neck, you are probably lifting your head; keep it resting on the floor. Stop the set when you can no longer control the lowering phase, as sloppy reps here tend to produce lower back discomfort rather than better abs.
[ Workout Log & Planner ]
Put your next workout in Fitwill
Keep your plan and training log ready when you are.


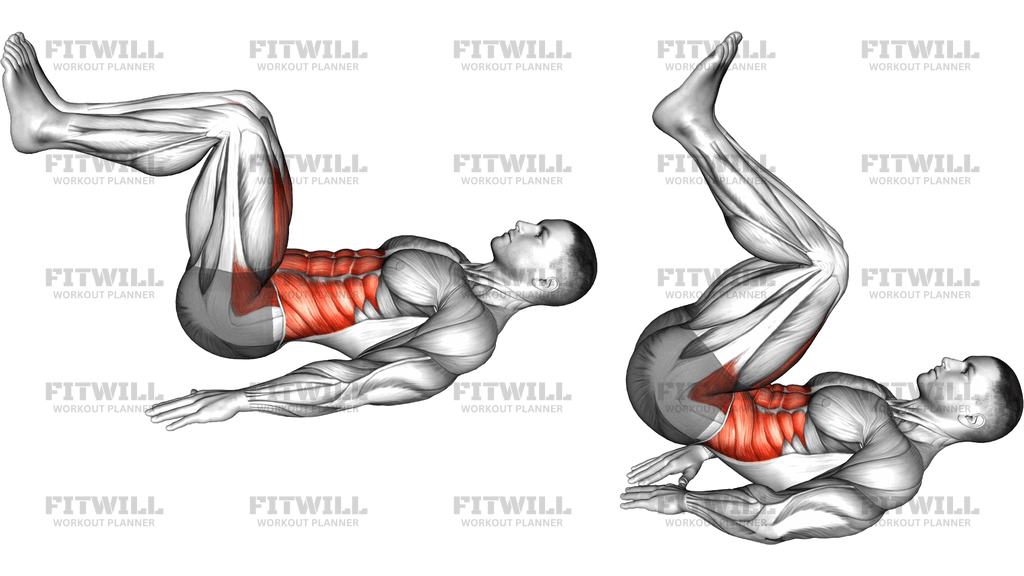
Instructions
- Lie flat on your back on an exercise mat with your legs extended and your arms resting alongside your body, palms facing down.
- Bend your knees to roughly 90 degrees, then lift your feet so your knees stack directly over your hips; your shins should be parallel to the floor.
- Press your arms and upper back lightly into the floor and pull your ribs down so your lower back is in contact with the mat before you start.
- Brace your abdominal muscles as if bracing for a light poke to the stomach, and keep your head and shoulders relaxed on the floor.
- Exhale and curl your hips up off the floor, swiping your knees up and in toward your chest while keeping the knee angle unchanged.
- At the top, your knees should be drawn close to your torso and your tailbone should be lifted, with only your upper back and shoulders supporting you.
- Pause for a beat at the top, feeling your lower abs hold the curled position rather than letting momentum carry you.
- Inhale and lower with control, rolling your spine back down one section at a time until your tailbone and lower back are flat on the mat again.
- Reset your brace with your knees over your hips and your lower back flat before starting the next rep; do not let your feet drop to the floor between reps.
- Complete your target reps with the same knee angle and lifting height throughout, and stop the set once the descent becomes hard to control.
Tips & Tricks
- Think of the movement as a pelvic curl, not a leg swing; if your knees travel forward past your hips, the abs unload and your body starts rocking.
- If your hip flexors burn before your abs do, reduce the range and focus on a small, sharp lift of the tailbone rather than a big leg movement.
- Press your palms into the floor during the lift only as much as needed for balance; leaning hard on your arms lets you cheat the curl.
- Keep your head down for the entire set. Lifting the head to watch your legs is a common habit that creates neck tension without adding ab work.
- Avoid kicking the knees toward your chest with momentum. The swipe should take about one second up and two to three seconds down.
- If your lower back arches off the mat at the start, your starting brace is weak; flatten your back first, then begin the curl.
- Do not straighten your legs as you fatigue. Straight legs lengthen the lever and shift the effort toward the hip flexors and lower back.
- Place a folded towel under your hips if the bone of your tailbone presses uncomfortably into a hard floor.
- Tempo is your progress lever here. Once full-range reps feel easy, slow the lowering phase rather than adding more reps.
Frequently Asked Questions
What muscles does the Lower Ab Swipe work?
The primary muscles are the lower fibers of the rectus abdominis, supported by the deep transverse abdominis and the hip flexors. The obliques assist in keeping the knees stacked and the pelvis level as you curl.
How is the Lower Ab Swipe different from a reverse crunch?
The mechanics are very similar; both use a posterior pelvic tilt with bent knees. The Lower Ab Swipe emphasizes the sweeping path of the knees up toward the chest with a controlled roll of the hips, which makes the curling action easier to feel.
Is the Lower Ab Swipe suitable for beginners?
Yes, as long as beginners start with a partial range. Lifting just the tailbone a few centimeters off the mat with the knees over the hips still trains the pattern, and the range can grow as control improves.
Why do my hip flexors feel the Lower Ab Swipe more than my abs?
This usually means the legs are driving the movement instead of the pelvis. Keep the knee angle fixed, shrink the range, and focus on tilting your hip bones toward your ribs rather than pulling your knees with your thighs.
Should my feet touch the floor between reps of the Lower Ab Swipe?
No. Keeping your knees stacked over your hips with feet off the floor maintains continuous tension on the abs. Only lower your feet when the set is finished.
Can I do the Lower Ab Swipe on a hard floor without a mat?
You can, but a mat or folded towel makes the exercise far more comfortable on the spine and tailbone. Comfort matters because you should not be tensing up against a painful surface during the curl.
How high should my hips lift during the Lower Ab Swipe?
High enough that your tailbone and lower back leave the floor and your knees finish close to your chest, but not so high that you roll onto your shoulders or neck. Control matters more than height.
What can I substitute for the Lower Ab Swipe if it bothers my lower back?
A dead bug is a gentler option because the pelvis stays flat on the floor. If that still causes discomfort, choose a different core exercise and check your starting brace before returning to this movement.
How many reps and sets of the Lower Ab Swipe should I do?
Two to four sets of 10 to 15 controlled reps works well for most people. Since the movement is bodyweight-only, progress by slowing the lowering phase or adding sets rather than rushing the reps.