Sitting Side Bend On A Chair
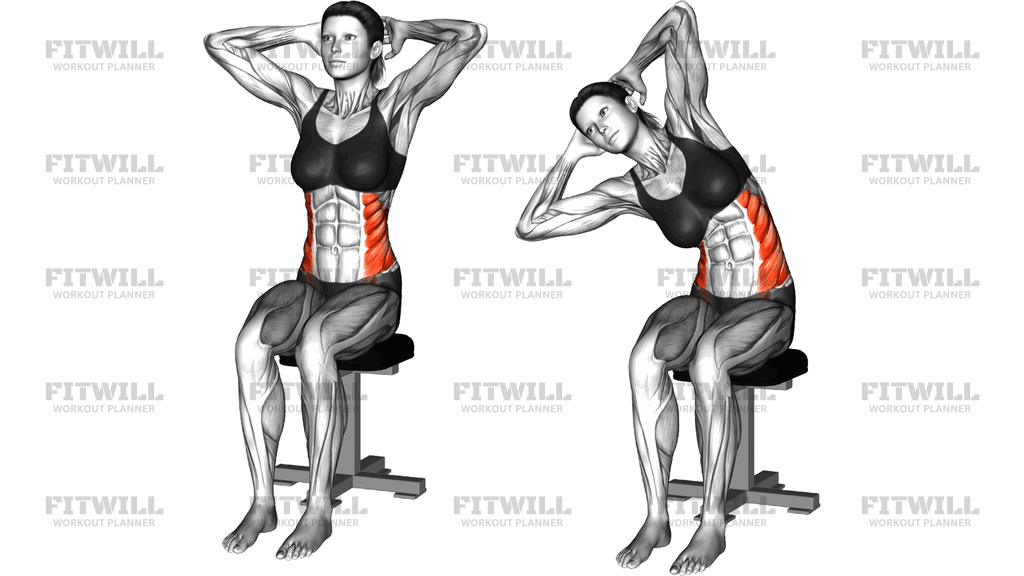
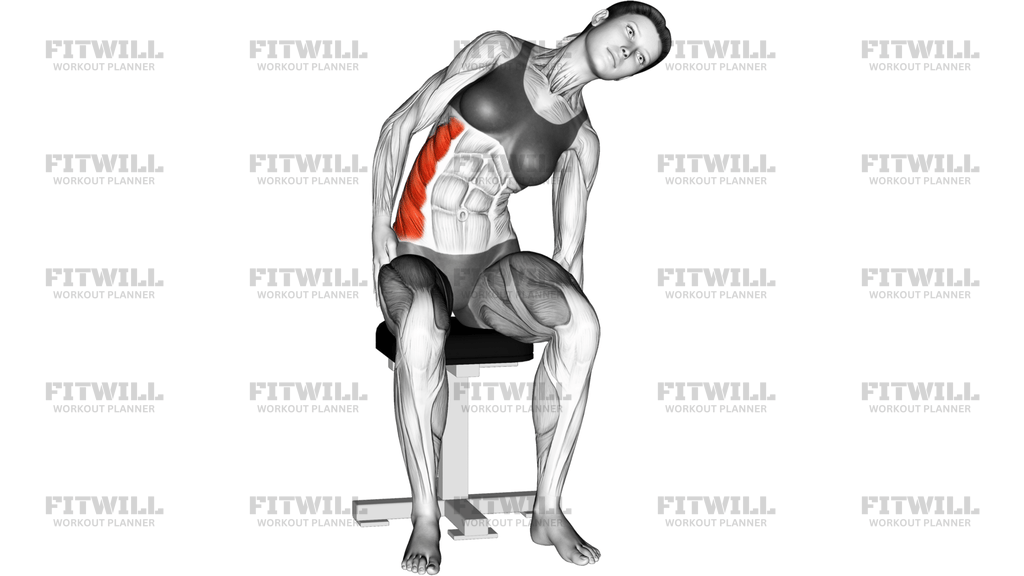
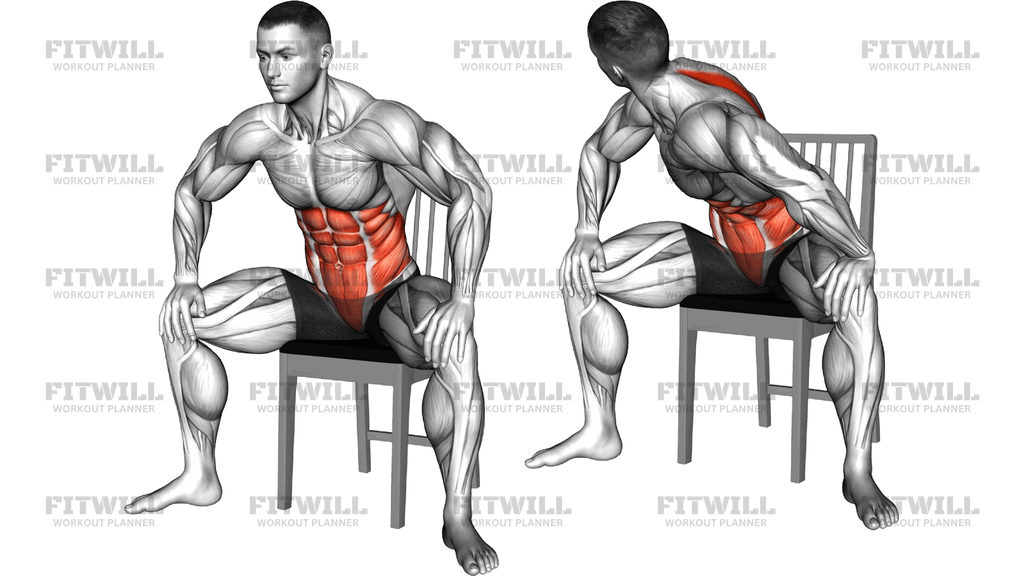
The Sitting Side Bend On A Chair is a simple lateral flexion drill performed from an upright seated position, with the hands placed lightly behind the head and the torso leaning directly out to one side before returning to center. Because the chair removes the balance and stability demands of standing versions, all of your attention can go into feeling the side of the waist lengthen and contract. It targets the obliques along the flank of the trunk, with supporting work from the deep lateral muscles of the lower back such as the quadratus lumborum.
This movement suits a wide range of people. Office workers who spend hours at a desk often develop stiffness through the sides of the trunk, and this is one of the easiest ways to restore mobility without getting on the floor. It is also a useful warm-up before more demanding core training, a gentle reintroduction to trunk movement for beginners, and a low-load option for older adults or anyone recovering general mobility who is not ready for loaded side bends with a dumbbell.
Setup matters more than it looks. Sit tall on the front half of the seat with both feet flat on the floor and roughly hip-width apart, so your hips stay level and your weight stays even. If you drift to one buttock or let your hips tip, the bend stops coming from the waist and starts coming from the hips, which defeats the purpose. The hands belong behind the head with the elbows wide, but they are there to support the head position, never to crank the neck forward or pull it sideways.
To execute the bend, brace the trunk lightly and slide one shoulder down and out to the same side, letting the torso fold sideways like a closing book rather than twisting forward. You should feel a clear stretch along the opposite side of your waist and ribs. Pause briefly at the end of the range, then pull yourself back up to tall sitting by engaging the muscles on the working side. Keep your chest facing forward the whole time; if your shoulders rotate, the obliques stop doing the work.
Common use cases include desk-break mobility routines, seated warm-ups for older or chair-based classes, and trunk preparation before rotational sports or weighted core work. Because it is performed one side at a time, it also gives you an easy way to compare left and right and gently chase symmetry.
For safety, keep the movement slow and within a comfortable range. A side bend should never produce sharp pain in the lower back, ribs, or neck. If your chair is on wheels or unstable, move it against a wall or use a firm, fixed seat, and stop if you feel any pinching or dizziness.
[ Workout Log & Planner ]
Put your next workout in Fitwill
Keep your plan and training log ready when you are.


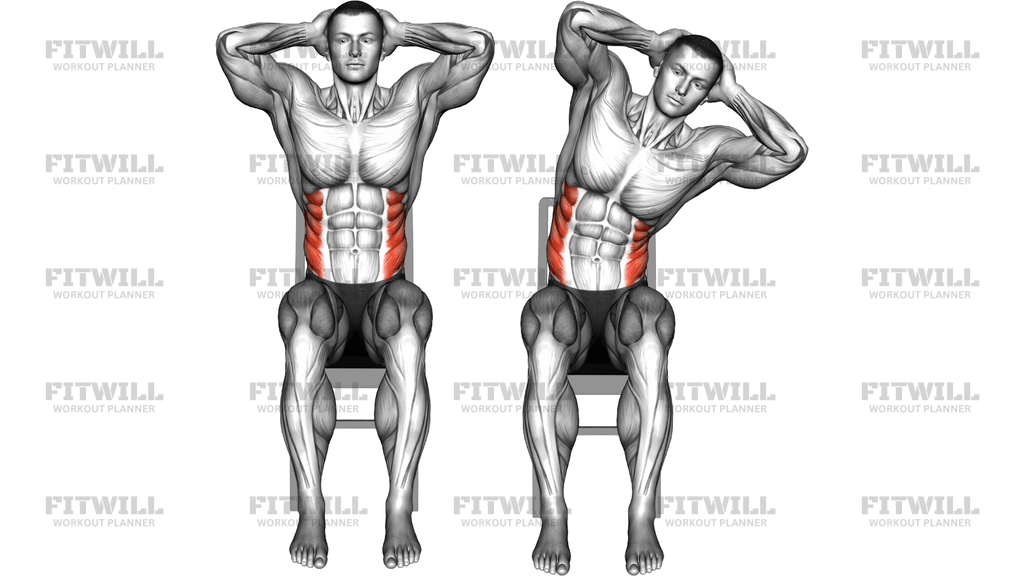
Instructions
- Sit on a stable chair with your back off the backrest, feet flat on the floor about hip-width apart, and your weight spread evenly across both sitting bones.
- Place your hands lightly behind your head with your fingers touching the back of the skull and your elbows flared out to the sides, then sit up as tall as you can.
- Gently brace your trunk as if preparing for a light push, and keep your hips square and level in the seat.
- Inhale, then lean your torso straight out to the right side, letting your right shoulder travel down toward your right hip while your left elbow stays open toward the ceiling.
- Continue bending until you feel a distinct stretch along the left side of your waist and ribs, keeping your chest facing forward and both hips glued to the seat.
- Hold the stretched position for one or two slow breaths without collapsing your chest or pulling on your neck.
- Exhale and use the muscles along your right side to draw your torso back up to tall sitting, moving at about half the speed of the descent.
- Complete all repetitions on the right, then switch sides and repeat the same number of bends to the left.
- Between sides, reset: shake out your shoulders, recheck that both feet are flat and your hips are level, and re-establish tall posture before the next set.
Tips & Tricks
- The most common fault is turning this into a twist. If your chest rotates toward the floor as you bend, the obliques are being bypassed; face your chest forward and picture bending between two panes of glass.
- Do not interlace your fingers and yank your head sideways. Rest the hands on the back of the head for support only, and let the trunk do the bending.
- Keep your sitting bones planted. If one hip lifts off the seat as you bend, shorten the range and focus on isolating the movement above the beltline.
- Sit forward on the seat, not slumped against the backrest. Leaning back flattens the natural curve of your spine and limits how far you can safely side bend.
- Move at the ribs, not just the shoulders. Think about spreading the ribs on the stretch side and squeezing them together on the working side to get more from each rep.
- If one side feels noticeably tighter, start your set on that side and match the reps with your more flexible side rather than pushing the tight side further.
- Keep your neck long. Looking slightly ahead rather than down at your knees prevents the head from lagging or leading the bend.
- Breathe through the stretch instead of holding your breath; exhaling as you return up helps the trunk muscles control the ascent.
- On a rolling office chair, lock the wheels or push the chair against a wall before starting, or the seat will slide sideways under you.
Frequently Asked Questions
What muscles does the Sitting Side Bend On A Chair work?
The primary targets are the obliques on the side of the trunk, with the quadratus lumborum and other lateral lower back muscles assisting. The side you bend toward contracts while the opposite side lengthens under the stretch.
Is the Sitting Side Bend On A Chair good for beginners?
Yes, it is one of the most accessible lateral trunk exercises because the seat provides balance support and no load is required. Beginners should start with a small range and prioritize keeping the hips level and the chest facing forward.
Why do my hands need to be behind my head during the Sitting Side Bend On A Chair?
The hands behind the head support the skull and keep the elbows open, which helps you stay tall rather than hunching forward. They are not for pulling; dragging your head into the bend strains the neck and removes work from the obliques.
Should I bend to both sides when doing the Sitting Side Bend On A Chair?
Yes, always train both sides with equal reps, even if one side feels tighter. Starting with the tighter side and matching it on the other is a simple way to work toward balanced range over time.
How far should I lean in the Sitting Side Bend On A Chair?
Bend only until you feel a comfortable stretch along the opposite side of your waist and ribs. Depth varies between people, and forcing extra range usually causes the hips to lift or the torso to twist, both of which reduce the benefit.
What is the most common mistake in this exercise?
Twisting or collapsing forward instead of bending straight sideways. Fix it by imagining your chest pressing between two narrow walls and keeping both sitting bones firmly on the seat throughout the rep.
Can I do the Sitting Side Bend On A Chair in an office chair?
You can, but make sure the chair is stable, not on casters that roll, and low enough that both feet rest flat on the floor. A firm dining chair against a wall is often a safer choice than a swivel chair.
What can I use instead of a chair for this movement?
A sturdy bench, stability ball, or the edge of a firm bed works if it lets you sit tall with feet flat. Standing side bends are a related option, though they add a balance demand the seated version removes.
Is it safe if I feel a pinch in my lower back during the Sitting Side Bend On A Chair?
A pinch is a signal to reduce your range rather than push through it. Sit taller, slow the tempo, and stay within a comfortable arc; if the sensation persists, stop and choose a gentler trunk mobility drill.