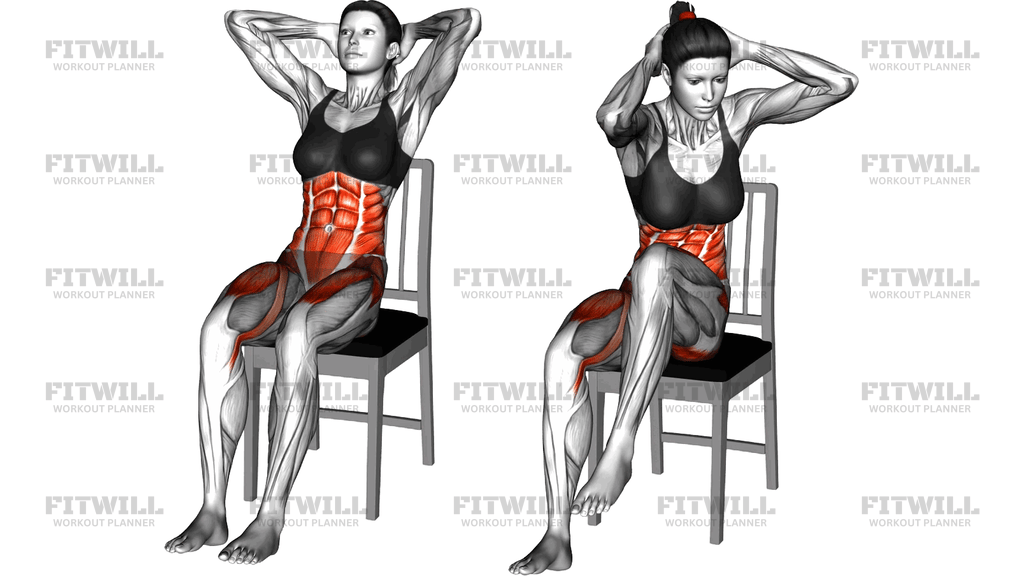
Sitting Knee Tuck On A Chair
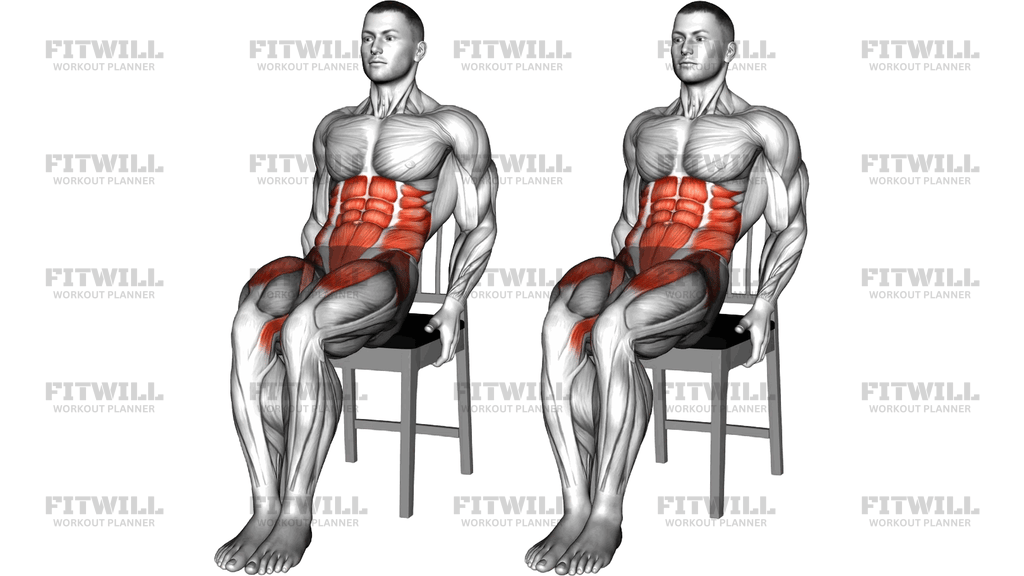
Sitting Knee Tuck On A Chair is a low-equipment core exercise that turns an ordinary sturdy chair into an abdominal training tool. You sit upright on the front edge of the seat, grip the sides of the chair for support, and draw your knees in toward your chest before lowering them back down with control. Because the torso stays relatively upright, the abs work hard to curl the pelvis and spine while the hip flexors assist in lifting the thighs.
This movement is especially useful for people who train at home, in an office, or anywhere a full floor setup is impractical. Beginners who find hanging knee raises or lying leg raises too demanding can use it to build basic abdominal strength and control without straining the lower back. It is also a practical option for older adults or anyone recovering general fitness, since the chair provides balance support throughout every rep.
The main muscles trained are the rectus abdominis and the lower portion of the abs, which are responsible for pulling the pelvis up as the knees come in. The hip flexors, particularly the iliopsoas and rectus femoris, work alongside the abs to raise the thighs, while the obliques stabilize the trunk so the knees travel straight rather than swinging to one side. Your arms and shoulders only work isometrically to keep you steady on the seat.
Setup matters more than it might seem. Sitting too far back on a soft or low chair rounds the lower back and makes it difficult to tuck the knees cleanly past the hips, so choose a stable chair without wheels and perch on the front edge. Leaning back slightly is acceptable, but excessive reclining shifts the work toward the hip flexors and away from the abs, which defeats the purpose of the exercise.
To perform it well, brace your abdomen before each rep, then lift your knees toward your chest, letting your lower back round gently as the knees pass in front of your hips. Pause briefly at the top, lower the feet to the floor under control, and reset your posture before the next rep. Keep the movement smooth rather than jerky, and let the abdominal contraction, not momentum from swinging the legs, drive the knees upward.
Common use cases include desk-break training, warm-up core activation, and home circuits paired with seated exercises like chair dips or sit-to-stands. Keep the reps moderate and the tempo controlled; if your thighs or front of the hips burn before your abs do, reduce the range slightly so the tuck stays within what your abdominal muscles can actually control.
[ Workout Log & Planner ]
Put your next workout in Fitwill
Keep your plan and training log ready when you are.


Instructions
- Sit on the front edge of a stable, armless chair with your feet flat on the floor and your knees bent to roughly 90 degrees.
- Place your hands on the sides of the seat beside your hips and grip the edge firmly to anchor your upper body.
- Sit tall with your chest up and shoulders relaxed, then tighten your abdominal muscles as if bracing for a light punch.
- Exhale and lift both knees up toward your chest, letting your pelvis tilt backward and your lower back round slightly as the knees rise.
- Pause for one second at the top with your knees drawn in and your abdomen fully compressed.
- Inhale as you slowly lower your feet back to the starting position, keeping your hands on the seat so your torso does not collapse forward.
- Avoid letting your feet slam down or your legs swing; the lowering phase should take at least as long as the lift.
- Reset your posture, re-brace your core, and begin the next repetition from a still, upright position.
- Complete your target repetitions, then stand up or rest your hands on your thighs between sets to release tension.
Tips & Tricks
- If the chair slides or tips as you lift your knees, place it against a wall or switch to a heavier chair; a rolling office chair is not appropriate for this movement.
- Do not let your shoulders creep up toward your ears as you grip the seat — press your hands down lightly and keep your neck long.
- If your hip flexors cramp or dominate the movement, reduce the tuck height so your abs, not your thighs, finish each rep.
- Leaning back dramatically turns this into a hip flexor exercise; keep your torso within about 45 degrees of upright to keep the abs working.
- Squeeze your knees together throughout the tuck — letting the legs drift apart makes it harder to control the path and invites twisting.
- The gentle rounding of the lower back at the top is part of the exercise, but if you feel pinching in the spine, shorten the range instead of forcing the knees higher.
- Start with your feet flat on the floor rather than crossed or lifted; this gives you a clean, repeatable starting point for every rep.
- Move with a two-second lift, one-second hold, two-second lower tempo to stop momentum from taking over the set.
Frequently Asked Questions
What muscles does the Sitting Knee Tuck On A Chair work?
The primary muscles are the abdominals, especially the lower fibers of the rectus abdominis, which curl the pelvis as the knees rise. The hip flexors assist in lifting the thighs, and the obliques stabilize your trunk so the knees track straight.
Is the Sitting Knee Tuck On A Chair good for beginners?
Yes, it is one of the most approachable knee tuck variations because the chair supports your weight and removes the grip and balance demands of hanging versions. Beginners can start with 8 to 10 controlled reps and a partial tuck range.
What kind of chair should I use for the Sitting Knee Tuck On A Chair?
Use a stable, armless chair with a flat seat and no wheels, and sit on the front third of the seat so your hands can grip the edges beside your hips. Test that it does not tip backward before doing a full set.
Why do I feel my thighs more than my abs during this exercise?
That usually means you are leaning back too far or lifting with momentum, which shifts the work to the hip flexors. Sit more upright, slow the tempo down, and focus on tilting your pelvis under as the knees come in.
Should my feet touch the floor between repetitions?
For most people, yes — lowering the feet fully and resetting keeps each rep consistent and prevents swinging. Advanced users can keep the heels hovering just above the floor for continuous tension.
How is the Sitting Knee Tuck On A Chair different from a hanging knee raise?
The seated version removes the grip and shoulder demands of hanging from a bar, so it isolates the abs and hip flexors in a much shorter range. It is a good stepping stone before progressing to lying leg raises or hanging knee raises.
Is it safe for my lower back?
When performed with a controlled tempo and a moderate range, the gentle spinal flexion involved is a normal, trainable movement. If you experience sharp pain or pinching, shorten the tuck, reduce the reps, or consult a qualified professional before continuing.
How many reps and sets of the Sitting Knee Tuck On A Chair should I do?
Two to three sets of 10 to 15 slow reps is a solid starting point. Prioritize a full pelvic curl and controlled lowering over chasing a higher number of fast reps.
Can I make the Sitting Knee Tuck On A Chair harder once it feels easy?
Yes — hold a small weight or medicine ball between your knees, pause longer at the top, or keep your feet off the floor for the entire set. Slowing the lowering phase to three or four seconds is another simple progression.