Standing Opposite Straight Arm Clasp Raise (Left O)
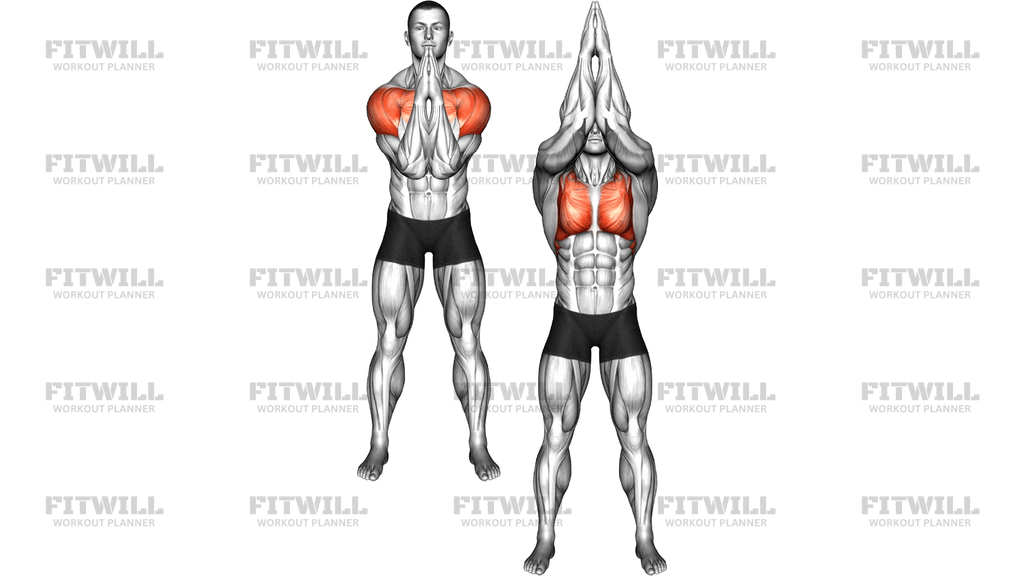
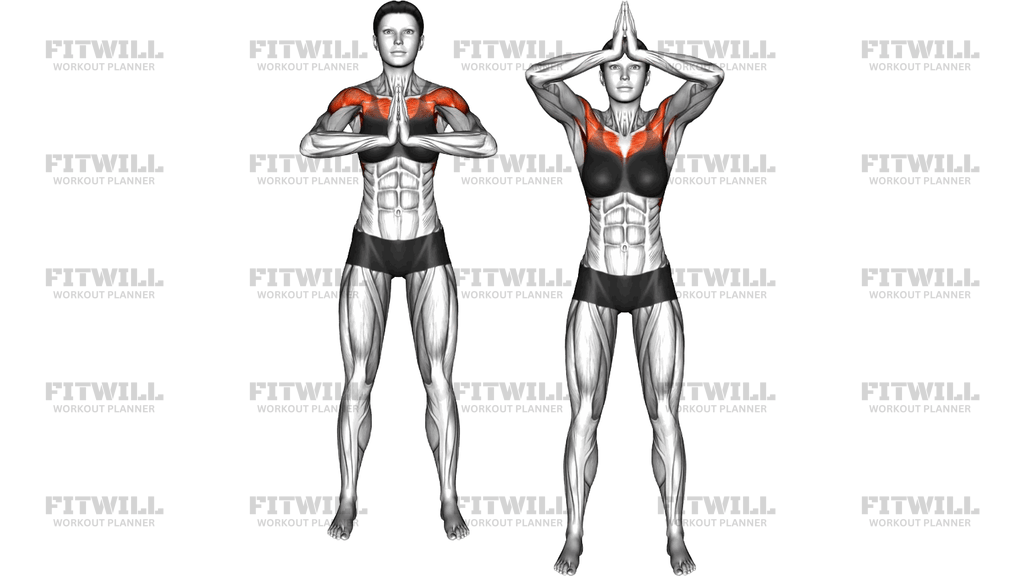
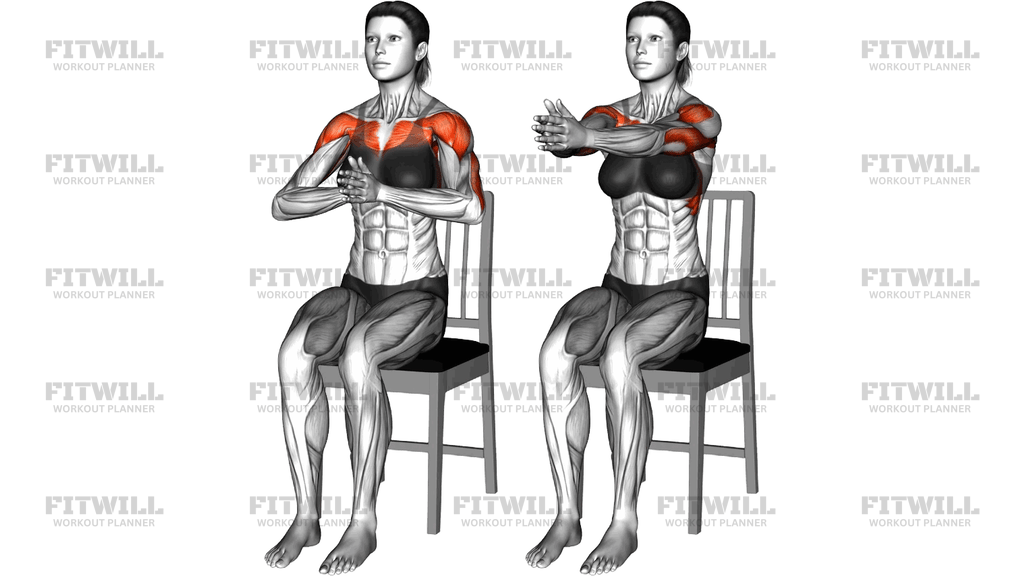
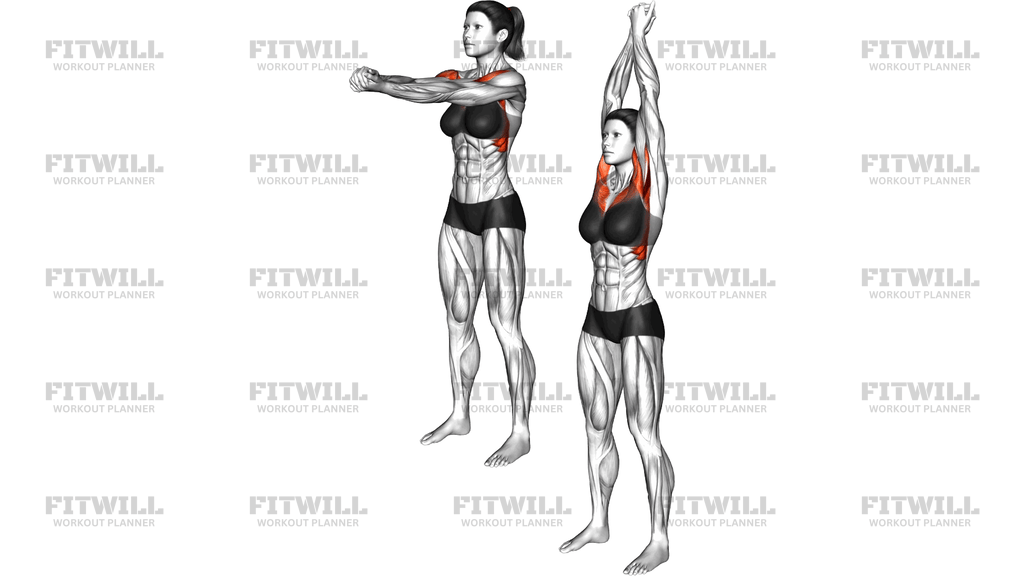
Standing Opposite Straight Arm Clasp Raise (Left O) is a body weight movement performed from a tall standing position. You interlace or press your hands together in front of your chest, keep both elbows fully straight, and raise the clasped arms in a smooth arc until they finish overhead. Because the arms stay locked out the entire time, the shoulders and chest have to do the work of lifting and guiding the arms instead of the elbows doing the steering.
This movement is useful as a warm-up primer, a mobility drill with an active strength component, and a low-load activation exercise. It works well at the start of an upper body session before pressing work, or as a reset for people who spend long hours sitting with rounded shoulders. The rising arc takes the shoulders through a large range of motion while the clasped hands keep the arms tracking together, which makes it easy to feel whether one side is doing more work than the other.
The main muscles involved are the pectoralis major, particularly as the arms travel up and inward from the low front position, along with the front delts and the upper traps that help elevate the arms overhead. The serratus area and mid-back stabilizers work to keep the shoulder blades moving cleanly on the ribcage, and the straight arms mean the triceps and forearm muscles hold an isometric lockout through every rep.
Setup matters more than it looks. Stand with feet about hip width, ribs stacked over the pelvis, and avoid leaning back as the arms rise. The most common compensation is arching the lower back or shrugging hard toward the ears to finish the top position, both of which take work away from the chest and shoulders and put stress on the spine and neck. Keeping the torso quiet turns this into a clean shoulder and chest drill rather than a full-body lean.
To execute it well, start with the clasped hands at chest height and arms extended straight forward. Sweep the arms upward along a slightly curved path in front of the body until they finish directly overhead with the biceps near the ears. Pause briefly, then lower along the same path with control instead of letting gravity drop the arms. The tempo on the way down is where much of the value lives.
Use this exercise in warm-ups for two to three sets of ten to fifteen slow reps, as active recovery between pressing sets, or as a daily shoulder health drill. It requires no equipment and very little space, which makes it easy to slot into nearly any routine.
[ Workout Log & Planner ]
Put your next workout in Fitwill
Keep your plan and training log ready when you are.


Instructions
- Stand tall with your feet about hip width apart and your weight spread evenly across both feet.
- Interlace your fingers or press the palms of your hands together and extend both arms straight out in front of your chest with the elbows fully locked.
- Set your gaze forward, brace the abdominals lightly, and pull the ribs down so your lower back is not already arched before you move.
- Keeping the elbows straight, sweep the clasped hands upward in a smooth arc in front of your body toward the ceiling.
- Continue raising until the arms finish directly overhead with the upper arms close to your ears and the hands still clasped.
- Hold the top position for a brief moment and keep the shoulders from shrugging up toward your ears.
- Lower the clasped arms back down along the same arc to the starting position in front of your chest, resisting gravity rather than dropping the arms.
- Exhale as you raise the arms overhead and inhale as you lower them back down.
- Complete all reps on the designated left-side orientation, keeping the clasp and arm path identical on every rep, then reset your stance if your posture drifts.
Tips & Tricks
- If you cannot get the arms fully overhead without arching your lower back, stop the arc at the height where your torso stays stacked and gradually work higher over time.
- Keep a slight softness in the shoulder blades at the top; jamming the shoulders hard toward the ears shifts work to the upper traps and away from the chest and delts.
- The most common mistake is bending the elbows halfway up, which turns this into a partial press. If you catch the elbows flexing, lighten the effort and slow the tempo.
- Do not let the clasped hands drift behind the head at the top. The finish point is directly overhead so the shoulders stay in a trackable line.
- Move at a pace of roughly two seconds up and two to three seconds down; rushing the lowering phase removes most of the chest involvement.
- If one side feels like it is pulling harder, check that both shoulders are reaching to the same height instead of letting the stronger side lead the arc.
- Squeeze the palms of the clasped hands gently into each other throughout the rep to increase chest and arm engagement without adding weight.
- Keep the neck relaxed and the jaw loose at the top position; craning the chin up is a sign you are reaching too far past your current shoulder range.
- This drill pairs naturally with band pull-aparts or wall slides in a warm-up to cover both the front and back of the shoulder girdle.
Frequently Asked Questions
What muscles does the Standing Opposite Straight Arm Clasp Raise (Left O) work?
The primary work comes from the chest, with strong contributions from the front delts and upper traps as the arms rise overhead. The triceps and forearms hold the straight-arm clasp isometrically throughout the movement.
Why do my hands need to be clasped instead of held apart?
The clasp ties both arms into a single unit, which keeps them tracking together and makes it easier to raise the arms straight without the elbows bending. It also lets you squeeze the hands into each other to increase chest engagement.
Is this exercise suitable for beginners?
Yes, it is a low-load body weight drill that most beginners can perform safely. The main coaching point is controlling the arc and avoiding lower back arch, since there is no external weight to manage.
Should I keep my elbows completely straight the whole time?
Yes, the straight-arm position is what defines this movement and forces the shoulders and chest to drive the arc. Bending the elbows turns it into a pressing motion and changes which muscles do the work.
How many reps and sets should I do?
For warm-ups and activation, two to three sets of ten to fifteen slow repetitions work well. Because the load is your own arm weight, higher reps with controlled tempo are more useful than low-rep efforts.
Why does my lower back arch when I raise my arms overhead?
That is usually a mobility or control limitation at the shoulder, so the spine leans back to finish the arc. Brace your abs lightly, keep the ribs down, and only raise as high as you can while the torso stays stacked.
Can I do this exercise if my shoulders are sore or injured?
It is generally gentle because there is no external load, but any pain-free range rule applies. If a shoulder is currently injured, work only within a comfortable arc and check with a qualified professional before continuing.
What can I substitute for the Standing Opposite Straight Arm Clasp Raise (Left O)?
Straight-arm front raises with a light plate or band, wall slides, or unclasped arm circles cover similar ground. The clasp version is simply the most equipment-free way to keep both arms locked and aligned.
Where should I feel the effort during the movement?
You should feel it across the chest and the front of the shoulders as the arms travel up, with a mild reach sensation overhead. Sharp pinching in the shoulder joint or neck strain means you have gone past a useful range.
Should I shrug my shoulders at the top of the raise?
A small natural upward rotation of the shoulder blades is normal, but forceful shrugging toward the ears shifts work to the upper traps and neck. Keep the shoulders reaching upward without collapsing up toward the head.