Knees And Toes Point Out Squat Slide Wall
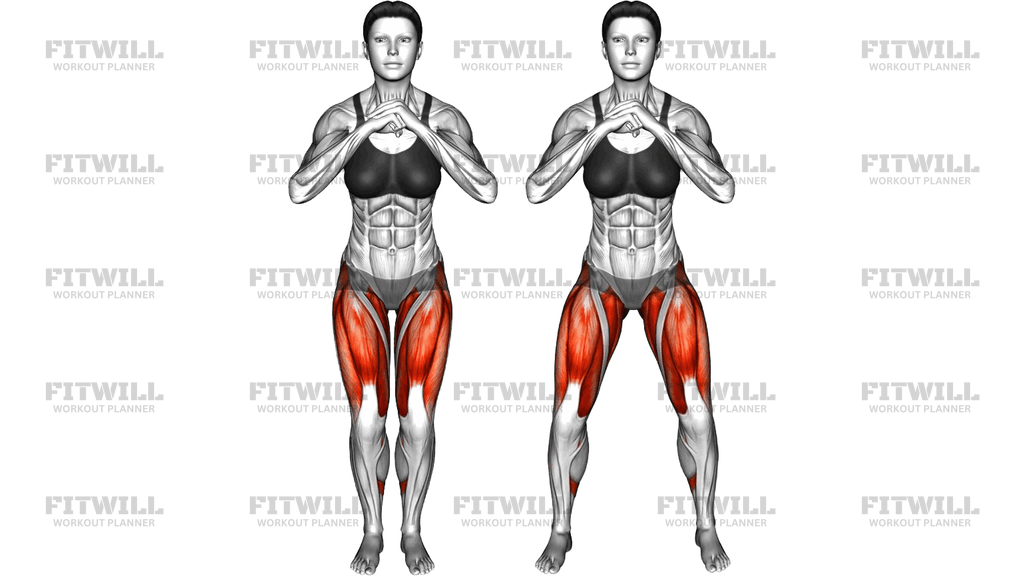
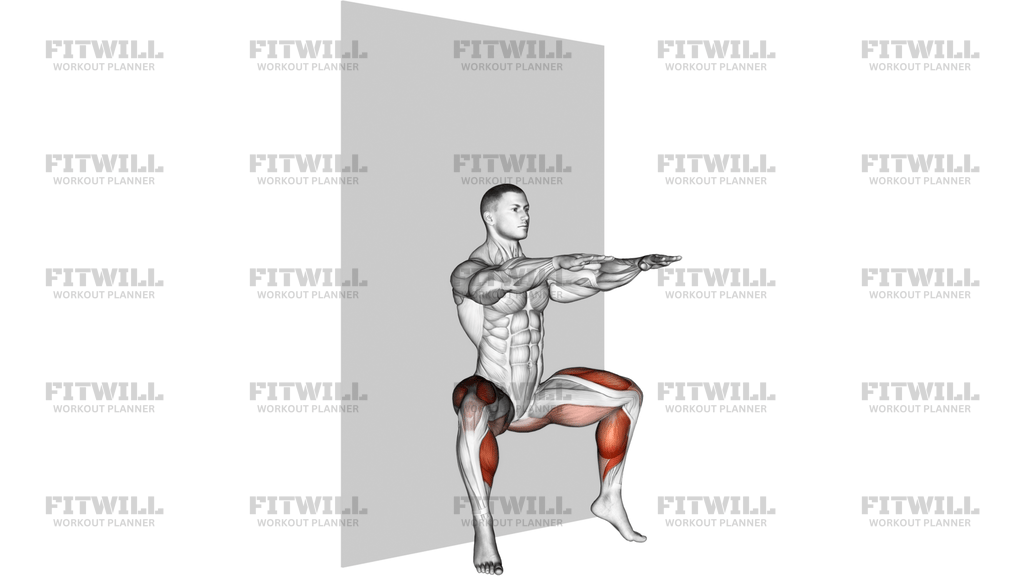
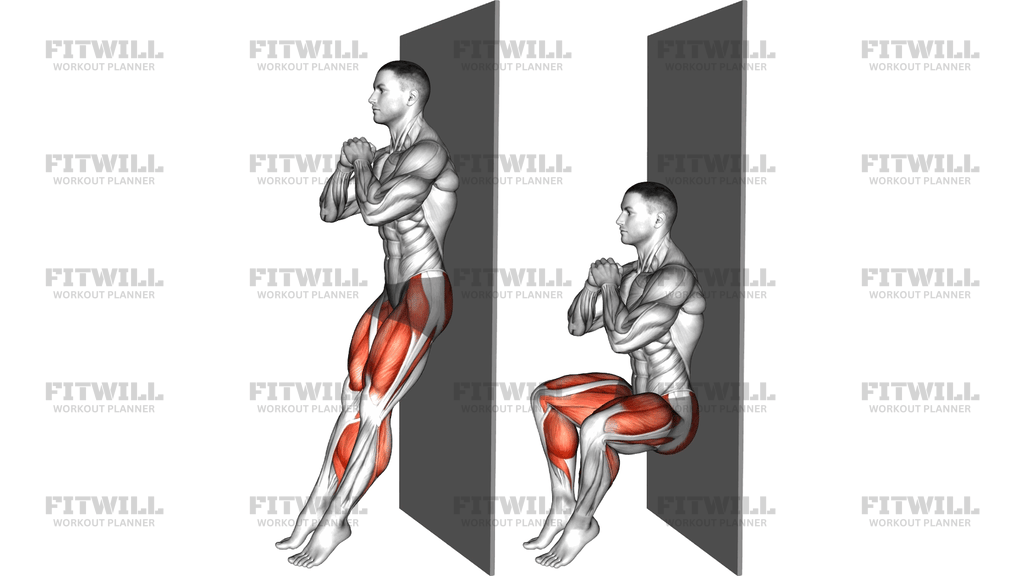
The Knees And Toes Point Out Squat Slide Wall is a body weight squat variation performed with your back flat against a wall and your feet placed close together so that both the knees and toes angle outward. Instead of stepping the feet forward away from the wall as in a standard wall sit, you keep your hips and spine in contact with the wall and slide straight down until your thighs reach at least parallel, then press back up along the same vertical path. The hands are clasped in front of the chest for balance, and the feet stay side by side throughout the movement.
This setup creates a very specific training effect. Because the feet remain close together and turned out, the adductors on the inner thigh work hard to control the outward knee position, while the quadriceps carry most of the load through the deep knee bend. The glutes assist at the bottom and drive the return to standing. The wall also removes momentum from the equation: you cannot lean forward, swing, or bounce out of the hole, so the legs do the work on every centimeter of the slide.
The turnout of the knees and toes is what separates this exercise from a regular wall squat. Angling the knees outward while keeping the feet narrow loads the inner thigh and hip muscles in a lengthened position and challenges the hip external rotators and knee-tracking control. If your knees drift inward as you descend, you lose the intended training effect and put unnecessary twisting stress on the knee joint, so the outward angle needs to be actively maintained from top to bottom.
This movement suits lifters who want to build quad and inner thigh strength without equipment, trainees working on squat mobility and depth in a supported position, and anyone rehabilitating or re-grooving a squat pattern where the wall gives instant feedback about posture. It is also a useful finisher after heavier leg work, since the slide is self-limiting: if the muscles fatigue, you simply stop sliding rather than collapsing under a bar.
To execute it well, keep your entire back, from shoulders to tailbone, in contact with the wall as you slide down and up. Press the knees outward in line with the turned-out toes, keep the heels down, and control the descent rather than dropping into the bottom. Move only as deep as you can while keeping the knees tracking outward and the back flat against the wall.
From a safety standpoint, the main risks are knee tracking that collapses inward and pushing deeper than your hips and ankles allow. Warm up the hips and ankles first, keep the turnout honest rather than exaggerated, and if you feel pinching at the front of the knee or hip, reduce the depth instead of forcing through it. Progress by adding a pause at the bottom or slowing the tempo rather than adding external load early on.
[ Workout Log & Planner ]
Put your next workout in Fitwill
Keep your plan and training log ready when you are.


Instructions
- Stand with your back against a smooth, flat wall, feet together and about a hand's length out from the base of the wall so your body forms a slight incline.
- Rotate your legs outward from the hips so both knees and toes point diagonally out to the sides, keeping the heels close together and flat on the floor.
- Clasp your hands together in front of your chest with elbows tucked in, and press your shoulders, upper back, and hips lightly against the wall.
- Brace your core and pull your ribs down so your lower back stays flat against the wall rather than arching away from it.
- Slide your hips straight down the wall, letting your knees travel outward over your toes while your back maintains full contact with the surface.
- Descend until your thighs are at least parallel to the floor or until your back starts to peel away from the wall, whichever comes first.
- Pause briefly at the bottom, keeping the knees pressed outward in line with the turned-out feet and the heels down.
- Push through your whole foot and slide back up the wall at the same controlled speed, exhaling as you rise.
- Finish each rep standing tall with the knees extended but not locked, then take a breath and reset the turnout before the next slide.
- Breathe steadily throughout: inhale as you lower, exhale as you drive back up.
Tips & Tricks
- The most common fault is letting the knees cave inward as you get tired near the bottom; imagine pushing both knees apart toward the walls on either side of you to keep the turnout honest.
- If your lower back arches off the wall during the descent, you are going deeper than your current hip and ankle mobility allows; shorten the range until you can keep full back contact.
- Do not push the feet far from the wall to make the exercise easier, because that turns it into a standard squat and defeats the vertical slide that loads the quads and inner thighs.
- Keep your weight spread across the whole foot, especially the big-toe side, since the turned-out position tends to roll people onto the outer edges of the feet.
- If your ankles feel pinched or your heels want to lift, your stance is either too narrow for your hips or too deep for your mobility; reduce depth before widening the feet.
- Move slowly and deliberately. A two- to three-second descent and a controlled ascent make this far harder than rushing, because the wall eliminates momentum anyway.
- Wall friction matters: smooth clothing or a shirt that catches on the wall can break the slide, so test a short rep first to check the surface.
- Add a two- or three-second pause at the bottom to build strength in the deep knee angle, which is where most people lose the outward knee position.
- Squeeze the glutes as you come up through the last third of the ascent, since the narrow turned-out stance makes it easy to let the lower back take over the finish.
Frequently Asked Questions
Which muscles does the Knees And Toes Point Out Squat Slide Wall target?
The quadriceps do most of the work through the deep knee bend, with the glutes driving you back up and the inner thighs working to hold the turned-out knee position. The hip external rotators also contribute to keeping the knees angled outward.
Why do the knees and toes point outward in this exercise instead of straight ahead?
The turnout, combined with the narrow stance, places extra demand on the inner thighs and hip rotators and teaches you to keep the knees tracking over the toes. It changes the load distribution compared with a standard wall squat.
Is the Knees And Toes Point Out Squat Slide Wall suitable for beginners?
Yes, it is a good beginner exercise because the wall provides balance support and immediate feedback about posture. Beginners should limit depth to the point where their back stays flat against the wall and the knees stay out over the toes.
How deep should I slide down the wall?
Aim for thighs at least parallel to the floor, but stop earlier if your back peels off the wall, your heels lift, or your knees start to cave inward. Depth you can control with the outward knee angle is more valuable than maximum depth.
What is the most common mistake in this movement?
Letting the knees drift inward as fatigue sets in, which is usually visible in the bottom third of the slide. Fix it by actively pressing the knees outward and cutting the set short once you cannot hold the turnout.
Can I add weight to the Knees And Toes Point Out Squat Slide Wall?
You can hold a light weight or plate against your chest once body weight becomes easy, but only after you can keep full back contact and honest knee turnout through every rep. Adding load before that usually masks tracking faults.
What can I use instead if I do not have a smooth wall?
Any sturdy vertical surface works, such as a door frame side, a squat rack upright, or a smooth wall with a towel between your back and the surface. The key is a stable surface that lets your back slide without catching.
Is this exercise safe for the knees?
For healthy knees it is generally well tolerated because the load is only body weight and the path is controlled. Avoid forcing depth if you feel pinching at the front of the knee, and keep the knees tracking outward rather than twisting or collapsing in.
How does this differ from a standard wall sit?
A wall sit is a static hold with the feet planted forward and apart, while this exercise is a dynamic slide with the feet close together and turned out. The moving version trains the legs through a full range and adds the inner thigh demand of holding the turnout.
Where should I place my hands during the slide?
Clasp your hands together in front of your chest with your elbows pointed down and in, as shown in the standard setup. This keeps your arms out of the way and helps you stay balanced without pressing them against the wall.