Suspender Inverted Row Parallel To The Floor
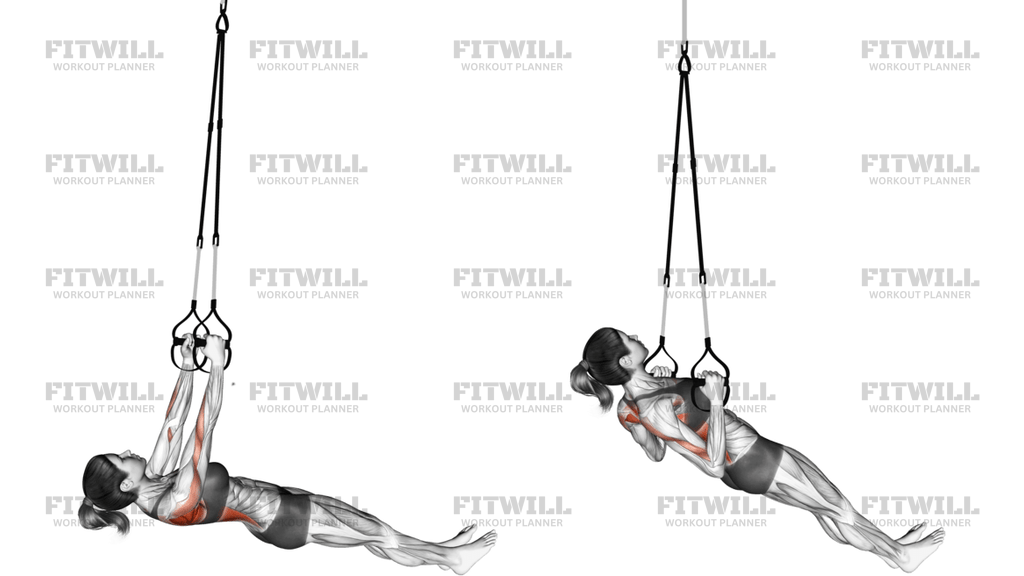
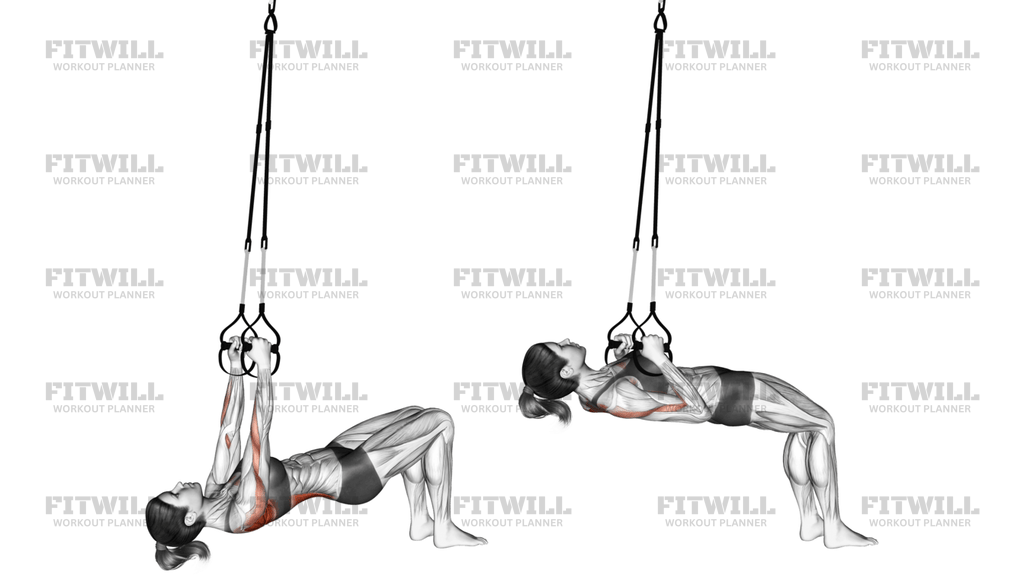
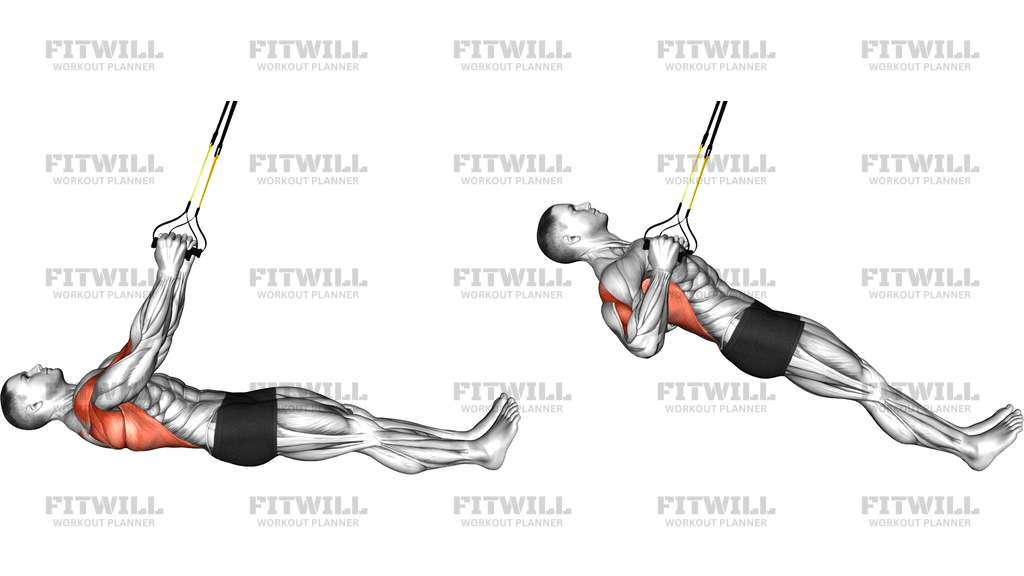
The Suspender Inverted Row Parallel To The Floor is a bodyweight horizontal pulling exercise performed with a suspension trainer. You hang from the handles with your body held in a perfectly straight line, heels resting on the floor, and pull your chest up toward the anchor point. Because your body stays parallel to the ground rather than angled, every rep moves your full bodyweight through a longer, flatter arc, which makes this one of the most demanding variations of the inverted row family.
This movement primarily builds the lats and upper back, with the rhomboids and mid-traps pulling the shoulder blades back and together at the top of each rep. The biceps assist the pull, the rear shoulders help guide the elbows, and the entire trunk works isometrically to keep your hips from sagging. Since the hands move independently on separate suspension handles, your stabilizers around the shoulders are constantly engaged to control the unstable straps.
The setup is what separates this exercise from easier angled versions. With your body level to the floor, you cannot lean on leg drive or a favorable angle to cheat the rep, so the lats and mid-back have to do the work. Grip the handles with a neutral grip, palms facing each other, and keep the straps taut the entire time. A slack strap or wandering handle instantly changes the difficulty and the muscles doing the pulling.
To perform it well, think of pulling your elbows down and back toward your ribs rather than simply dragging your hands to your chest. Lead with the chest, squeeze the shoulder blades together at the top, and lower yourself under control until the arms are fully extended. The descent matters as much as the pull; dropping fast robs you of half the training effect and often causes the hips to sag.
This version suits intermediate to advanced trainees, or anyone who has already mastered a more upright suspension row. It is a solid choice when you want a horizontal pull without a barbell or rowing machine, and it pairs well with push-ups or push-up variations to balance pressing and pulling in a minimalist program. If a full parallel set is too hard, walk your feet forward to raise your torso slightly, then progress back toward horizontal as your pulling strength grows.
As with any suspension exercise, check that the anchor point and straps are secure before loading your weight into them, and keep your neck in line with your spine throughout the set rather than craning your chin toward the handles.
[ Workout Log & Planner ]
Put your next workout in Fitwill
Keep your plan and training log ready when you are.


Instructions
- Set the suspension trainer to roughly mid-length so the handles hang about waist height when loaded, and check that the anchor point is solid.
- Lie on your back underneath the anchor point and take a neutral grip on the handles, palms facing each other, with your arms fully extended above your chest.
- Walk your feet forward until your body forms one straight line parallel to the floor, resting your weight on your heels with toes pointed up.
- Brace your core and squeeze your glutes so your hips do not sag, and keep your head neutral with your ears in line with your spine.
- Start each rep by pulling your shoulder blades down and back, then drive your elbows toward your sides to bring your chest up toward the handles.
- Pause briefly at the top with your chest close to your hands and your shoulder blades squeezed together.
- Lower yourself slowly with control until your arms are fully extended and your body is back in a straight, horizontal line.
- Exhale as you pull up and inhale as you lower back down, keeping the breath steady instead of holding it.
- Complete all reps while keeping tension in the straps; reset your body line between reps if your hips drop or your back arches.
Tips & Tricks
- The most common fault in this exact position is letting the hips drop toward the floor as you fatigue; brace the abs and glutes before the first rep, not just after you notice the sag.
- Because the straps are unstable, the handles tend to drift inward as you pull; press your pinkies slightly outward against the handles to keep your elbows tracking back at roughly 45 degrees to your torso.
- Avoid pulling your hands to your neck or chin. If your hands end up above your chest line, you are shortening the range for your lats; aim for the handles to arrive near your lower chest.
- Do not let the shoulder blades roll forward at the bottom of each rep. Finish the lowering phase with a slight stretch across the upper back while keeping the straps under tension.
- If your grip gives out before your back does, chalk your hands or use a hook grip on the handles rather than cutting the set short.
- Keep the heels anchored and the toes pulled up. Pushing through the balls of the feet raises the hips and turns the rep into a shorter, easier angle without you noticing.
- Slow the lowering phase to two or three seconds if you cannot feel your upper back working; the eccentric is where most of the mid-back stimulus in this movement comes from.
- When the parallel version is too strict, shift your feet forward a few inches so your body angles slightly upward, then work back toward horizontal.
- Check the strap length before every set. A handle sitting even slightly lower on one side will twist your torso and load one side of the back unevenly.
Frequently Asked Questions
What muscles does the Suspender Inverted Row Parallel To The Floor work?
The lats and upper back, especially the rhomboids and mid-traps, do most of the pulling, with the biceps and rear shoulders assisting. Your core, glutes, and legs work isometrically to hold the straight, horizontal body line.
Why is the parallel-to-the-floor version harder than a normal suspension row?
When your body is horizontal, you are lifting essentially your full bodyweight against gravity with no leg assistance. A more upright angle shifts part of your weight toward your feet and lightens the pull considerably.
Is this exercise suitable for beginners?
Most beginners should start with a more angled body position, walking the feet forward so the torso sits higher. Once you can complete controlled sets there, progress toward the parallel position.
How far should I pull up on the Suspender Inverted Row Parallel To The Floor?
Pull until your chest reaches or nearly touches the level of your hands, with your shoulder blades squeezed together. Stopping short usually means the arms and hips are compensating for a shortened back pull.
What grip should I use on the suspension handles?
A neutral grip with palms facing each other is the standard setup and is generally comfortable for the shoulders. The independent handles also let your wrists find their natural path as you pull.
My hips sag toward the floor during the set. How do I fix it?
Sagging hips almost always come from a loose brace, so squeeze the glutes and brace the abs before pulling, and end the set when you can no longer hold the straight line. Reducing the range or raising the body angle temporarily also helps.
Can I substitute the Suspender Inverted Row Parallel To The Floor if I do not have a suspension trainer?
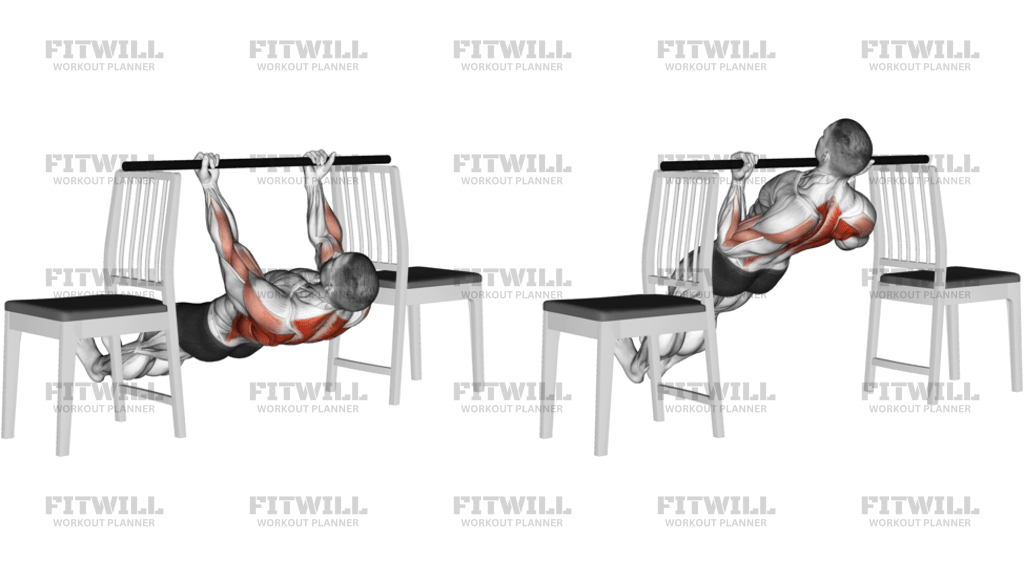
Yes. A bar set low in a rack or a sturdy table edge allows a similar horizontal row, though the fixed bar removes the stabilizing demand of the swinging straps and may feel slightly easier.
How does this movement compare to a barbell row?
Both train the lats and upper back horizontally, but the inverted row loads the spine far less and adds a core stability demand from holding the straight body position. The suspension handles also allow more natural movement at the wrists and shoulders.
Is it safe to hang from a suspension trainer anchored overhead?
It is safe as long as the anchor is rated for bodyweight and the straps are undamaged and properly locked. Test the setup by loading your weight gradually before starting the set, and keep the straps clear of your face throughout.
How many reps and sets should I do?
Because the parallel position is demanding, three to four sets of five to ten controlled reps is a practical range. Focus on keeping the straight body line for every rep rather than chasing higher numbers with sagging hips.