Silent Burpee With Chair
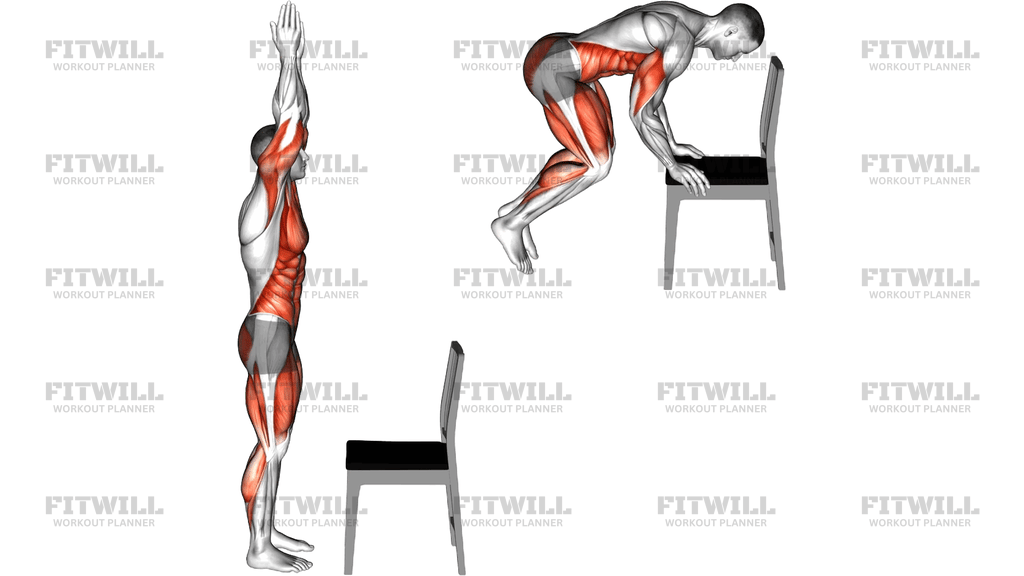
The Silent Burpee With Chair is a low-impact, joint-friendly version of the classic burpee that uses a sturdy chair as an elevated hand support. Instead of dropping to the floor and jumping, you place your palms on the chair seat, step your feet back into an incline plank, then step them forward again and stand tall with your arms overhead. The "silent" part is the whole point: every transition is controlled and quiet, so you can train early in the morning or in an apartment without stomping, thudding, or disturbing anyone below you.
Because your hands are elevated on the chair, the movement is noticeably easier than a floor burpee. The incline reduces the load on your shoulders, chest, and wrists during the plank portion, and stepping instead of jumping removes the impact from your knees, ankles, and lower back. That makes this version a smart choice for beginners building up to full burpees, anyone returning from a layoff, older trainees who want conditioning without pounding, and people in shared living spaces who still want a real full-body effort.
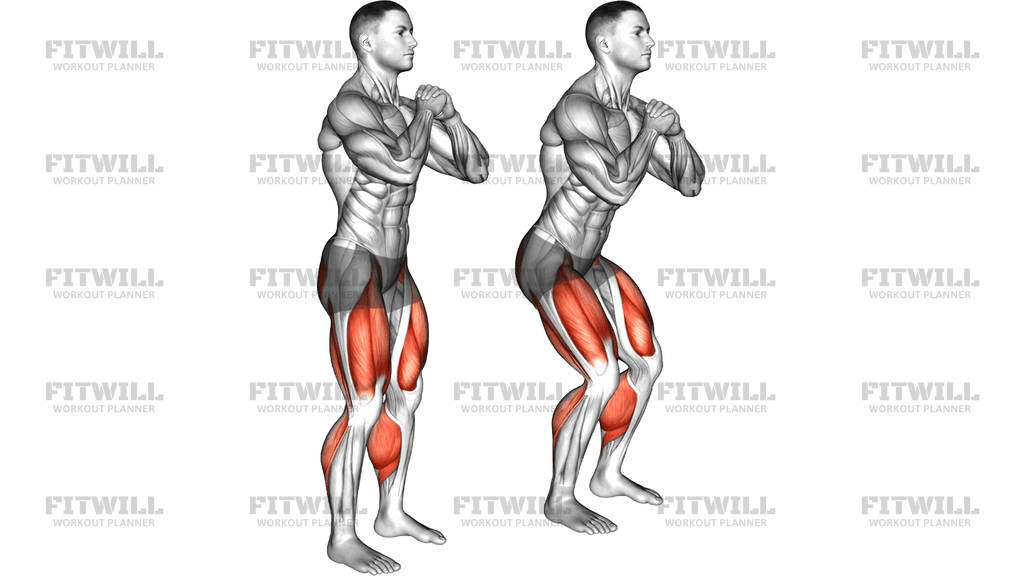
Even at a gentle pace, this exercise trains a lot at once. The squat and stand work the quads, glutes, and calves; the incline plank position demands steady work from the chest, shoulders, triceps, and the entire core to keep your body in one straight line; and repeated cycles push your heart rate up quickly. Done continuously for 30-60 seconds or more, it becomes a genuine conditioning tool rather than just a strength drill.
Setup matters more than it looks. The chair must be heavy or braced against a wall so it cannot slide or tip when you lean your weight into it, and the seat height determines how hard the plank portion feels: a higher seat makes everything easier, a lower seat brings you closer to a floor burpee. Keep your hands flat on the seat, roughly shoulder-width, and set the chair on a non-slip surface before you start.
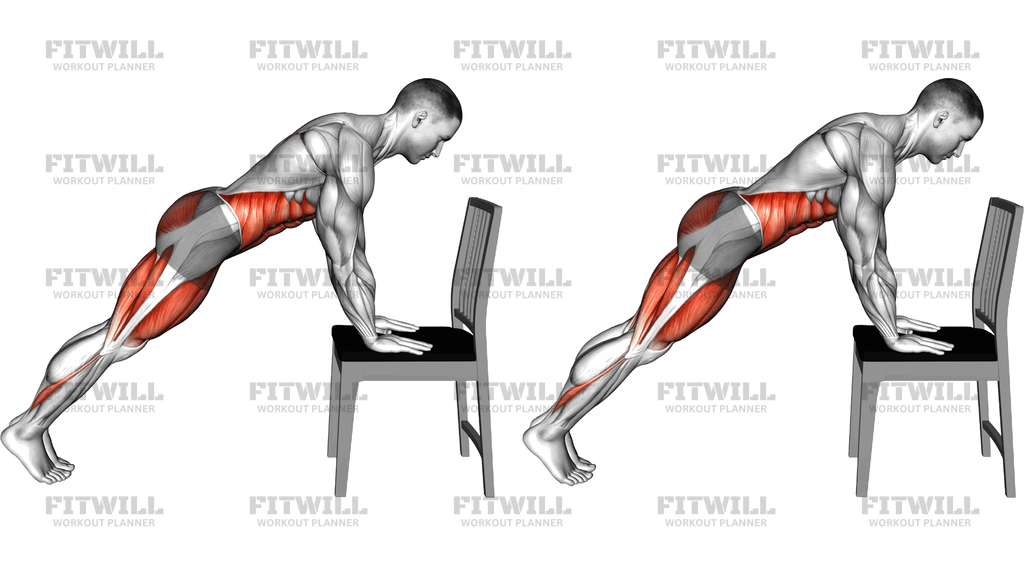
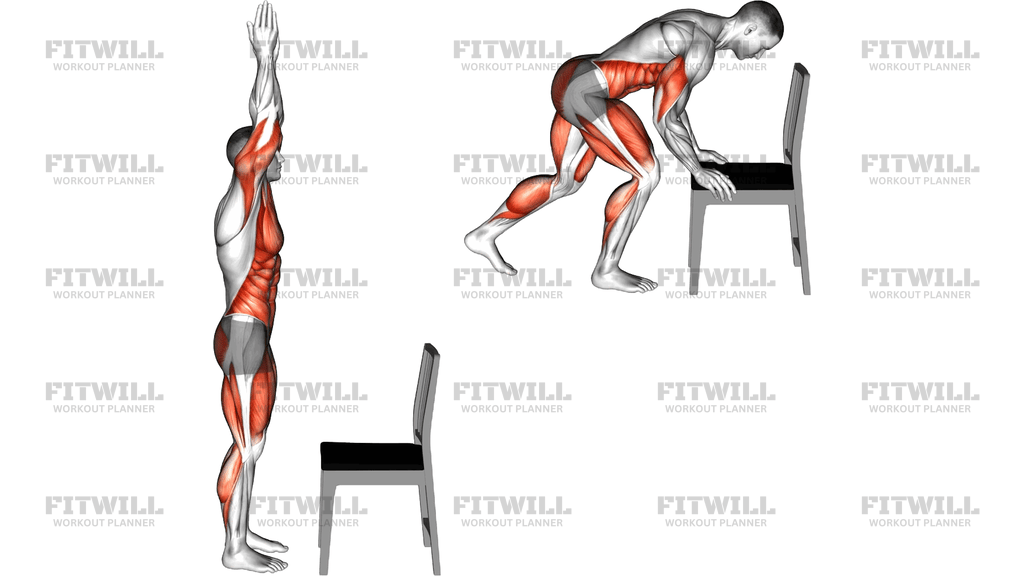
Execution should be smooth and deliberate. Hinge at the hips, place your palms on the seat, step one foot back and then the other until your body forms a straight line from head to heels, pause briefly, then step the feet forward and drive back up to a full stand with arms reaching overhead. Move quietly throughout - if you can hear your feet slapping, you are rushing and losing control.
A practical safety note: always test the chair with a firm push before your first rep, keep your weight over the seat rather than behind it, and stop if you feel any wrist or shoulder discomfort. Slower, quieter reps are better reps here - speed can come later once the pattern feels automatic.
[ Workout Log & Planner ]
Put your next workout in Fitwill
Keep your plan and training log ready when you are.


Instructions
- Place a sturdy chair with its backrest against a wall so it cannot slide, and stand facing the seat about an arm's length away with your feet hip-width apart.
- Start standing fully upright with your arms raised straight overhead, shoulders relaxed and feet flat on the floor.
- Hinge forward at the hips with a slight knee bend and place both palms flat on the chair seat, hands about shoulder-width apart with fingers spread for stability.
- Step one foot back at a time until both legs are extended behind you, landing each foot quietly on the balls of the feet.
- In the incline plank position, keep your body in one straight line from head to heels: brace your abs, squeeze your glutes, and keep your shoulders stacked over your wrists.
- Hold the plank for a brief moment, breathing steadily through your nose rather than holding your breath.
- Step one foot forward up toward the chair, then bring the other foot forward so both feet are flat on the floor under your hips.
- Drive through your legs to stand fully upright, reaching your arms straight overhead to finish each rep the same way you started.
- Reset your stance and brace before starting the next repetition, keeping the entire cycle smooth and quiet from top to bottom.
Tips & Tricks
- If the chair shifts even slightly when you lean on it, move it against a wall or swap it for a heavier one - a sliding chair is the biggest risk in this exercise.
- The most common mistake is letting the hips sag or the lower back arch in the incline plank; fix it by squeezing your glutes and thinking about tucking your ribs slightly toward the chair.
- Do not let your shoulders creep up toward your ears when your hands are on the seat; press the seat away slightly and keep space between your shoulders and neck.
- Quiet feet are a built-in quality check - if your steps land loudly, you are falling into the plank instead of placing your feet under control.
- Adjust chair height to match your level: a higher seat is easier on the wrists and shoulders, and you can progress to a lower seat or a step platform over time.
- Keep your weight centered over the chair seat during the plank; leaning too far back behind your hands strains the shoulders and makes the chair less stable.
- Alternate which foot steps back first each rep, or switch every few reps, so you do not develop a one-sided pattern.
- Breathe out as you stand up and in as you step back to the plank; holding your breath is a sign you are going too fast or too tense.
- If your heels lift when you stand back up, slow the return and focus on pressing through the whole foot rather than snapping up onto your toes.
Frequently Asked Questions
Which muscles does the Silent Burpee With Chair work?
It is a full-body movement: the quads, glutes, and calves drive the squat and stand, while the incline plank loads the chest, shoulders, triceps, and core. Your heart and lungs do plenty of work too, especially on longer sets.
Why use a chair instead of doing burpees on the floor?
The elevated hand position reduces the load on your wrists, shoulders, and chest, and stepping instead of jumping removes impact from the knees and ankles. It is a scalable way to learn the burpee pattern or to train quietly in an apartment.
Is the Silent Burpee With Chair suitable for beginners?
Yes, it is one of the most beginner-friendly burpee variations. Start with a higher, heavier chair, move slowly, and once ten clean reps feel easy, lower the seat height or add reps rather than adding speed.
How can I make sure the chair does not move during the exercise?
Place it with the backrest against a wall on a non-slip floor, and give it a firm push with one hand before your first rep. If it wobbles or slides at all, use a heavier chair or brace it in a doorway-adjacent corner.
What does the "silent" part actually mean in practice?
Every foot placement is controlled and quiet - no jumping, no landing, no floor contact with the hands. If you can hear your feet hitting the floor, you are rushing the steps and losing the control that makes this version joint-friendly.
How high should the chair seat be?
A standard chair around 45 cm high works for most people. The higher the seat, the easier the plank portion, so beginners can even start with a sturdy table and progress down to a chair, then a low step.
What is the most common mistake with this exercise?
Letting the hips sag in the incline plank, which stresses the lower back. Brace your abs and squeeze your glutes so your body stays in one straight line from head to heels the whole time your hands are on the seat.
What can I use if I do not have a suitable chair?
Any stable, knee-to-waist-height surface works: a bench, a sturdy ottoman, a step platform, or a kitchen counter for the easiest version. Just confirm it cannot tip or slide before you put your weight on it.
How many reps should I do?
Start with 2-3 rounds of 8-10 slow, quiet reps or 30-second continuous sets, resting about a minute between rounds. Since the goal is controlled conditioning, prioritize smooth form over rep speed.
Is it safe for wrist or knee issues?
The elevated hands and stepping pattern make it much gentler on the wrists and knees than a floor burpee, but you should still keep pressure distributed across the whole palm and step softly. If either joint complains, raise the hand support higher or check with a professional before continuing.