Standing Single Leg Front Back Side To Side Toe T
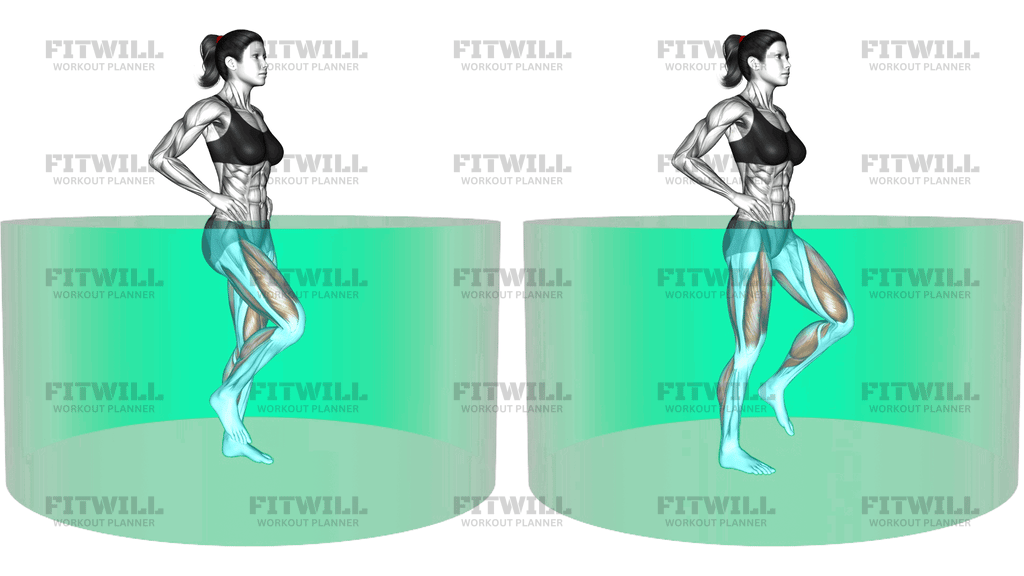
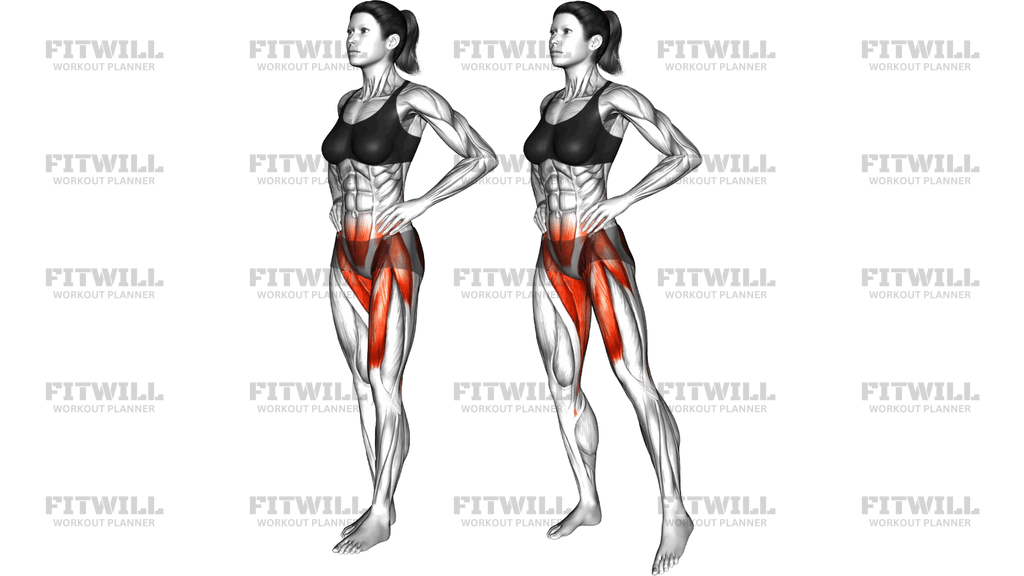
The Standing Single Leg Front Back Side To Side Toe Tap is a balance and hip-stability drill performed on one leg. You stand tall on one foot with your hands on your hips, then reach the free foot forward to tap its toe on the floor, return it to center, tap it behind you, and then sweep it out to the side for additional taps. Because the moving leg only ever kisses the ground with the toes, the stance leg has to do nearly all of the stabilizing work.
This movement is especially useful for anyone building single-leg control: runners, people returning from lower-body layoffs, older adults working on fall prevention, and lifters who wobble during split squats, single-leg deadlifts, or lunges. The muscles doing the quiet work are the gluteus medius and the smaller hip stabilizers on the standing side, while the tap leg trains hip flexors, adductors, and quads as it travels through its path. The calves and the small muscles around the ankle also work constantly to keep you from swaying.
The setup matters more than it looks. A tall spine, hands on the hips, and eyes fixed on a point ahead give you a stable reference, while soft knees stop you from locking back and cutting off the stabilizers' contribution. If the torso tips or the hips swing, the drill stops challenging balance and becomes a sloppy leg swing, so the quality of the standing position is the whole point of the exercise.
Execution should be deliberate. Tap the toe lightly, with almost no weight shift into it, and feel the stance hip staying stacked over the standing ankle. The four directions—front, back, and both sides—each challenge the hip slightly differently: front and back taps test sagittal-plane control, while side taps load the outer hip and demand that you resist leaning away. Moving slowly in all four directions is what makes this deceptively hard.
Because it needs no equipment and very little space, this drill fits easily into warm-ups, cooldowns, or rest periods between heavier lifts. It pairs well with other single-leg work early in a session, when you are fresh enough to balance well. Start near a wall or a sturdy chair if you are new to it, and progress by slowing the tempo, adding a pause after each tap, or closing your eyes once the pattern feels automatic.
[ Workout Log & Planner ]
Put your next workout in Fitwill
Keep your plan and training log ready when you are.


Instructions
- Stand tall on your right leg with a soft bend in the knee, and place both hands lightly on your hips.
- Lift your left foot slightly off the floor and shift your weight fully over the standing ankle so your hip, knee, and foot form one vertical line.
- Pick a fixed point on the wall in front of you at eye level and brace your core to steady your ribcage.
- Reach the left leg forward and tap your left toes on the floor about one foot in front of the standing foot, keeping the tap light.
- Return the left foot to center beside the standing ankle without resting your weight on it, then tap the toes behind you and come back to center.
- Sweep the left leg straight out to the left side and tap the toes on the floor, then return to center; keep your torso upright rather than leaning right.
- Repeat the front, center, back, center, side, center sequence for your target number of reps, then switch to standing on the left leg.
- Exhale smoothly as you reach each tap and inhale as the foot returns to center; avoid holding your breath.
- Between sets, shake out the ankles and reset your stance so each set starts from a balanced, upright position.
Tips & Tricks
- Keep the tap weightless—if you feel your body weight shift onto the tapping foot, shorten the reach so the stance leg stays loaded.
- Watch for the standing hip drifting sideways over the pinky toe; cue yourself to press the big toe into the floor to pull the arch back under center.
- Do not lock the standing knee straight. A small, constant knee bend keeps the hip stabilizers active and protects the joint.
- If you wobble badly on side taps, that is normal—they load the outer hip more than front taps, so reduce the range before you reduce the effort.
- Avoid letting the pelvis rotate as the foot goes front to back; imagine a cup of water balanced on each hip bone that must stay level.
- Slow the tempo before adding reps. A three-second reach and return is harder to control than a fast swing and trains balance better.
- Use a wall with one fingertip only as a last resort—keeping the hands on the hips gives you honest feedback about torso sway.
- If your standing foot cramps, that usually means you are gripping the floor with the toes; spread the foot wide and distribute pressure across the whole sole instead.
- Breathe in a steady rhythm rather than gulping air at the end ranges; breath-holding makes the torso stiff in the wrong way and worsens sway.
Frequently Asked Questions
What muscles does the Standing Single Leg Front Back Side To Side Toe Tap work?
The standing leg relies mainly on the gluteus medius and other hip stabilizers, supported by the calves and ankle muscles. The tapping leg works the hip flexors on the forward reach, the adductors and outer hip on side taps, and the quads as the foot travels and returns.
Is this exercise good for beginners?
Yes, it is one of the best entry points to single-leg training because the load is only your own leg weight. Beginners should stand near a wall and start with shorter taps until the stance leg stops shaking.
Why do my hands go on my hips for this drill?
Hands on the hips give you direct feedback: if you feel the hip bones tilting or swaying, you know the torso is compensating. It also removes arm swing as a crutch, forcing the hips and ankles to do the stabilizing.
How close should the toe taps be to my standing foot?
Keep the taps within roughly one foot of center in every direction. A longer reach increases the balance challenge, but only once you can tap lightly without shifting your body weight onto the moving foot.
What is the most common mistake in the Standing Single Leg Front Back Side To Side Toe Tap?
The most common error is dumping weight into the tapping foot and turning the drill into a partial step. Another frequent one is the torso leaning away during side taps—keep the shoulders stacked over the standing hip instead.
Can I do this exercise every day?
Yes, it is low-load and easy to recover from, so daily practice actually helps balance skills develop faster. Just stop if the standing ankle or knee feels irritated rather than simply worked.
What can I use if I cannot balance without support?
Stand beside a wall or countertop and rest one or two fingertips on it for the first week or two. Progress by touching with one finger, then hovering the hand near the support without touching it.
How does this drill carry over to other exercises?
Better stance-leg control translates directly to split squats, lunges, single-leg deadlifts, and running, where the same glute stabilizers keep the knee and hip aligned. It is a low-fatigue way to groove that alignment before heavier work.
Should my tapping leg be straight or bent?
Keep the tapping knee slightly bent and relaxed so the foot can reach front, back, and side smoothly. A rigid straight leg makes the hip swing and pulls your torso off balance.
How many reps and sets should I do?
A practical starting dose is 5-8 full front-back-side cycles per leg for 2-3 sets, moving slowly. Once that feels controlled, slow the tempo or add a one-second pause on each tap rather than piling on reps.