Weighted Sandbag Walking Lunge
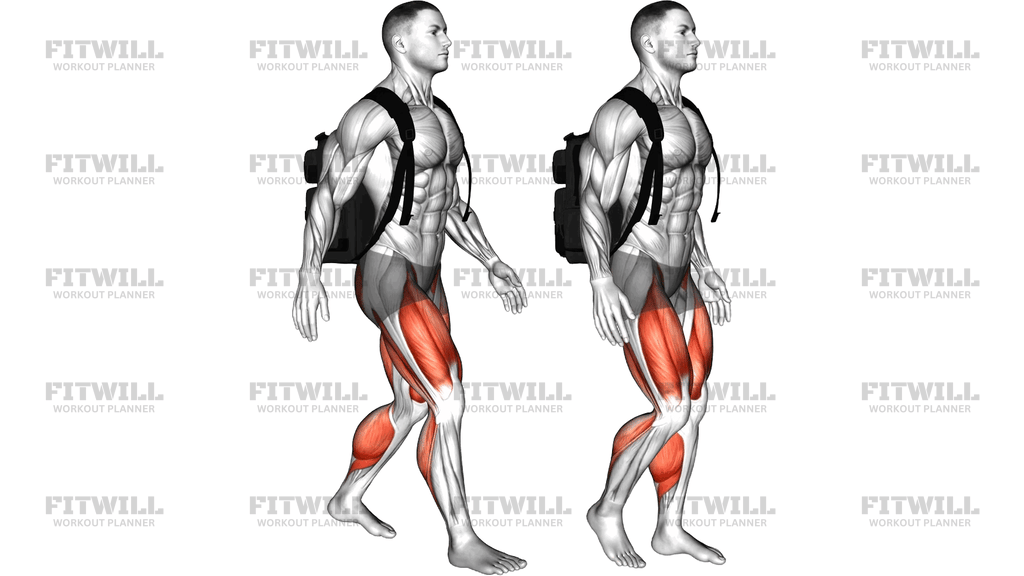
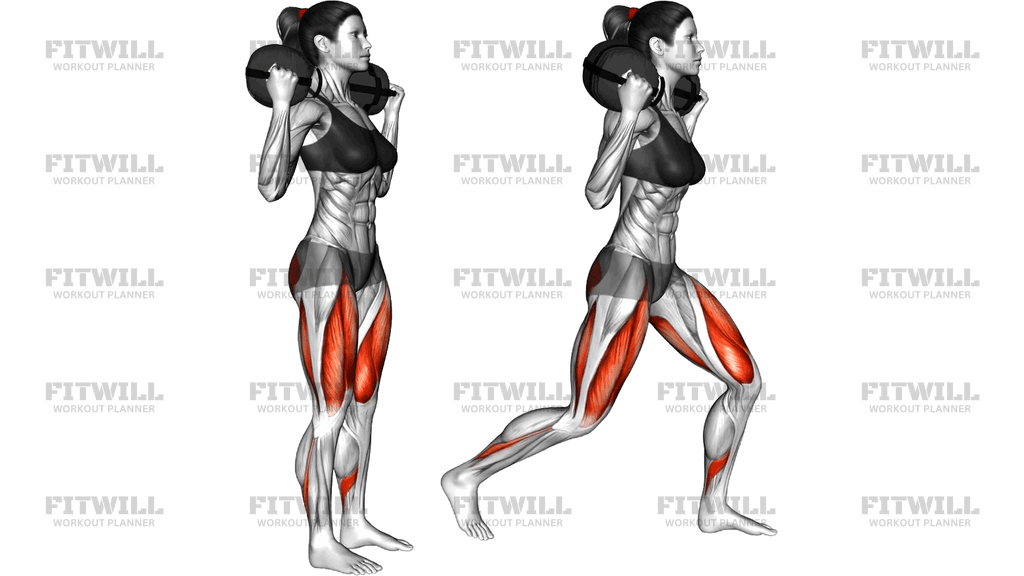
The Weighted Sandbag Walking Lunge is a traveling lunge variation performed with a sandbag rested across the back of your shoulders, held in place with both hands. Instead of lunging in place, you step forward repeatedly, alternating legs so you move across the floor with each rep. The sandbag's shifting fill makes it a uniquely demanding load: unlike a barbell, the weight moves and settles as you walk, forcing your trunk and hip stabilizers to work the entire time.
This exercise is useful for almost anyone with basic lunge experience. Lifters use it to build unilateral leg strength without the spinal compression of a barbell, athletes use it because walking under an unstable load closely mirrors real-world carrying and cutting demands, and general trainees like it because a single sandbag replaces racks, benches, and spotters. If you can perform bodyweight walking lunges with balance and control, you are ready to add the sandbag.
The primary work comes from the quads of the front leg, which absorb and then drive you out of each step. The glutes extend the hip at the top of every rep, the hamstrings assist and control the descent, and the calves stabilize the ankle as you push off. Because the load sits behind your neck, your upper back, traps, and entire core stay under constant tension to keep your torso tall and the bag from drifting side to side.
Setup matters more here than in most lunge variations. Resting the sandbag across your upper traps and rear shoulders, rather than hugging it to your chest, changes your center of gravity and demands a braced, upright torso. If the bag sits crooked or you round forward, every step gets harder and less precise, so take a moment to position it evenly before you start walking.
To execute well, step forward into a long enough stride that your front shin stays roughly vertical and your back knee travels down toward the floor rather than forward. Push through the whole front foot to stand, bring the trailing leg through, and immediately step with the opposite leg. Keep breathing steadily, one breath per step, and stop the set when your form or your path starts to wander.
Common uses include leg-day finishers, conditioning circuits, and loaded carries progressions. Practical safety points: choose a sandbag weight you can clean to your shoulders comfortably, walk on a flat, clear surface, and end the set by stepping the bag off behind you or lowering it in front of you with a flat back rather than twisting it off your shoulders.
[ Workout Log & Planner ]
Put your next workout in Fitwill
Keep your plan and training log ready when you are.


Instructions
- Clean the sandbag to your shoulders and rest it across the back of your neck and upper traps, gripping the handles or bag body with both hands and elbows pointing down and slightly forward.
- Stand tall with feet hip-width apart, squeeze your shoulder blades gently together to create a shelf for the bag, and set your gaze on a point a few meters ahead.
- Brace your core as if preparing for a light push, ribs stacked over your hips, and lift one foot off the floor to find your balance before the first step.
- Step forward with that leg into a long stride, planting your whole front foot flat and keeping your torso vertical as you transfer your weight onto it.
- Lower under control until your front thigh is near parallel to the floor and your back knee hovers just above the ground, front shin close to vertical.
- Drive through the midfoot and heel of the front leg to stand, pulling your back leg through until your feet are together, then immediately step forward with the opposite leg.
- Exhale as you push up out of each lunge, inhale at the top as you reset your brace between steps.
- Continue alternating legs for the planned number of steps or distance, keeping the bag level across your shoulders the whole way.
- To finish, stop with feet together, then step the sandbag off behind you or swing it around to the front and lower it to the floor with a neutral spine.
- Shake out your legs, reset the bag evenly, and begin the next set from the opposite leg if you counted an odd number of steps.
Tips & Tricks
- If the sandbag slides to one side, check that both hands are gripping with equal pressure and that your shoulders are level; a crooked bag usually means a crooked torso, not a bag problem.
- Short steps are the most common fault with a rear-loaded sandbag: the weight pushes you forward, and your front knee travels past your toes. Deliberately lengthen the stride until your back knee drops straight down.
- Keep your elbows tucked under the bag rather than flared wide; flared elbows let the bag roll toward your neck and pull your head forward.
- Look at the horizon, not your feet. Dropping your head rounds your upper back exactly where the bag is sitting and makes balance worse on every step.
- If you wobble on the planting leg, slow down and pause a beat with both feet down before the next step; walking lunges reward rhythm, not speed.
- Alternate which leg starts each set so one side does not quietly do more total work over weeks of training.
- On soft flooring like grass or rubber, expect slightly more ankle and hip stabilization demand than on a hard floor and reduce weight accordingly.
- If your grip fatigues before your legs, that is a signal the bag is too heavy or too slippery; re-chalk or choose a lighter bag rather than letting it shift mid-lunge.
- Avoid letting the back foot slam down as you pull it through; a controlled leg recovery keeps your torso from rocking side to side under the load.
Frequently Asked Questions
What muscles does the Weighted Sandbag Walking Lunge work?
The quads and glutes do most of the work, with the hamstrings assisting on the descent and the calves stabilizing each push-off. Because the sandbag rests behind your neck, your core, upper back, and traps also work continuously to keep your torso tall and the bag level.
Why hold the sandbag behind the neck instead of hugging it to the chest?
The behind-the-neck position shifts your center of gravity upward and backward, which demands more from your trunk and upper back and loads the legs more directly. A chest-hugged bag shifts work toward the front-loaded core and changes the balance demands entirely.
Is the Weighted Sandbag Walking Lunge suitable for beginners?
Yes, once you can perform bodyweight walking lunges with solid balance and no knee valgus. Start with a very light sandbag or even an empty one and focus on stride length and an upright torso before adding meaningful weight.
How heavy should the sandbag be?
Pick a weight you can clean to your shoulders easily and control for at least 10-16 steps without the bag drifting or your torso leaning forward. Most people progress by adding steps or distance first and bag weight second.
My front knee hurts during the Weighted Sandbag Walking Lunge. What should I fix?
The usual culprit is a stride that is too short, which drives the knee forward past the toes and stacks load on the front of the knee. Lengthen your step so the shin stays close to vertical, and make sure the knee tracks over the toes rather than caving inward.
How long should each walking lunge stride be?
Long enough that when you lower, your front shin is roughly vertical and your back knee descends toward the floor rather than shooting forward. For most people this means a noticeably longer step than a normal walking stride.
Can I substitute the Weighted Sandbag Walking Lunge with dumbbell walking lunges?
Yes, dumbbells at your sides are a reasonable swap and are easier on balance. The trade-off is that you lose the unstable, rear-loaded demand on your core and upper back, so the sandbag version is generally harder for the trunk.
How many steps should I do per set?
Count total steps, not reps per leg, and aim for 10-20 controlled steps per set for strength, or 30-50 steps with a lighter bag for conditioning. Stop the set as soon as the bag starts shifting or your stride shortens.
Is it safe to do this exercise with a history of lower back issues?
The rear-loaded position keeps your torso upright but does place continuous demand on the spinal stabilizers. If you have a history of lower back problems, get clearance from a qualified professional first and start very light, prioritizing a braced, tall torso over load.
Should I rest between steps or keep a continuous walking rhythm?
A steady rhythm works best once you are comfortable, taking a breath at the top of each rep. Beginners can pause briefly with feet together between steps to reset balance and brace, then progress to continuous walking as control improves.