Ring Tuck Planche
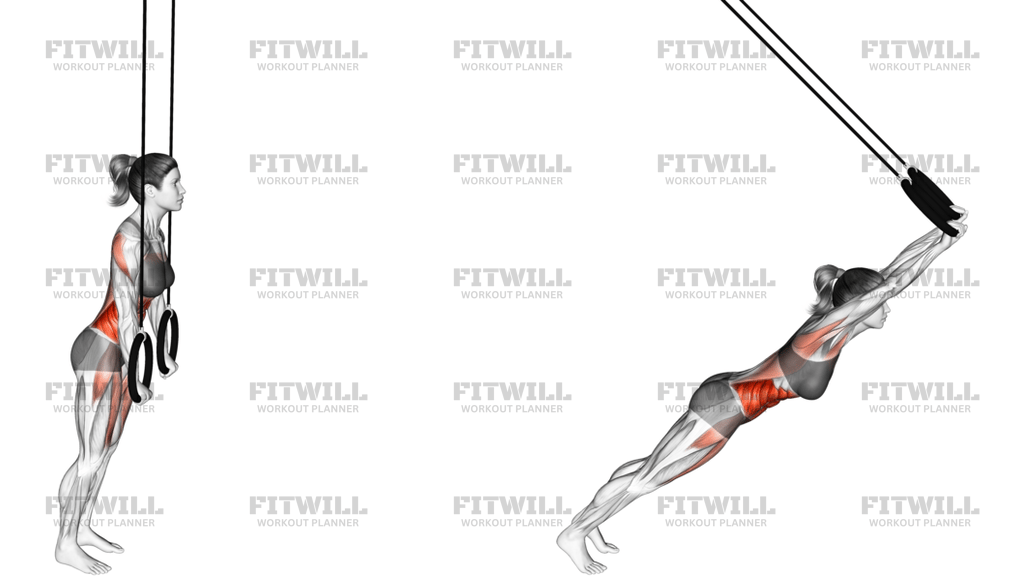
The Ring Tuck Planche is a straight-arm strength hold performed on gymnastic rings. From a support position, you lean your shoulders well ahead of your hands while pulling your knees into a tight tuck, so your whole body weight rides over and above the rings with your arms locked. The rings' instability is what makes this version special: unlike parallel bars or the floor, the rings can swing, separate, or turn inward, so you have to actively control them the entire time you hold.
This movement is aimed at intermediate to advanced calisthenics and gymnastic strength trainees. It sits on the progression road toward the full planche, but it is far more than a stepping stone — holding a tucked position over rings builds serious shoulder and chest strength, scapular control, and straight-arm stability that carries over to ring dips, planche push-ups, and iron cross work. If you can hold a solid ring support for 30 to 60 seconds and perform ring dips with control, you are ready to start training it.
The primary load lands on the front delts and chest, which work isometrically to keep your torso from collapsing backward over your hands. Your triceps and elbows hold the arms straight, the serratus anterior and traps stabilize the shoulder blades, and the abdominals and hip flexors keep the tuck compact and your lower back from arching. Grip and forearm endurance also get taxed because the rings are constantly trying to rotate under your hands.
Setup matters more here than in almost any other hold. Set the rings so your hands hang around hip height, giving you room to lean forward without your feet or the straps interfering. A false grip or a firm neutral grip with the rings turned slightly outward gives you more control over their tendency to rotate. Everything about the position — the lean, the rounded back, the tucked knees — exists to shorten the lever and stack your center of mass directly over your hands.
To execute it well, think of pushing the rings down and slightly behind you as your shoulders travel forward past your hands. Keep the elbows locked from the first inch of the lean; any elbow bend turns the hold into a hidden dip and robs the shoulders of the training effect. The tuck should be tight — knees pulled to the chest, heels close to the glutes, back rounded like a ball — because a loose tuck multiplies the difficulty dramatically.
A few practical points will keep you training safely. Start with short holds of three to five seconds and build volume slowly, since straight-arm shoulder work stresses connective tissue that adapts slower than muscle. Keep the rings from drifting wide by actively squeezing them slightly inward, and bail by simply dropping your feet to the floor behind you rather than fighting a losing position. Treat this as a strength skill, not an endurance exercise, and rest fully between sets.
Fitwill
Log Workouts, Track Progress & Build Strength.
Achieve more with Fitwill: explore over 9600 exercises with images and videos, access built-in and custom workouts, perfect for both gym and home sessions, and see real results.
Start your journey. Download today!




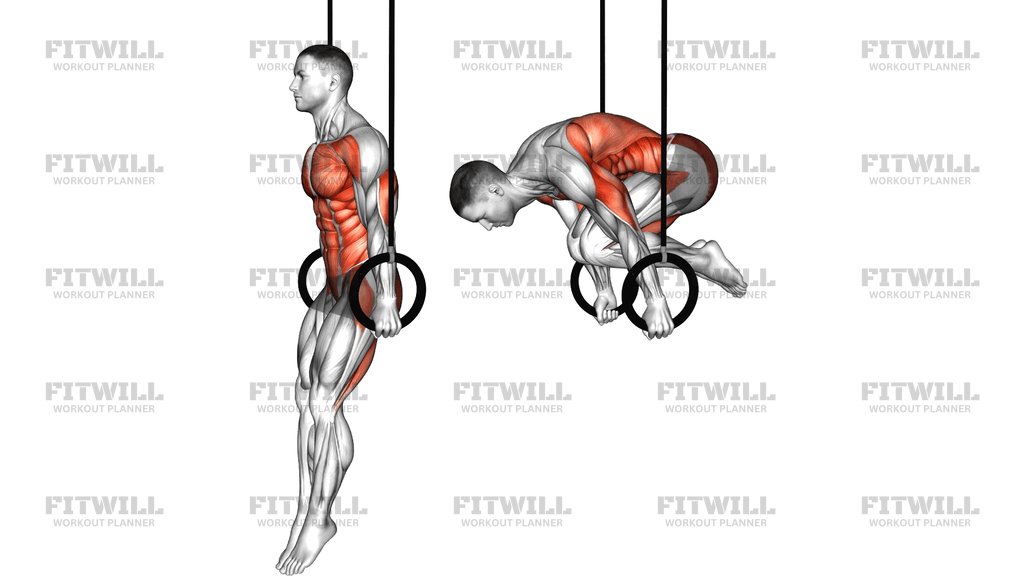
Instructions
- Adjust the rings so the handles hang at roughly hip height when you stand beside them, and check that the straps are even and the buckles are secure.
- Grip the rings in a firm neutral grip with your thumbs wrapped around the handles, and turn the rings slightly outward so you can control their rotation.
- Press into a support position with your arms locked, shoulders pushed down away from your ears, and your body hanging straight with your feet pointed.
- Brace your midsection and round your upper back slightly before you lean, exhaling as you set your torso position.
- Lean your shoulders forward past your hands while pushing the rings down and slightly behind you, keeping your elbows completely straight the whole time.
- Once your center of mass is over your hands, pull your knees in toward your chest and let your hips rise until your whole body is tucked above the rings.
- Hold the top position with your back rounded, knees tight to your chest, and the rings squeezed slightly inward to stop them from drifting apart.
- Breathe in shallow, controlled breaths through the hold — do not hold your breath, but avoid big chest expansions that shift your balance.
- To finish, lower your hips smoothly and drop your feet to the floor behind you, or extend back to support and then dismount, rather than collapsing out of the hold.
- Rest 60 to 90 seconds between sets, and reset your grip and ring position completely before the next attempt.
Tips & Tricks
- If your hips sag below your hands, you are not leaning far enough forward — the lean has to come first, before the knees tuck, or you will end up in a low hang instead of a planche.
- Bent elbows are the most common fault on rings. Lock them out before you start leaning and lock them again mentally at the top, because even a small bend turns this into a dip and offloads the front delts.
- If the rings twist or drift outward during the hold, actively rotate them inward against each other; this stabilizes the straps and keeps your hands in a strong pressing line.
- A loose tuck with the knees drifting away from the chest multiplies the load enormously. Squeeze your heels toward your glutes and think of curling into a ball to shorten the lever.
- Rounding your upper back is correct here — this is one of the few holds where a rounded spine is the intended position, so do not fight to arch or open your chest at the top.
- If your wrists ache, check that you are pressing through the whole hand and not collapsed onto the heel of the palm; wrapping the thumbs fully around the rings also reduces wrist strain.
- Work holds of three to eight seconds at full quality instead of grinding out longer sets with deteriorating position — straight-arm ring work punishes sloppy volume with sore elbows.
- Film yourself from the side. From above or in front, a half-tuck with low hips looks similar to a real hold, but the side view will show whether your hips are actually above your hands.
- If you cannot get your hips over your hands at all, spend time on ring support holds and advanced tuck L-sits first, and practice the lean alone with your feet still touching the floor.
Frequently Asked Questions
Which muscles does the Ring Tuck Planche work most?
The front delts and chest carry most of the load isometrically, with strong contributions from the triceps, serratus anterior, and shoulder blade stabilizers. The abs and hip flexors hold the tuck closed, and the forearms work to control the rotating rings.
Can beginners train the Ring Tuck Planche?
Most beginners should build a base first with ring support holds, ring dips, and tucked L-sits. If you cannot hold a stable ring support for about 30 seconds, start there before attempting any forward lean over the rings.
How high should the rings be set for the Ring Tuck Planche?
Set the handles around hip height while standing, so you can lean forward with clearance and still drop your feet to the floor to bail. Too high and dismounts get awkward, too low and your feet or the straps get in the way.
Why do my elbows hurt after Ring Tuck Planche training?
Straight-arm holds load the elbow connective tissue heavily, and the volume often climbs too fast. Cut your hold times back, ensure the elbows are fully locked rather than hyperextended under load, and allow a couple of rest days between sessions.
What is the most common mistake in the Ring Tuck Planche?
Bending the elbows and letting the hips sink below hand height, which converts the hold into a partial dip. Fix it by locking the arms before you lean, leaning until your shoulders are clearly past your hands, and keeping the tuck tight.
How is the Ring Tuck Planche different from a tuck planche on parallel bars or the floor?
The rings move, rotate, and can drift apart, so you must stabilize them inward and forward the entire hold. This makes the ring version harder on grip, shoulder stabilizers, and coordination, even though the tucked body position is identical.
What can I use instead of the Ring Tuck Planche if I have no rings?
A tuck planche on parallel bars, parallettes, or the floor trains the same pressing pattern with more stability. Ring support holds and advanced tuck L-sits on rings are good precursors when rings are available but the full lean is not yet.
How long should I hold the Ring Tuck Planche each set?
Aim for quality sets of three to eight seconds with full rest between attempts. Once you can accumulate 20 to 30 seconds of clean total hold time in a session, progress toward a slightly more open tuck.
How do I safely get out of a Ring Tuck Planche if I lose balance?
Do not fight the lean — lower your hips and drop your feet to the floor behind you in one smooth motion. Since the rings are set around hip height, your feet should reach the ground quickly, which is exactly why the setup height matters.
Does the Ring Tuck Planche help toward the full planche?
Yes, it is the standard first rung of the planche progression on rings, teaching you to stack your mass over your hands with straight arms. From here you progress to the advanced tuck, then single-leg and straddle variations as the shoulders adapt.