Leg Under And Above Shoulders Bridge Pose
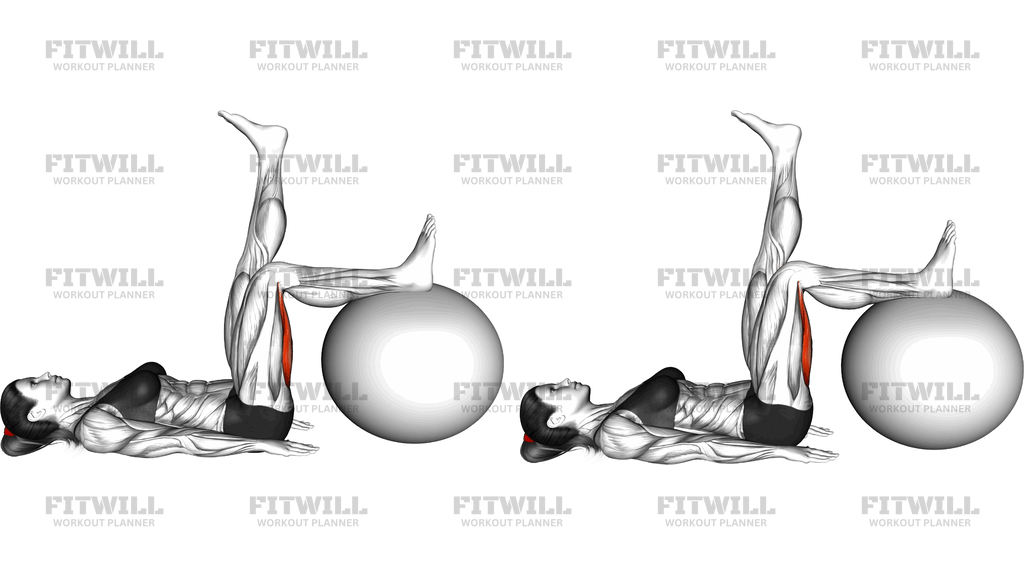
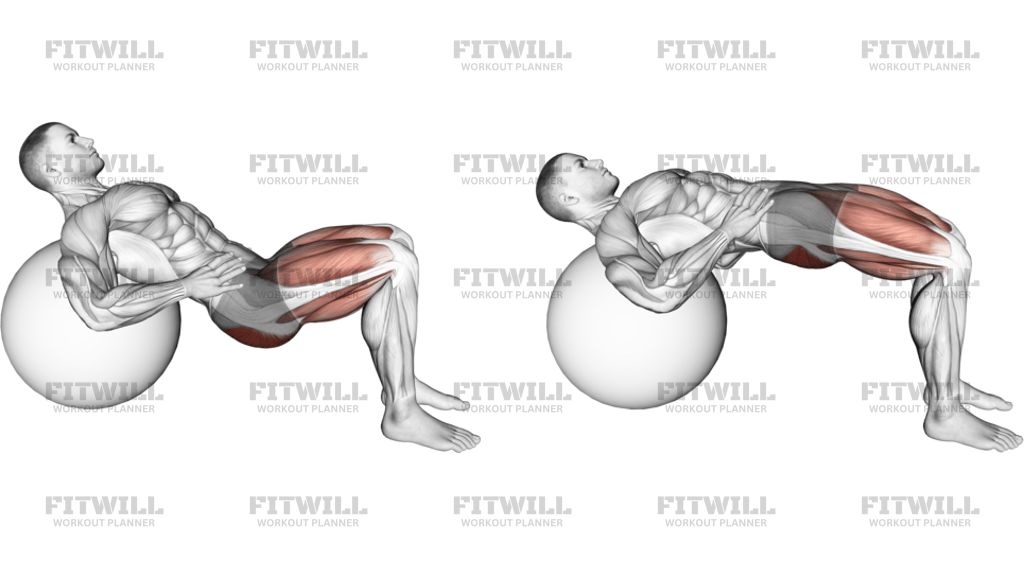
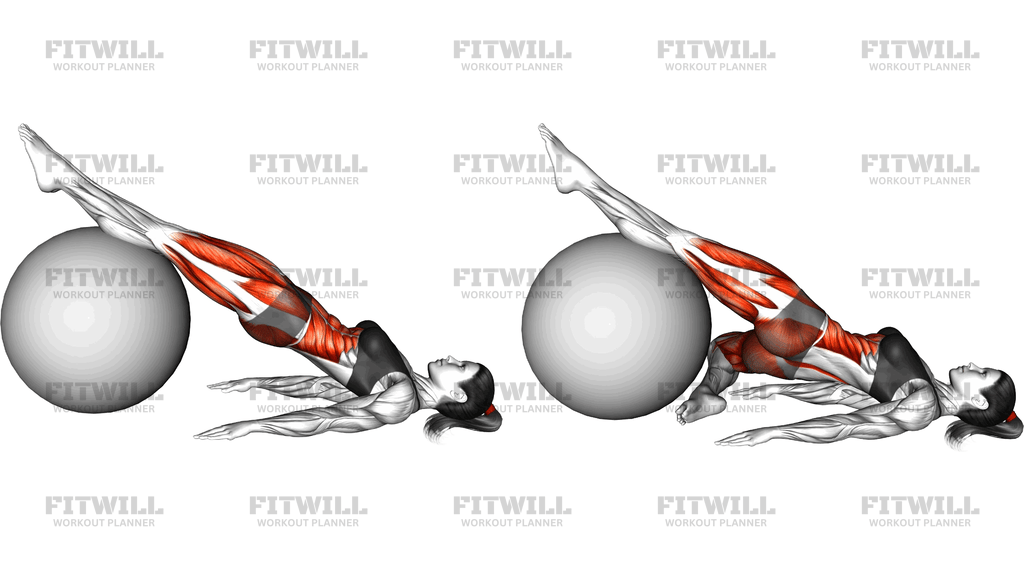
Leg Under And Above Shoulders Bridge Pose is a floor-based bridge variation performed with the lower legs resting on a stability ball. You lie on your back with your arms flat on the mat, press your legs back into the ball, and lift your hips until the body forms one long diagonal line from shoulders to feet, with the pelvis rising above the shoulder line. From there you lower the hips back down with control, keeping the legs in contact with the ball the whole time. The ball acts as a rolling support point, which means your legs and trunk have to work together just to keep it from drifting.
This movement suits people who want to strengthen the back of the body without loading a barbell on their hips. It is common in Pilates-inspired training, general glute and hamstring work, and rehab-style programs where controlled hip extension is the goal. Because the legs are elevated on an unstable surface, the demand is very different from a standard floor bridge: the same hip extension now happens on a moving base.
The primary muscles working are the glutes and hamstrings, which extend the hips and keep the legs drawn back into the ball. The lower back muscles and deep core stabilize the pelvis and spine throughout, and the adductors and stabilizers around the hips help hold the legs steady on the ball. The arms and shoulders stay relaxed on the floor rather than pushing the body up, so the lift should come from the hips, not from pressing through the hands.
Setup matters more here than in most bridges because the ball will move if you let it. The ball should sit under the calves and lower legs, close enough that your legs can press back and down into it, and your arms should be spread on the mat with palms down to give a small amount of balance support. Starting with the ball too far away turns the lift into a leg curl and shifts the work away from the glutes.
To execute it well, begin the lift by squeezing the glutes and gently tucking the pelvis, then drive the legs into the ball as the hips rise. At the top, aim for a straight line through the shoulders, hips, and feet rather than an arched lower back. Pause briefly, then lower the hips slowly so the ball stays under control instead of rolling forward or sideways.
A few practical points will keep this safe and effective. If the ball is new to you, place it near a wall so it cannot roll away, and use a smaller range of motion at first. Stop at the point where your body is straight; lifting higher by arching the lower back adds stress to the spine without extra glute work. If you feel hamstring cramping, which is common in this position, warm up first and reduce the height of the lift.
[ Workout Log & Planner ]
Put your next workout in Fitwill
Keep your plan and training log ready when you are.


Instructions
- Lie on your back on an exercise mat with your legs extended and place a stability ball under your calves and lower legs.
- Roll the ball away from you until your legs are nearly straight and the ball is tucked firmly under the lower legs, keeping your feet relaxed.
- Spread your arms out on the floor at your sides with palms facing down, and let your shoulder blades and neck settle into the mat.
- Exhale and brace your deep core, drawing your belly gently in to set the pelvis before you move.
- Squeeze your glutes first, then press your calves back and down into the ball as you lift your hips toward the ceiling.
- Continue lifting until your body forms one straight line from shoulders to feet, with the hips slightly above the shoulder line.
- Hold the top position for one to two seconds, keeping the legs actively pressing into the ball so it does not drift forward.
- Inhale and lower your hips back toward the floor slowly, maintaining contact between the legs and the ball the entire way down.
- Reset your brace at the bottom, check that the ball has not rolled out of position, then begin the next repetition.
- Breathe out on the lift and in on the lowering, and keep the movement smooth rather than jerky.
Tips & Tricks
- If the ball keeps rolling away from you, you are lifting with the legs slack. Actively press the calves back into the ball for the entire rep, not just at the top.
- Arching the lower back at the top is the most common fault. Stop once the shoulders, hips, and feet line up, and finish the lift with a glute squeeze instead of a spine arch.
- Do not push off the floor with your hands. The arms are there for balance; if your shoulders are doing the work, the ball is too far from your body.
- Hamstring cramps are frequent in this position because the hamstrings work at a long length. Warm up first, flex your toes toward your shins, and build up the range gradually.
- If the ball slips sideways, your legs are not aligned. Keep the feet hip-width apart and centered on top of the ball from the first rep.
- Beginners can wedge the ball against a wall or use a smaller ball so it is easier to control while learning the hip lift.
- Keep the neck relaxed and the gaze straight up. Craning the chin toward the chest or lifting the head disturbs the shoulder contact and balance.
- Slow the lowering phase down to two or three seconds. Most of the hamstring benefit in this exercise comes from controlling the descent, not the lift itself.
- If you feel the work shifting into your lower back, reduce the height of the lift and re-focus on tucking the pelvis before rising.
Frequently Asked Questions
What muscles does Leg Under And Above Shoulders Bridge Pose work?
The glutes and hamstrings do the main hip extension work, while the lower back muscles and deep core stabilize the pelvis. The hip stabilizers also work continuously to keep the legs steady on the ball.
Where exactly should the stability ball be placed?
The ball sits under the calves and lower legs with the legs nearly straight. This keeps the load on the glutes and hamstrings rather than turning the movement into a leg curl.
Is Leg Under And Above Shoulders Bridge Pose suitable for beginners?
Yes, with modifications. Start with a smaller lift, keep the ball near a wall so it cannot roll, and master a regular floor glute bridge first if the unstable base feels difficult.
Why use a stability ball instead of doing a bridge on the floor?
Elevating the legs on an unstable ball lengthens the lever and forces the glutes, hamstrings, and core to control both the lift and the balance. It is noticeably harder than a floor bridge with the same range.
How high should my hips rise at the top?
Lift only until the shoulders, hips, and feet form a straight line, with the hips roughly above the shoulder line. Going higher by arching the lower back adds spinal stress without improving glute activation.
Why does my ball drift forward during the exercise?
The ball drifts when the legs go passive. Keep constant backward pressure through the calves into the ball, especially on the way down, when most people relax their legs.
What can I substitute if I do not have a stability ball?
A standard floor glute bridge or a bridge with the heels on a bench works the same hip extension pattern with more stability. A stability ball leg curl also targets the hamstrings from a similar position.
My hamstrings cramp during this exercise. What should I do?
Cramping is common because the hamstrings work at a long stretch. Warm up beforehand, shorten the range slightly, point the toes less, and build up over several sessions.
How many repetitions should I perform?
Eight to twelve controlled repetitions work well, holding each top position for one to two seconds. Stop the set when you can no longer keep the ball steady or hold a straight body line.
Is this exercise safe for people with lower back sensitivity?
It can be gentle because the floor supports the spine and there is no external load, but control is essential. Keep the range to a straight body line, avoid any arching at the top, and stop if you feel pain rather than muscle effort.