Bodyweight Arms Out Squat
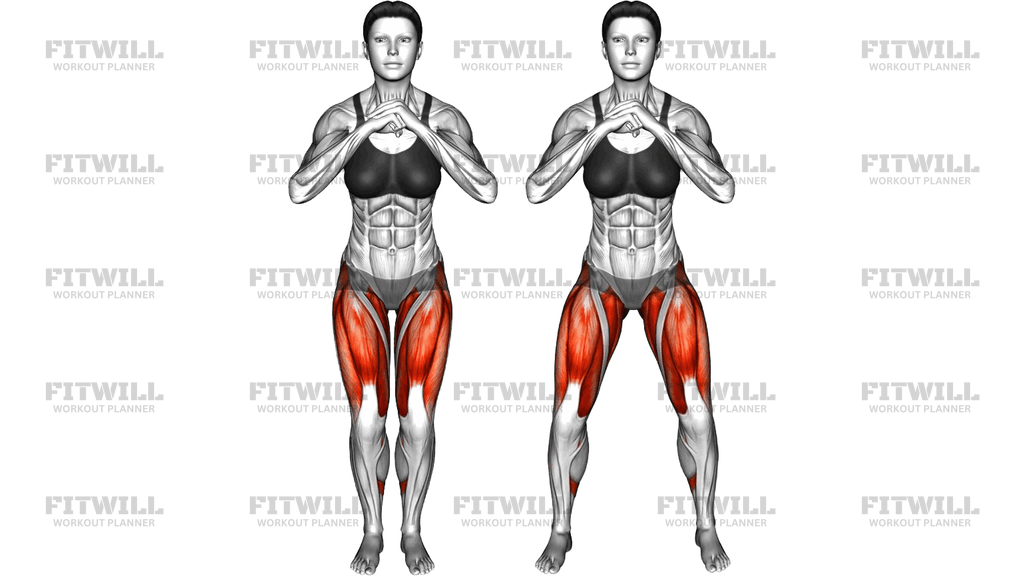
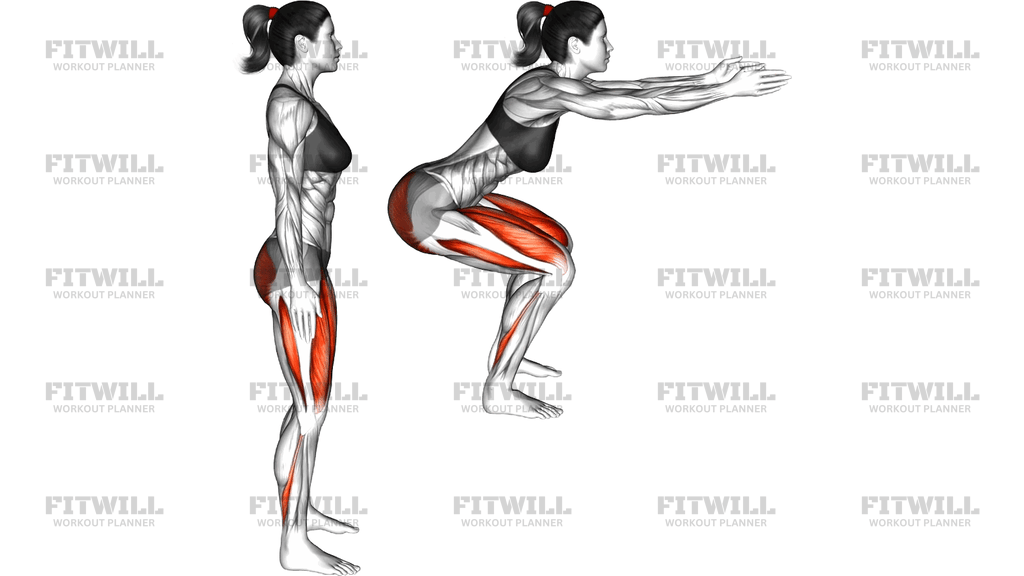
The Bodyweight Arms Out Squat is a fundamental lower-body exercise performed with no equipment other than your own body. You stand with your feet roughly shoulder-width apart, raise both arms straight out in front of you to shoulder height, and sit your hips down and back until your thighs are at or below parallel with the floor. The extended arms are not just for show — they act as a counterbalance that shifts your weight slightly forward, making it much easier to keep your chest tall and your heels planted while you reach a full depth.
This version of the squat is the one I recommend most often to beginners learning the movement pattern for the first time. Because the arms-out position lengthens your effective lever arm, it compensates for the tight ankles, hips, or shoulders that usually make a hands-free or loaded squat feel awkward. That means you can practice a full range of motion immediately, groove the hip-hinge-and-knee-bend pattern, and build confidence before adding a barbell, dumbbells, or kettlebell later on.
The primary work is done by the quadriceps at the front of the thigh, which extend the knees as you stand back up. The glutes and hamstrings control the descent and drive the hips forward at the top, the calves and ankle stabilizers keep you balanced over your feet, and the muscles of the core and lower back hold your torso upright against the pull of gravity. The isometric effort of holding your arms at shoulder height also engages the shoulders and upper back lightly throughout the set.
Setup matters more than most people expect. Your stance width and foot angle determine whether your knees track cleanly over your toes or collapse inward, and a braced trunk is what keeps the squat from turning into a forward fall. Because there is no external load, the main thing you can get wrong is position rather than weight — which makes it a safe, low-risk way to build competence, but only if you hold yourself to a real standard on every rep.
Execution is straightforward: break at the hips first, let the knees travel forward over the toes, and lower until your hip crease drops to or just below knee level, keeping your arms extended the whole time. Pause briefly at the bottom if you can, then drive through your whole foot — heels and mid-foot — to stand tall. Exhale on the way up, inhale on the way down, and reset your stance and brace between reps rather than rushing.
Common use cases include warm-up sets before leg training, learning-to-squat progressions, home workouts with no equipment, high-repetition conditioning circuits, and active recovery days. It scales easily: slow the tempo, add a pause at the bottom, or increase reps to make it harder, or shorten the range slightly while you work on mobility to make it easier.
[ Workout Log & Planner ]
Put your next workout in Fitwill
Keep your plan and training log ready when you are.


Instructions
- Stand with your feet about shoulder-width apart, toes turned out slightly, and your weight spread evenly across both feet.
- Extend both arms straight out in front of your chest to shoulder height, palms facing down or inward, and keep them there for the entire set.
- Draw your shoulder blades gently back and down, lift your chest, and brace your abdominal muscles as if preparing for a light push to the stomach.
- Inhale, then push your hips back and down, bending your knees in the same direction your toes are pointing.
- Lower until your hip crease is level with or slightly below your knees, keeping your heels flat on the floor and your torso leaning only slightly forward.
- Pause for a beat at the bottom without letting your knees cave inward or your heels lift.
- Exhale and press through your heels and mid-foot to stand, driving your hips forward until your knees and hips are fully extended.
- Keep your arms at shoulder height throughout the rep — do not let them drop as you fatigue.
- Between reps, re-brace your trunk and check your foot position before starting the next descent.
- Complete your planned repetitions, then lower your arms and shake out your legs before the next set.
Tips & Tricks
- If your heels lift off the floor at the bottom, widen your stance slightly or turn your toes out a little more — the arms-out counterbalance only helps if your feet are positioned to let you sit down between them.
- The most common mistake with this variation is letting the arms drift downward as the set goes on, which removes the counterweight and causes the chest to fall forward. Set a mental cue: hands stay at eye level the entire rep.
- If your knees track inward as you rise, think about spreading the floor apart with your feet — pressing the outer edges down — rather than just pushing up.
- Do not bounce out of the bottom. A short pause keeps tension on the quads and glutes and protects your knees from a jerky rebound.
- A slight forward lean is normal and healthy, but if your back rounds at the bottom, stop a few inches higher and gradually work deeper over weeks as your hip and ankle mobility improves.
- Breathe in on the way down and out on the way up. Holding your breath for a whole set of bodyweight squats is unnecessary and makes you dizzy by rep twelve.
- Keep your body weight distributed over the whole foot. Sitting too far back on the heels tips you backward; shifting onto the toes strains the knees.
- If your shoulders tire before your legs, lower your arms a few inches or bend the elbows slightly — the counterbalance still works as long as the hands stay in front of your body.
- Film yourself from the side once in a while. The side view instantly reveals whether your depth, heel contact, and torso angle are consistent from rep to rep.
Frequently Asked Questions
What muscles does the Bodyweight Arms Out Squat work?
The quadriceps are the primary movers, with strong support from the glutes and hamstrings. Your calves, ankle stabilizers, core, and the muscles holding your arms at shoulder height all work isometrically to keep you balanced.
Why are the arms extended forward instead of kept at the sides?
The outstretched arms act as a counterweight that shifts your center of mass slightly forward, which helps you sit back into a deep squat without your heels lifting or your chest dropping. It is the simplest way to make a full-depth bodyweight squat accessible to beginners.
How deep should I go in the Bodyweight Arms Out Squat?
Aim for your hip crease to reach knee level or slightly below, as long as your heels stay flat and your lower back does not round. If you cannot hit that depth yet, squat to your current comfortable range and improve gradually.
Is this a good squat for beginners?
Yes, it is one of the best teaching variations because the arm position self-corrects balance issues and there is no load to manage. Master it here before progressing to goblet squats or barbell work.
How many reps should I do?
For learning the pattern, 2-3 sets of 8-12 slow, controlled reps works well. For conditioning or home workouts, sets of 15-25 reps or timed intervals are common.
My arms get tired before my legs — is that normal?
Some shoulder fatigue is normal at first since the arms are held statically at shoulder height, but it should not dominate. If it does, lower your arms slightly or relax the elbows a touch while keeping your hands forward.
Can I use the Bodyweight Arms Out Squat as a warm-up?
Absolutely. A set of 10-15 reps with bodyweight alone raises your core temperature, lubricates the hips, knees, and ankles, and rehearses the squat pattern before any loaded lower-body work.
What is the most common mistake in this exercise?
Knees caving inward on the way up and heels lifting at the bottom are the two biggest issues. Both are fixed by foot positioning and actively pressing the whole foot into the floor throughout the rep.
What can I substitute if squats bother my knees?
Try a box squat to a chair or bench, which limits depth and gives you a target, or reduce the range to a partial squat within a pain-free zone. Persistent knee discomfort should be checked by a qualified professional.
How do I make the Bodyweight Arms Out Squat harder without equipment?
Slow the lowering phase to three or four seconds, add a two-second pause at the bottom, or move to a single-leg progression once both-leg reps feel easy. Higher reps also increase the challenge for muscular endurance.