Sitting Hip Mobilization Circle On Exercise Ball
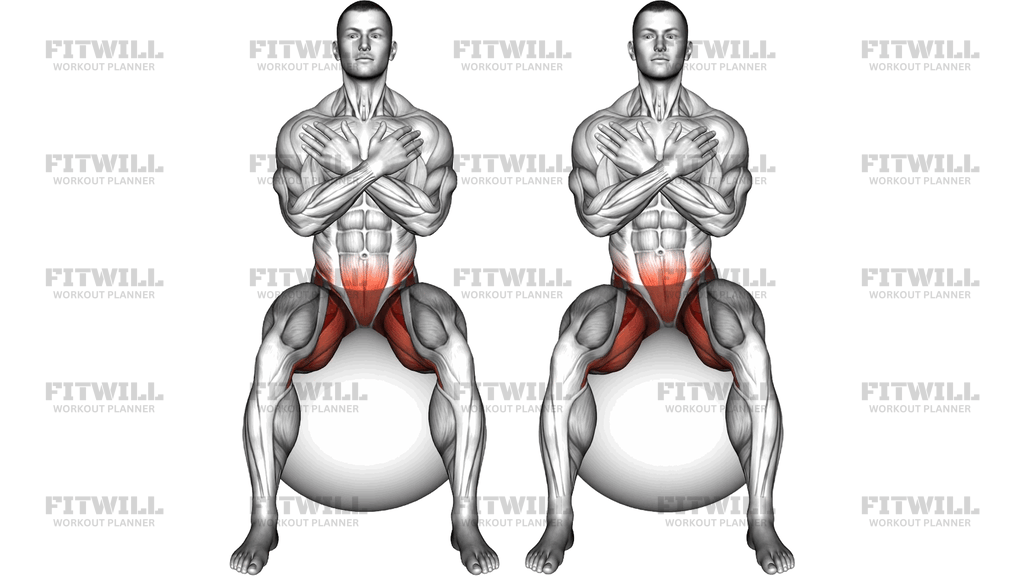
Sitting Hip Mobilization Circle On Exercise Ball is a low-load mobility drill performed seated on a stability ball with the arms crossed over the chest and the feet planted wide on the floor. Instead of forcing a stretch into one fixed position, you use the ball's natural rolling surface to glide the hips through a smooth circular path, letting the pelvis travel forward, sideways, back, and sideways again in one continuous loop. The ball does the work of supporting your weight, so the hip joints and the surrounding muscles can move without you having to hold yourself up.
This drill is especially useful for anyone whose hips feel locked up after long periods of sitting. Office workers, drivers, and people who spend most of the day in a chair tend to lose easy range in hip flexion, extension, and rotation, and this movement gently reintroduces all of those directions in a single pass. It is also a good warm-up before squats, deadlifts, or any lower-body session, and a comfortable option for older trainees or beginners who find floor-based hip mobility work too demanding on the knees or lower back.
The main benefit comes from the combination of hip motion and stabilizing demand. As the pelvis circles, the hip flexors, adductors, glutes, and deep rotators are taken through lengthening and shortening phases, while the deep core works quietly to keep your trunk stacked over the ball. Crossing the arms over the chest removes the option of bracing with your hands, so your trunk and hips have to control the movement themselves rather than relying on upper-body support.
Setup matters more than it looks. A ball that is too low crams the hips into deep flexion and makes the circle choppy, while one that is too high reduces how far the pelvis can travel. Sit so your thighs angle slightly downward, place the feet wider than shoulder width with the whole foot flat, and keep the ball inflated firmly enough that it rolls under you instead of collapsing. Soft flooring helps keep the ball from sliding out from under your feet.
To execute the movement well, sit tall, cross the arms over the chest, and let the pelvis lead. Draw a circle on the floor with your hips — front, side, back, other side — keeping the circle as round and even as you can. The ball rolls slightly beneath you as your weight shifts, and your head and chest stay quiet on top of the moving pelvis rather than swaying with it. After several circles in one direction, reverse and repeat.
Treat this as a mobility and control drill, not an exercise to rush or load. Move at a conversational pace, stay within a circle size that never forces your feet to lift or your spine to round, and expect the first few reps to feel smaller than the later ones. If the ball feels unstable or the circle becomes jerky, make the circle smaller and slow down before progressing.
[ Workout Log & Planner ]
Put your next workout in Fitwill
Keep your plan and training log ready when you are.


Instructions
- Choose a stability ball inflated firmly, and sit on top of it with your feet flat on the floor, spread wider than shoulder width so your base is stable.
- Cross your arms over your chest and sit up tall, with your head stacked over your ribcage and your weight balanced evenly through both sitting bones.
- Brace your midsection lightly as if preparing for a gentle nudge, and make sure your heels and the balls of your feet stay in contact with the floor.
- Begin the circle by letting your pelvis glide forward so your weight rolls toward the front of the ball and your hips fold slightly.
- Continue the loop by shifting your weight to one side, then rolling back so the pelvis tips backward and your lower back rounds a little over the ball.
- Complete the circle by traveling out to the opposite side and bringing the pelvis forward again, drawing one smooth, even loop with your hips.
- Keep the movement in the pelvis: your head, chest, and crossed arms stay centered while only the hips travel the circular path.
- Breathe continuously throughout, inhaling on half of the circle and exhaling on the other half rather than holding your breath.
- After completing your reps in one direction, reverse the circle and perform the same number going the other way.
- To finish, slow the circle down, bring the pelvis back to a level, centered position on top of the ball, and stand up by walking your feet in before rising.
Tips & Tricks
- If the circle collapses into a front-to-back rocking motion, deliberately exaggerate the sideways portions of the loop — most people under-travel laterally at first.
- Widen your foot stance if the ball starts to roll your feet along the floor; the feet are your brake, and a narrow stance gives them nothing to grip with.
- Check ball firmness before starting: an under-inflated ball sinks and makes the pelvis tilt feel mushy, while a properly inflated ball rolls crisply under you.
- Do not let your ribcage lean and sway to create the circle — if your shoulders are traveling as much as your hips, shrink the circle and re-center your torso over the ball.
- Keep your heels down the entire time. Lifting a heel mid-circle means the circle has grown beyond what your hips can currently control.
- Start each session with small circles and gradually enlarge them over the set; this lets the hip joints warm into range instead of forcing it on the first rep.
- If your lower back feels strained rather than worked, reduce how far you let the pelvis tip backward over the ball and keep more of the circle in front of your midline.
- Bare feet or flat-soled shoes work better than cushioned running shoes, which can make the foot-to-floor contact feel unstable.
- Pause briefly at the front, side, back, and side points of each circle if you tend to rush — the brief holds expose which direction your hips resist most.
Frequently Asked Questions
What does Sitting Hip Mobilization Circle On Exercise Ball mainly work?
It primarily mobilizes the hip joints while the hip flexors, adductors, glutes, and deep hip rotators are taken through their ranges. The deep core also works to keep your trunk balanced on the moving ball.
Why are the arms crossed over the chest in this exercise?
Crossing the arms removes hand support so the trunk and hips have to control the ball themselves. If you need balance help when learning, you can hover a hand near a wall, but keep the arms crossed for the working sets.
How big should the hip circles be?
Start with a circle small enough that your feet stay flat and your torso stays centered, then enlarge it gradually as the hips loosen. A smooth, even small circle is worth more than a large, jerky one.
Is Sitting Hip Mobilization Circle On Exercise Ball suitable for beginners?
Yes, and it is often easier for beginners than floor-based hip mobility drills because the ball supports your weight and there is no demand on the knees. Just start with small circles near a wall until you trust the ball.
What size stability ball should I sit on for this drill?
Pick a size that lets you sit with your thighs sloping slightly downward and your feet flat on the floor. If your knees sit above your hips, the ball is too low and the front of the circle will feel cramped.
Why do my feet slide or lift during the circle?
This usually means the circle is too large, the stance is too narrow, or the floor is too slippery. Widen your feet, shrink the circle, and move to a surface with more grip such as a mat or carpet.
Can I use this exercise as a warm-up before lifting?
Yes, two to three sets of circles in each direction make an efficient warm-up before squats, deadlifts, or running. Keep the pace moderate so you loosen the hips without fatiguing them.
What is a good substitute if I do not have a stability ball?
Sit on the edge of a sturdy bench or chair and perform the same pelvis circles with feet wide and arms crossed. The ball's rolling surface is lost, so keep the ranges smaller and rely more on deliberate control.
How long should I circle in each direction?
About 20 to 30 seconds per direction, or roughly 8 to 12 slow circles, works well for one set. Repeat for two to three sets, resting briefly between them.
Is it normal to feel one direction of the circle tighter than the others?
Very common — most people notice restriction at the back of the circle or on one specific side. Spend a little extra time and a few extra circles in the tight direction rather than avoiding it.