High Lunge To Warrior I Pose
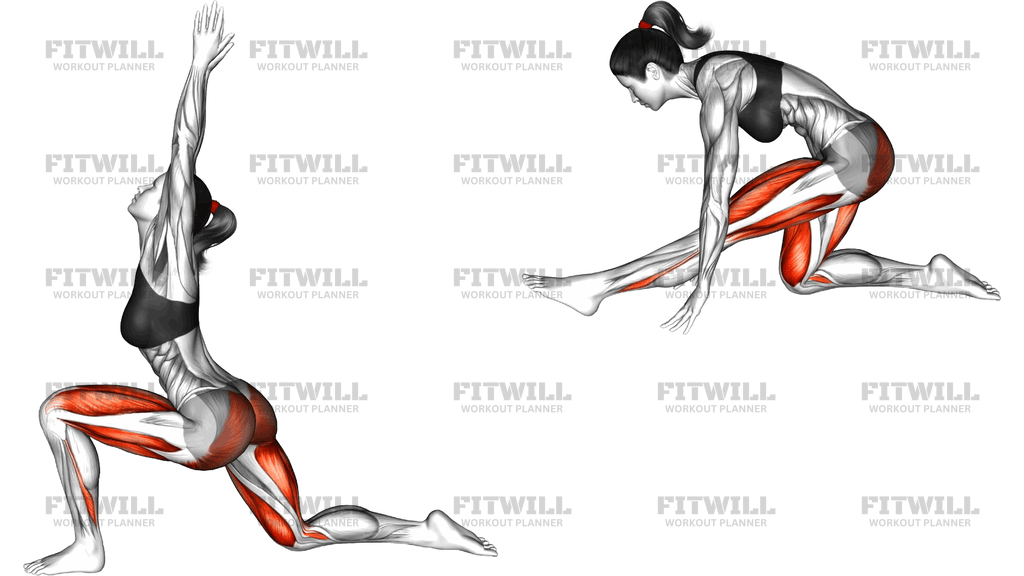
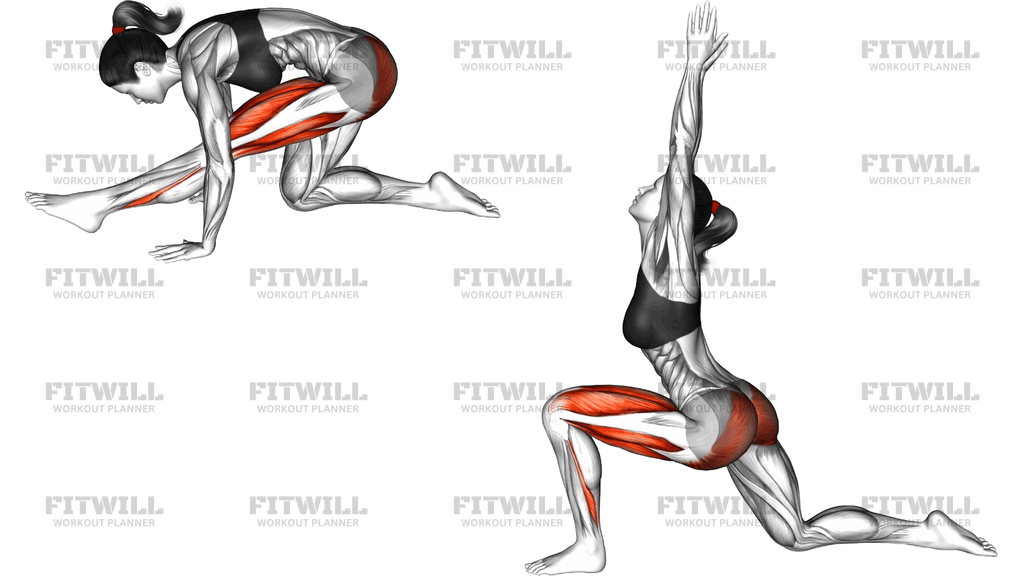
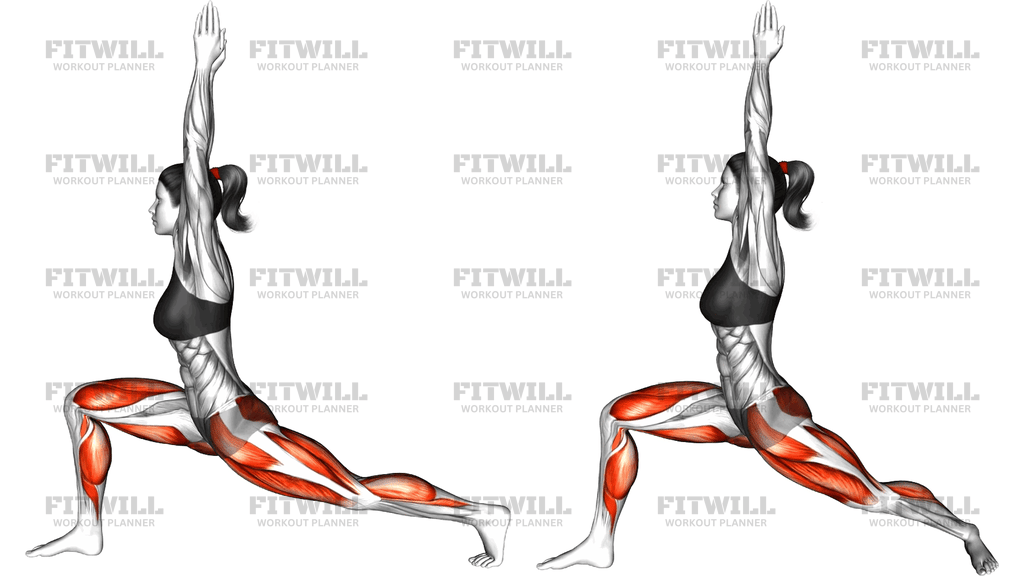
High Lunge To Warrior I Pose is a flowing yoga transition that takes you from a balancing high lunge, with the back heel lifted, into the grounded, square-hip stance of Warrior I. Both positions share the same foundation: a deep forward bend in the front knee, a long straight back leg, and both arms reaching straight overhead. The only real difference is the back foot, which presses into the floor in high lunge and settles flat with the heel down in Warrior I. Moving between the two teaches you how to keep your torso tall and your arms stable while your base of support changes underneath you.
This transition is especially useful for anyone who spends long hours sitting, because both shapes put the back hip into extension and open the hip flexors, which tend to get short and stiff at a desk. The front leg works hard isometrically, with the quads and glutes holding a deep bent-knee position, while the back leg's calf and ankle stabilizers manage the shift from a raised heel to a flat foot. The overhead arm reach also lightly loads the shoulders and challenges the core to keep the ribs from flaring as the arms go up.
Setup matters more than most people expect. Your stance length determines everything: too short and the front knee drifts past the toes with the torso pitching forward, too long and the back hip cannot extend enough for you to square the pelvis. Aim for a stride roughly the length of your own leg, with the front knee stacked directly over the ankle and tracking toward your second or third toe.
To execute the flow well, move slowly and deliberately. Establish the high lunge first, feel the back heel hovering, then lower that heel to the floor and rotate the back toes out slightly as the hips square forward to arrive in Warrior I. Reverse the same path to return. The transition should feel like one continuous, controlled lowering and lifting of the back heel rather than a hop or a shuffle.
This movement fits well at the start of a leg or mobility session as an active warm-up, in a yoga flow as a strength-building hold, or as a standalone drill for runners and lifters who need hip flexor length combined with single-leg stability. Two to three rounds of five to eight slow repetitions per side is a practical dose.
For safety, keep the front knee aligned over the ankle and never let it collapse inward. If balance is a challenge, practice near a wall or with a fingertip on a sturdy surface until the stance feels secure. Back off from the depth of the lunge if you feel pinching in the front hip or strain in the back knee, and prioritize a long spine over getting the arms perfectly vertical.
[ Workout Log & Planner ]
Put your next workout in Fitwill
Keep your plan and training log ready when you are.


Instructions
- Start in a high lunge: step your right foot forward about one leg-length, bend the right knee over the ankle, and rise onto the ball of the left foot so the left heel points at the ceiling.
- Square your hips toward the front of the mat by drawing the left hip forward and the right hip back, and engage your abdominal muscles to keep the torso upright.
- Extend both arms straight overhead with the palms facing each other or together, shoulders relaxed down away from the ears, and gaze forward.
- Inhale to lengthen the spine, then exhale and slowly lower the left heel toward the floor.
- As the heel lands, turn the left toes out about 45 degrees and press the outside of the left foot firmly down so the hips rotate to face forward, arriving in Warrior I with the left heel flat.
- Hold Warrior I for one to three breaths, keeping the bent right knee stacked over the ankle and the back leg actively straight.
- Exhale and reverse the path: lift the left heel, rotate the toes back to point straight behind you, and rise onto the ball of the foot to return to high lunge.
- Complete your repetitions on the right side, then step the left foot forward and repeat the entire sequence on the other side.
- Breathe steadily throughout: inhale as the arms and spine lengthen, exhale as the heel lowers and lifts, and reset your stance between sides if your feet have drifted.
Tips & Tricks
- If your back heel slams down as you move into Warrior I, control the descent by lowering it over a full exhale rather than letting gravity drop it.
- A common mistake is letting the front knee cave inward when the back foot changes position; press the big-toe side of the front foot down to keep the knee tracking over the middle of the foot.
- If the arms tire or the ribs start to flare overhead, lower the arms slightly in front of vertical instead of forcing them straight up.
- Shorten your stance if you cannot keep the front heel grounded, and lengthen it if the back knee feels compressed when the heel lowers.
- Squeeze the glute of the back leg as the heel lowers; this helps square the hips forward instead of leaving them open toward the side.
- Wobbling in high lunge usually comes from a stance that is too narrow side to side, so separate your feet to at least hip-width as if on two rails.
- Look straight ahead or slightly down rather than craning the neck up under the arms, which strains the neck and tips the chest backward.
- If balance is shaky, hold the pose with a hand on a wall or chair at hip height until the ankle stabilizers adapt.
- Keep a micro-bend in the back knee if full straightening pulls on the hamstring attachment; the goal is length, not a locked joint.
Frequently Asked Questions
What muscles does High Lunge To Warrior I Pose work?
The hip flexors of the back leg get the main stretch, while the front leg's quads and glutes hold an isometric contraction. The calves, ankle stabilizers, core, and shoulders support and stabilize the position throughout the transition.
What is the difference between the high lunge and Warrior I positions in this exercise?
In high lunge the back heel stays lifted and the hips face mostly forward, while in Warrior I the back foot is flat on the floor with the toes angled out about 45 degrees. The arm position and front-leg bend stay the same in both shapes.
Is High Lunge To Warrior I Pose suitable for beginners?
Yes, as long as the stance is kept moderate and balance is supported. Beginners can place a fingertip on a wall or shorten the lunge until leg strength and ankle stability develop.
Why does my back hip pinch when I lower the heel into Warrior I?
That pinching usually means the hips have not squared forward or the stance is too short for your hip extension range. Back off the depth, squeeze the back glute, and turn the back toes out a bit more before lowering the heel.
Should my front knee go past my toes?
A slight forward travel past the toes is fine as long as the knee stays stacked over the ankle and points over the second or third toe. Excessive travel with the heel lifting signals a stance that is too short.
Can I substitute High Lunge To Warrior I Pose with a static lunge stretch?
A static low lunge stretch covers the hip flexor lengthening but misses the balance and single-leg strength component. If you need an easier option, drop the back knee to the floor and keep the heel-lowering transition out until mobility improves.
How many repetitions should I do per side?
Two to three rounds of five to eight slow heel-lowering repetitions per side works well as an active warm-up or mobility drill. Hold Warrior I for one to three breaths at the bottom of each rep.
Do I need a yoga mat for this exercise?
A mat is helpful for grip and cushioning but not required; any firm, non-slip surface works. Avoid doing it on a slick floor where the back foot could slide out as the heel lowers.
Why do my calves burn during the high lunge portion?
In high lunge the back heel stays lifted, so the calf and foot muscles of that leg work continuously to hold you up. This is normal, and it eases as ankle strength and balance improve.
Is it safe to do this movement with knee issues?
Keep the front knee bend shallower, ensure it never collapses inward, and avoid deep holds if the knee is currently irritated. Stop and consult a professional if you feel sharp pain inside the knee joint during the transition.