Lying Pelvic Floor Relaxation And Deep Breathing
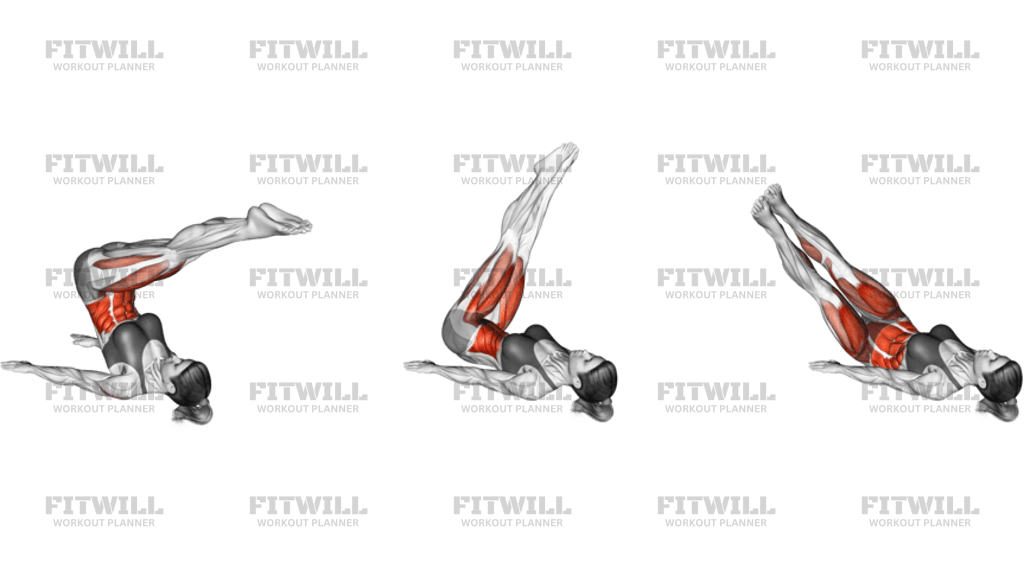
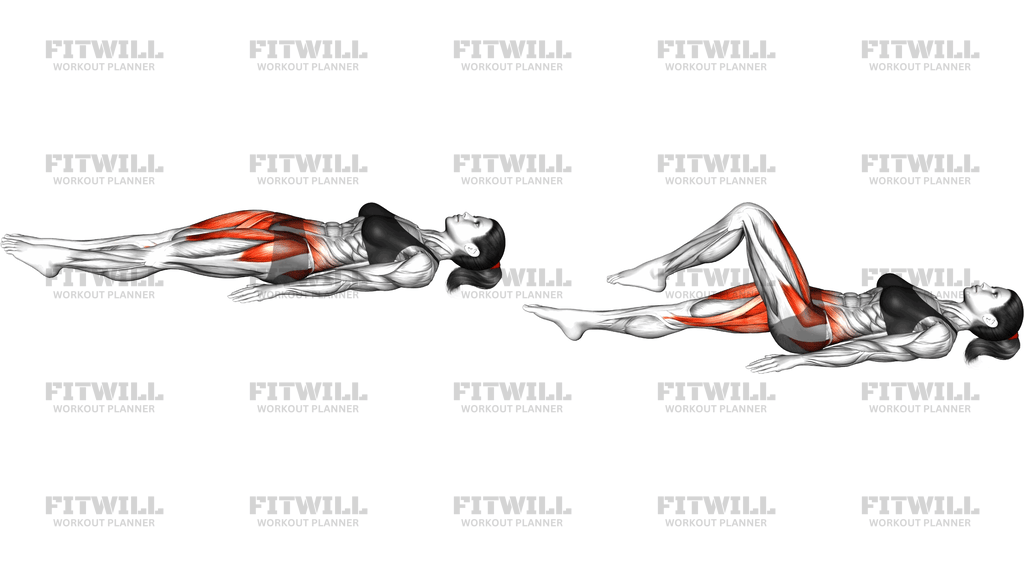
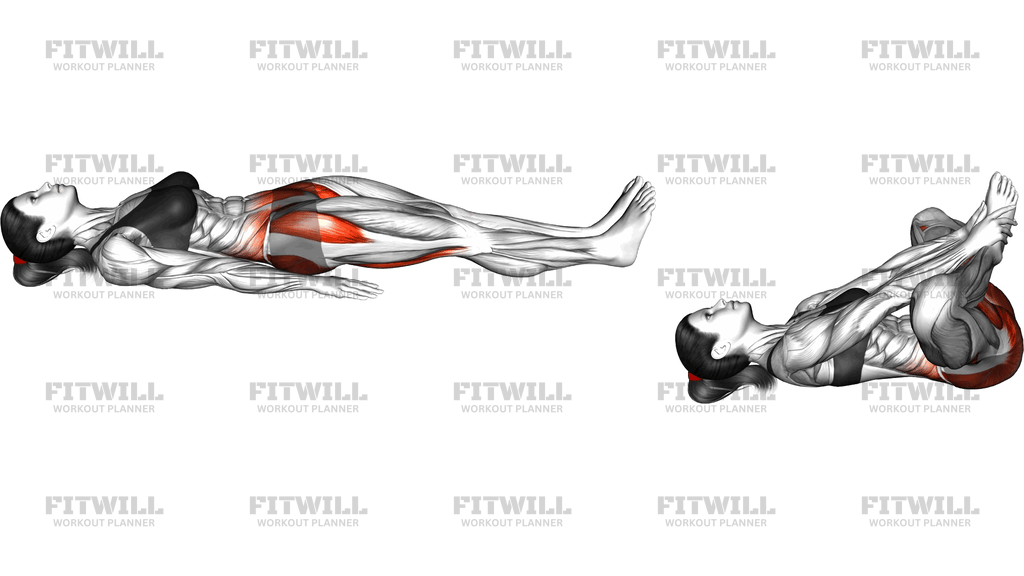
Lying Pelvic Floor Relaxation And Deep Breathing is a slow, restorative floor exercise that pairs supine breathing with a gentle knees-to-chest position. You start flat on your back with your legs long and your arms relaxed at your sides, breathe deeply into your belly and ribcage, then draw both knees in toward your chest and let the lower back settle into the floor as you keep breathing slowly. The goal is not to squeeze or brace anything — it is to deliberately release the pelvic floor, the deep abdominal wall, and the muscles around the hips and low back.
This movement is especially useful for people who carry constant tension in their core and pelvic region: anyone who spends long hours sitting, lifters who habitually brace hard, runners with tight hip flexors, and people recovering from general low back stiffness. It is also commonly used as a wind-down practice before sleep or as a calm first step in a core or mobility session. Because it is performed lying down, gravity does the work of the position and the nervous system gets a clear signal that it is safe to let go.
The breathing is the actual training stimulus here. As you inhale, the diaphragm descends and the belly and pelvic floor gently expand; as you exhale slowly through the mouth or nose, everything settles back down. That rhythmic rise and fall, repeated for several minutes, coordinates the diaphragm with the deep core muscles instead of leaving them working against each other. Pulling the knees toward the chest adds a mild stretch to the low back and glutes and makes it easier to feel the pelvic floor soften on each exhale.
Setup matters more than it looks. Lie on a mat with enough room to extend your legs fully, keep the head neutral rather than lifted, and let the arms rest loosely at the sides with palms down or up — whatever feels least effortful. When you draw the knees in, you can hold behind the thighs, on the shins, or at the knees, but the shoulders should stay relaxed and the neck should never strain forward. The lower back is allowed to flatten slightly toward the floor in the tucked position; that gentle flexion is part of the stretch.
Move slowly and without force. Breathe in through the nose for a count of about four, letting the belly rise, then breathe out for a count of six to eight, feeling the abdomen and pelvic floor release a little more with each exhale. Stay in the knees-tucked position for anywhere from one to three minutes, or cycle between legs-long and knees-in every five to six breaths. There should be no pain, no breath-holding, and no gripping through the shoulders or jaw — if you notice tension creeping in, back off the position and reset.
[ Workout Log & Planner ]
Put your next workout in Fitwill
Keep your plan and training log ready when you are.


Instructions
- Lie on your back on an exercise mat with both legs extended, arms resting at your sides, and your head in a neutral position facing the ceiling.
- Let the feet fall open slightly and consciously relax your shoulders, jaw, and hands before you begin.
- Inhale slowly through your nose for about four counts, allowing your belly and lower ribs to expand rather than lifting your chest.
- Exhale gently for six to eight counts, feeling the abdomen soften and the pelvic floor release downward and back up without clenching.
- Take two or three full breath cycles with the legs long, then bend both knees and draw them in toward your chest.
- Hold behind the thighs, on the shins, or at the knees with light hand contact — pull just enough to feel the low back lengthen, never into pain.
- Let the lower back settle toward the mat and keep the shoulders and neck relaxed; avoid lifting the head or hunching forward.
- Continue the same slow inhale-and-exhale pattern in the tucked position for six to ten breaths, releasing a little more on each exhale.
- To reset, release the legs slowly, extend them back along the mat, and take two or three quiet breaths before finishing or repeating.
Tips & Tricks
- If your hips or low back object to a deep tuck, place a folded towel under your head or hold behind the thighs instead of the shins so you are not fighting gravity with your arms.
- The most common mistake is treating this like an abdominal crunch — keep the head down and the neck long; the work is in the breath, not the abs.
- Many people unknowingly clench the pelvic floor on the inhale. Flip the pattern: feel everything expand and soften as you breathe in, and settle as you breathe out.
- If you catch yourself holding your breath when the knees come in, shorten the tuck slightly and re-establish the four-count inhale before pulling closer.
- Belly breathing can feel strange at first if you are used to bracing. Place one hand on your abdomen so you get tactile feedback that it is actually rising and falling.
- Keep the exhale longer than the inhale — the extended exhale is what signals the pelvic floor and deep core to let go rather than grip.
- Do not tuck the pelvis forcefully; let the knees-to-chest position create the gentle low back curve change on its own.
- Practice at the end of a workout, before bed, or after long sitting rather than as a warm-up requiring effort — this is a down-regulation drill.
- Stop and widen the position if you feel pinching in the hips or any numbness or tingling down the legs.
Frequently Asked Questions
What does Lying Pelvic Floor Relaxation And Deep Breathing actually train?
It trains coordination between the diaphragm, the deep core muscles such as the transverse abdominis, and the pelvic floor, while gently stretching the low back and glutes. It is a relaxation and motor-control drill, not a strength exercise.
Why do I draw my knees to my chest in this exercise instead of staying flat the whole time?
The knees-to-chest position gently flexes the lower back and stretches the glutes, which makes it easier to feel the pelvis and pelvic floor release. Alternating between legs-long and knees-tucked also lets you compare how your breathing changes in each position.
Is Lying Pelvic Floor Relaxation And Deep Breathing suitable for complete beginners?
Yes, it is one of the most accessible floor exercises because there is no load, no balance demand, and no forceful movement. Beginners should simply keep the breath comfortable and the tuck shallow enough that nothing strains.
Should I feel my abdominal muscles working during this exercise?
No — if you feel the abs gripping or a crunching sensation, you are bracing instead of relaxing. The abdomen should rise on the inhale and soften on the exhale with no deliberate tension.
How long should I hold the knees-to-chest position?
Six to ten slow breaths, roughly one to two minutes, is a good starting point. You can stay longer if it feels comfortable, but release the legs if you notice numbness in the hips or legs.
What equipment do I need for Lying Pelvic Floor Relaxation And Deep Breathing?
An exercise mat or any padded floor surface is all you need. A folded towel under the head or behind the thighs can make the position more comfortable.
Can I do this exercise if lying flat with straight legs bothers my lower back?
Yes, bend the knees slightly with the feet on the floor for the flat breathing portion, or slide a cushion under the knees. The key is breathing without low back discomfort, not keeping the legs perfectly straight.
What is the most common mistake in this movement?
Treating it like a crunch — lifting the head, pulling hard on the shins, and clenching the abs or pelvic floor. Keep the head down, the grip light, and let the long exhale do the releasing.
When is the best time to practice Lying Pelvic Floor Relaxation And Deep Breathing?
It works well after strength or cardio sessions to down-regulate, after long periods of sitting, or before bed. Because it promotes relaxation, it is better used as a finisher or stand-alone practice than as an active warm-up.
Is it safe to do every day?
For most people, yes — it is a low-intensity breathing and stretching drill with no external load. If you have specific pelvic health concerns or pain that does not settle, check with a qualified health professional before continuing.