Side Floor Tap Plank
The Side Floor Tap Plank is an anti-rotation core exercise that combines a side plank hold with a controlled reach of the top arm down toward the floor beneath your body. You support yourself on one extended arm while your feet stay stacked, then sweep the free hand down and lightly tap the ground before lifting it back to the ceiling. That small arc of movement forces the obliques, glutes, and shoulder stabilizers to work together to stop your torso from twisting or sagging.
This movement is useful for anyone who wants more from their side planks without adding external load. Because the reaching arm changes your center of gravity every rep, your lateral core has to constantly adjust to keep the hips high and squared. It is a solid choice for athletes in rotational sports, lifters who want stiffer midsections for squats and deadlifts, and anyone rehabbing toward more dynamic core work after mastering a standard side plank.
The main muscles at work are the obliques on the underside of your torso, along with the deep core muscles that resist unwanted rotation. The supporting arm and shoulder take on significant stabilizing duty, since you are holding yourself up on a straight arm throughout. The glutes, especially the upper one, and the muscles along the outer hip keep your legs lifted and your body in a straight line from head to heels.
Setup matters more here than in many core drills. If your supporting hand is not stacked under your shoulder, or your feet are not positioned to hold you steady, the tap becomes a wobbly struggle rather than a deliberate control exercise. Take a moment before each set to plant your hand, stack your joints, and brace your trunk so the movement happens at the shoulder and arm, not through a collapsing waist.
To perform it well, think of your body as one rigid plank tilting slightly forward onto its edge. The reach down should be slow and deliberate, roughly following the line under your chest, and the tap should be light enough that you never transfer weight onto the moving hand. Keep your ribcage pulled down and your hips pressed forward so the lower obliques, not your lower back joints, absorb the challenge.
A common use case is programming this as a finishing exercise at the end of an upper body or core session, performing timed sets or a set number of taps per side. Start with fewer repetitions than you think you need, because the fatigue from holding the plank accumulates quickly. Stop the set when your hips begin to drop or your supporting shoulder starts to shrug, and switch sides to keep the workload balanced.
[ Workout Log & Planner ]
Put your next workout in Fitwill
Keep your plan and training log ready when you are.


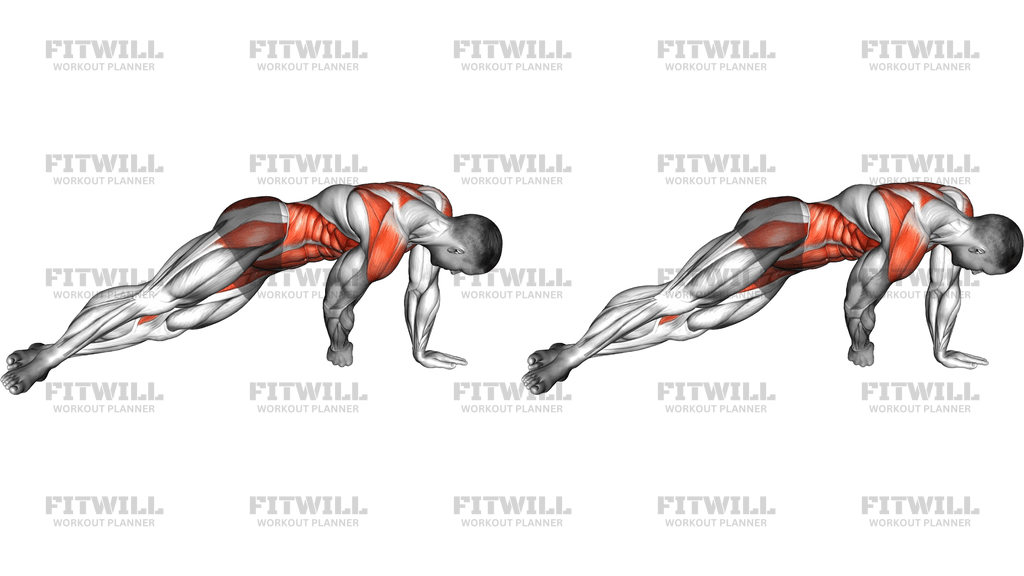
Instructions
- Lie on your side on an exercise mat and prop your upper body up on your lower forearm, then press up onto your hand so your supporting arm is fully extended and stacked directly under your shoulder.
- Stack your top foot on top of your bottom foot, or place the top foot on the floor just in front of the bottom foot for a wider, more stable base, and lift your hips until your body forms a straight line from head to heels.
- Raise your top arm straight up toward the ceiling so both shoulders are stacked vertically, and squeeze your glutes to lock your pelvis in place.
- Brace your abdominal wall as if bracing for a light punch, keeping your ribcage down and your neck long with your eyes forward.
- Slowly sweep your top arm down and under your torso, tracing a smooth arc toward the floor beneath or slightly behind your chest.
- Lightly tap the floor with your fingertips, making sure your hips stay high and square and no weight shifts onto the tapping hand.
- Reverse the arc in the same controlled path, raising the arm back up until it points at the ceiling again.
- Exhale gently as you reach down and inhale as the arm returns to the top, keeping your breathing steady and never holding your breath.
- Complete the planned number of taps, then lower your hips to the mat with control, shake out your supporting wrist and shoulder, and reset your position before switching to the other side.
Tips & Tricks
- If your hips drift backward as the hand comes down, imagine pressing your bottom hip toward the ceiling; the reach should never come at the cost of hip height.
- Shrugging the supporting shoulder is the most common breakdown point. Push the floor away and keep space between your ear and supporting arm for the entire set.
- Do not let the tap hand take over the work. If you feel your weight shifting onto it, make the tap lighter or shorten the reach slightly.
- On a hard floor, use a mat or pad under your hand and ankle, since the bony outside edge of the bottom foot and the heel of the palm take constant pressure.
- Wide feet make the exercise easier and stacked feet make it harder. Start with the wider stance and progress to stacked feet once you can hold the position without hip sag.
- Move the arm slowly rather than swinging it. A fast swing creates momentum that does the stabilization work your obliques should be doing.
- If your bottom shoulder complains before your core does, shorten your holds and build shoulder endurance with standard side planks before returning to this variation.
- Check your head position in a mirror or side view: craning the neck down to watch the tapping hand usually coincides with a collapsed ribcage. Keep your gaze straight ahead.
- Match the number of reps on each side, and always start with your weaker side so both halves of your core get equal, honest work.
Frequently Asked Questions
What muscles does the Side Floor Tap Plank work?
The primary work is done by the obliques and deep core muscles on the underside of your torso, which hold your hips up and resist rotation. Your supporting shoulder and arm stabilize constantly, and the glutes and outer hip muscles keep your legs lifted and aligned.
Is the Side Floor Tap Plank suitable for beginners?
It is a step up from a standard side plank, so beginners should first be able to hold a solid side plank for 20 to 30 seconds per side. From there, use a wider foot stance and keep the reach shallow until control improves.
Why do my hips drop when I reach my hand down to tap the floor?
The reaching arm shifts your center of gravity, and if your obliques and glutes are not braced hard, the trunk rotates and the hips fall. Slow the reach down, squeeze the glutes deliberately, and reduce the depth of the tap until you can keep the hips level.
Should my feet be stacked or staggered during the Side Floor Tap Plank?
Stacked feet is the stricter version because it narrows your base and demands more from the lateral core. Staggering the top foot slightly in front of the bottom foot widens the base and is a smart regression while you build stability.
My supporting wrist hurts during this exercise. What should I change?
Wrist discomfort usually comes from a hand placed too far forward or backward relative to the shoulder. Stack the hand directly under the shoulder, spread your fingers, press through the whole palm, and consider dropping to a forearm-supported variation if the discomfort persists.
How is the Side Floor Tap Plank different from a regular side plank?
A regular side plank is a static hold, while the floor tap adds a moving limb that continuously pulls your torso toward rotation. That makes it an anti-rotation exercise as well as a lateral core strengthener, so it trains a different quality than simply holding still.
How many repetitions should I do per side?
A reasonable starting point is 5 to 8 slow taps per side, or timed sets of 20 to 30 seconds. Progress by adding taps or time only as long as your hips stay high and your supporting shoulder does not fatigue first.
Can I substitute the Side Floor Tap Plank if I cannot support myself on one arm?
Yes. Perform the same reach-and-tap pattern from a forearm side plank, or from a side plank with the bottom knee bent and on the floor. Both keep the anti-rotation challenge while reducing the load on the shoulder and wrist.
Is it safe to do the Side Floor Tap Plank every day?
Daily practice is possible because the load is moderate, but the supporting shoulder and wrist need recovery just like any other working joint. Two to four sessions per week with rest days in between is a sustainable schedule for most people.