Sitting Elbows Tucked Open On A Chair
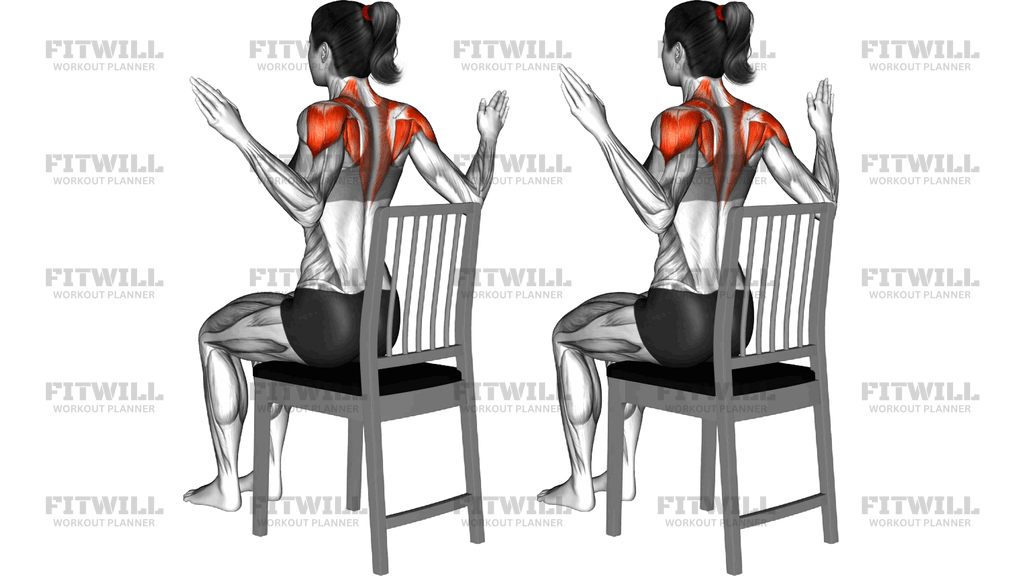
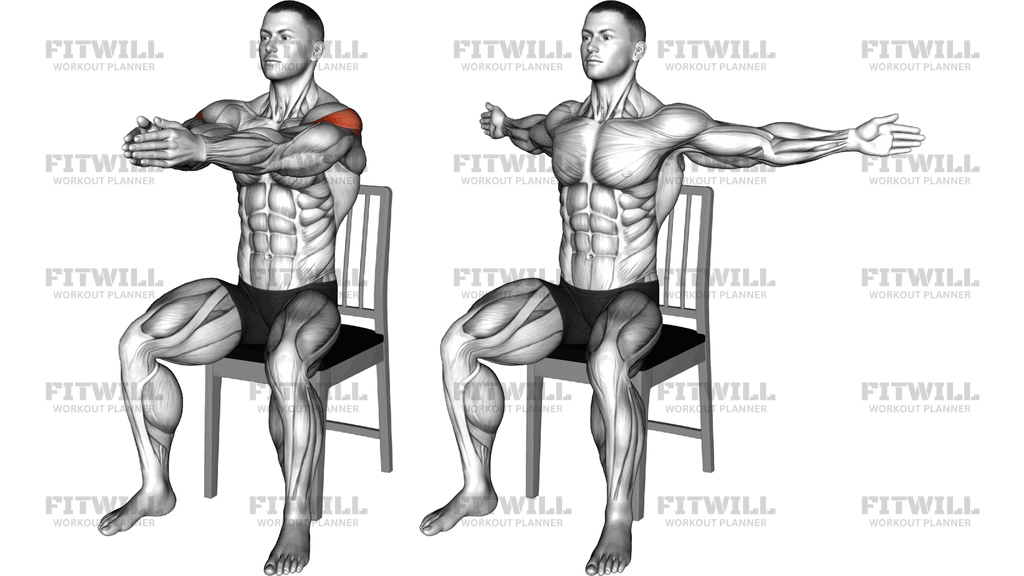
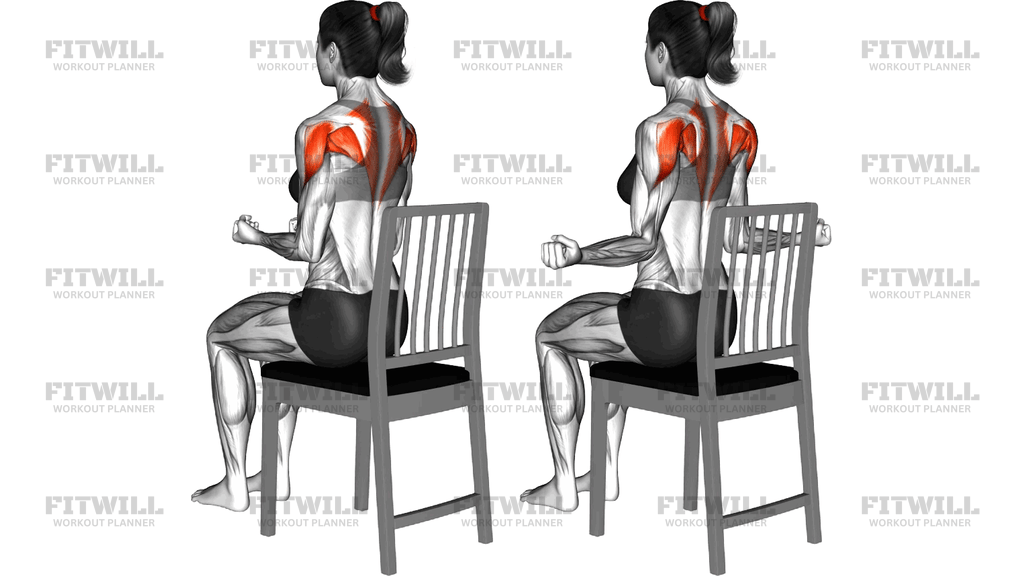
Sitting Elbows Tucked Open On A Chair is a simple body weight exercise for the back of the shoulders and the small rotator cuff muscles that steer the upper arm. You sit upright on a chair with your elbows pinned to your sides at roughly 90 degrees, then rotate your forearms outward so your hands swing away from your body like double doors opening. Because there is no external load, the movement relies entirely on clean positioning and muscle control, which makes it a go-to drill for warming up the shoulders before pressing or pulling work.
This exercise is especially useful for people who spend long hours at a desk, since rounded shoulders and a forward head posture tend to switch off the external rotators and the muscles between the shoulder blades. Office workers, beginners, and anyone rehabbing general shoulder stiffness can all benefit from doing it seated, because the chair removes balance demands and makes it easier to feel the correct muscles working. Lifters who bench or press heavily also use it as a low-fatigue way to keep the rotator cuff responsive.
The main work comes from the infraspinatus and teres minor, the two external rotators of the rotator cuff, together with the rear deltoids. As the arms open, the middle traps and rhomboids help hold the shoulder blades back and down, so you get a modest upper back contribution as well. The highlight of the setup is the elbow tuck: keeping the upper arms glued to your ribs forces the rotation to happen at the shoulder joint instead of letting the elbows drift or the torso twist to fake the motion.
To execute it well, sit tall on the front half of the chair with feet flat and ribs stacked over your hips. Bend both elbows to 90 degrees, press them lightly into your sides, and start with your forearms pointing forward. From there, rotate the forearms outward through a comfortable arc, pause briefly at the open position, and return under control. The tempo should stay smooth; this is a precision movement, not a power one.
Common use cases include shoulder warm-ups, active breaks during the workday, and technique practice before learning band or cable external rotations. Because the resistance is limited to what your muscles and gravity provide, it suits high-rep sets and careful, frequent practice rather than heavy strength work. If anything hurts in the shoulder joint rather than fatigues in the muscle, shorten the range or stop and get the shoulder assessed before continuing.
[ Workout Log & Planner ]
Put your next workout in Fitwill
Keep your plan and training log ready when you are.


Instructions
- Sit sideways-agnostic on a sturdy chair with your feet flat on the floor, hip-width apart, and your sitting bones planted evenly on the seat.
- Sit up tall through the crown of your head, then bend both elbows to 90 degrees and pin your upper arms firmly against your ribs.
- Turn your hands so your forearms point forward and your palms face each other or your fists stay soft; this is the tucked starting position.
- Brace your stomach lightly and draw your shoulder blades gently back and down without shrugging toward your ears.
- Exhale as you rotate both forearms outward, opening your hands away from your body while your elbows stay welded to your sides.
- Stop at the widest point you can reach without your elbows lifting forward or your torso leaning back, and hold the open position for one to two seconds.
- Inhale as you slowly rotate the forearms back forward to the starting position, resisting the urge to let the arms snap back.
- Complete your repetitions, then reset your posture by re-sitting tall and re-tucking the elbows before the next set.
Tips & Tricks
- If your elbows float forward as you open, imagine holding a rolled towel between each upper arm and your ribs; that cue alone fixes most of the leakage in this movement.
- Keep the 90 degree elbow angle honest. As the forearms fatigue, people tend to straighten the arms and turn the drill into a loose arm swing, which removes tension from the rotator cuff.
- Do not chase range. Opening until the shoulders roll forward or the lower back arches usually means the mid-back is compensating; a shorter, cleaner arc trains the external rotators better.
- Squeeze the shoulder blades slightly at the end of the outward rotation rather than just flopping the hands back, so the middle traps and rhomboids share the work.
- Sit on the front edge of the chair instead of slumping against the backrest; leaning back changes the shoulder angle and lets the torso do the rotating.
- Because there is no added weight, make the muscles work with tempo: take about two seconds out, pause, and two seconds back instead of rushing reps.
- If one side feels tighter or weaker, work each arm separately for a set so the stronger side cannot hide the difference.
- A mild working sensation in the back of the shoulder is normal; any sharp pinch at the front of the shoulder means you are rotating too far or too forcefully for the moment.
Frequently Asked Questions
Which muscles does Sitting Elbows Tucked Open On A Chair work?
The primary workers are the external rotators of the rotator cuff, mainly the infraspinatus, along with the rear deltoids. The middle traps and rhomboids assist by holding the shoulder blades back as the arms open.
Why must the elbows stay tucked against my sides during this exercise?
Tucked elbows lock the upper arm in place so the rotation happens at the shoulder joint itself. If the elbows drift forward, the movement turns into an arm swing and the rotator cuff stops doing the work.
Is Sitting Elbows Tucked Open On A Chair good for beginners?
Yes. The chair provides a stable base, there is no external load, and the 90 degree elbow position gives you a clear reference point, so it is one of the easiest ways to learn shoulder external rotation before adding bands or cables.
How many reps should I do of Sitting Elbows Tucked Open On A Chair?
Since the resistance is only your body weight, aim for higher reps, typically 12 to 20 controlled repetitions per set. Focus on tempo and a brief pause at the open position rather than speed.
Can I do this exercise at my desk during the workday?
Absolutely. All you need is a stable chair without wheels, and a set takes under two minutes. It is a practical micro-break for offsetting the rounded-shoulder position that comes from typing.
What is the most common mistake with this movement?
Leaning the torso backward or shrugging the shoulders to gain extra range. Both substitutions take tension off the external rotators, so keep the chest tall and the shoulder blades quiet as the forearms rotate.
What can I use if I do not have a chair?
Any stable seat works, such as a bench or the edge of a sturdy stool. You can also perform the same elbows-tucked rotation standing, but seated is preferable for beginners because it removes balance as a variable.
Should I feel this in the front of my shoulder?
No, the working sensation should sit in the back of the shoulder and between the shoulder blades. A pinch at the front usually means you are rotating past your comfortable range or forcing the elbows wider than they can stay tucked.
Is this exercise a replacement for weighted rotator cuff training?
It is a great entry point and warm-up, but body weight alone provides limited resistance for long-term strength progress. Once the movement feels easy at high reps, progress to light band or cable external rotations using the same tucked-elbow setup.