Sitting Side Circle Draw On A Chair
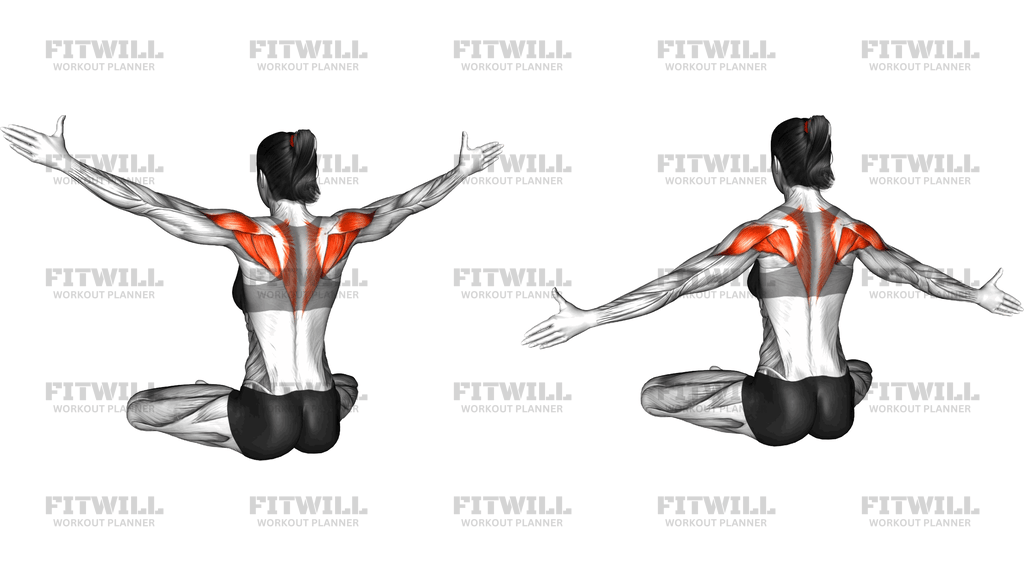
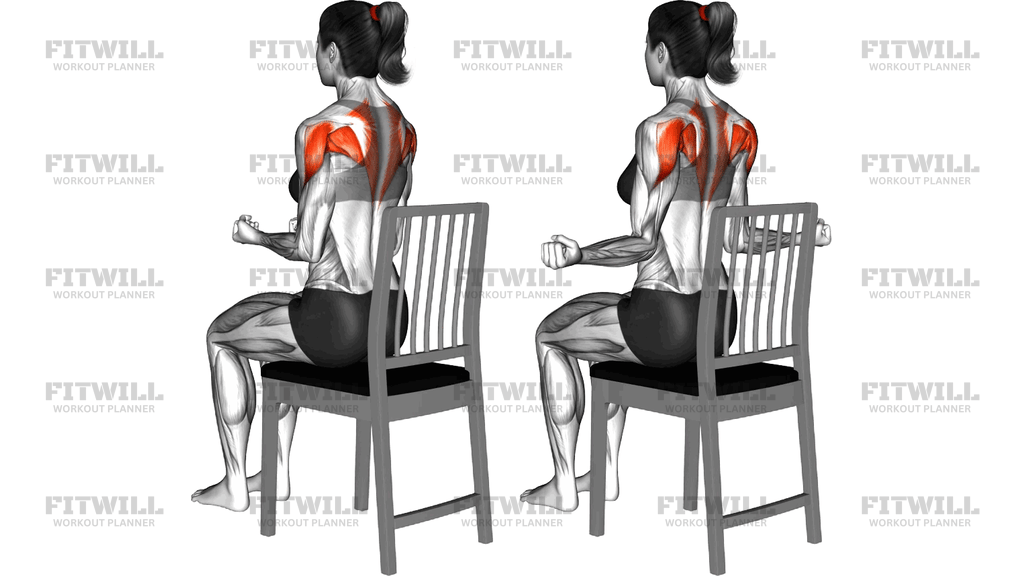
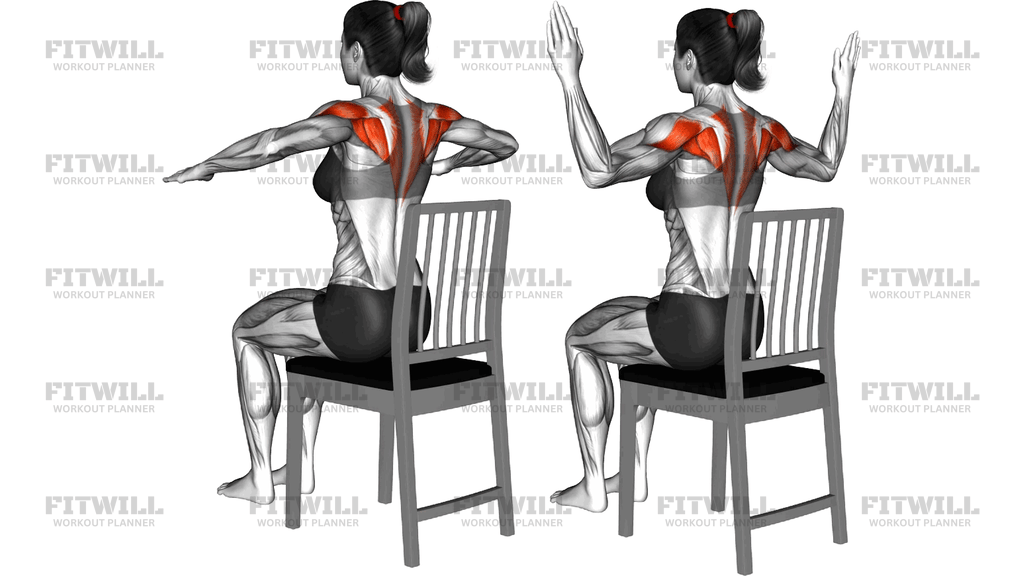
Sitting Side Circle Draw On A Chair is a seated mobility and activation drill where you sit on a chair, raise both arms out to your sides, and draw smooth circles with your hands while keeping your torso tall and still. Because your lower body is supported and your trunk is fixed, all of the motion has to come from the shoulder joints themselves, which makes this an honest test of how freely your shoulders actually move. The highlighted working areas are the rear shoulders and the muscles between the shoulder blades, which control the arm through every degree of the circle.
This movement suits anyone whose shoulders feel stiff from long hours at a desk, as well as lifters who want a low-load way to warm up the shoulder girdle before pressing or pulling. It is also a good fit for older adults or people returning from a layoff, since the chair removes balance demands and lets you focus purely on controlled arm motion. The circles train the small rotator cuff muscles and the rear deltoids in a coordinated way, which is exactly what most pressing-heavy routines neglect.
The setup matters more than it looks. Sitting sideways with the chair back beside you prevents you from leaning on it, and it encourages you to own your posture through your own trunk muscles rather than slumping into a backrest. Feet flat on the floor, knees roughly over the ankles, and a tall spine give your arms a stable platform to move from. If your torso wobbles or your ribs flare, the circle loses its shape and the shoulder stops doing the work.
To execute it well, raise your arms straight out to the sides at shoulder height, bend the elbows slightly, and begin tracing circles about the size of a dinner plate. Keep the movement smooth and continuous, with your shoulder blades gliding on the ribcage rather than hiking up toward your ears. After the planned number of reps in one direction, reverse the circle without dropping your arms. The pace should feel deliberate: roughly two to three seconds per revolution.
You can use this drill as a standalone shoulder-health break during the workday, as part of an upper-body warm-up, or as active recovery between heavier pressing sets. Because it uses no equipment beyond a sturdy chair, it travels well and needs almost no space. Keep the circles modest in size at first, and only widen them once your shoulders move freely without pinching or clicking that comes with discomfort.
[ Workout Log & Planner ]
Put your next workout in Fitwill
Keep your plan and training log ready when you are.


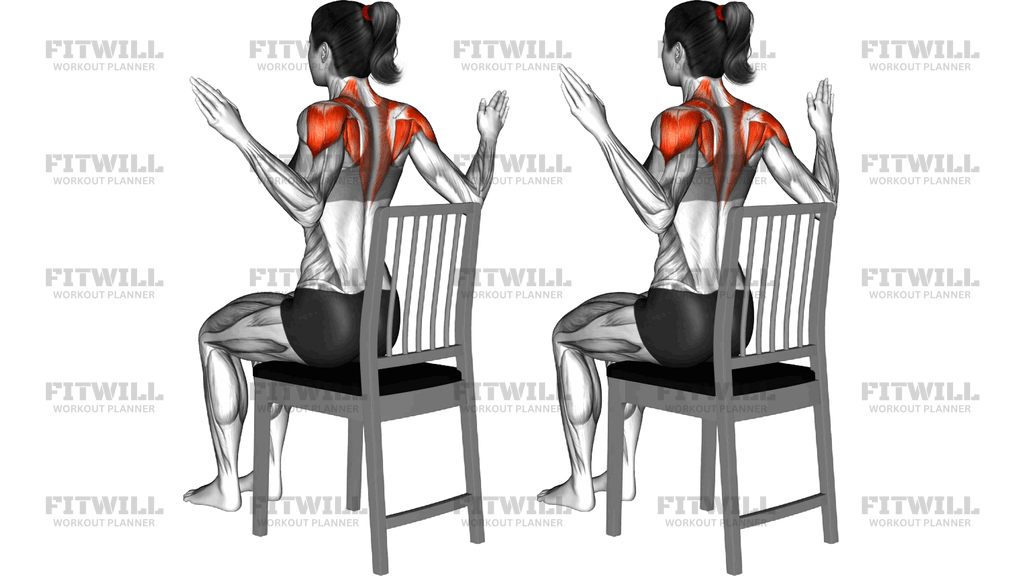
Instructions
- Sit sideways on a sturdy chair with your feet flat on the floor, hip-width apart, and your knees bent to about ninety degrees.
- Sit up tall on your sit bones so your spine is neutral and the chair back is beside you, not supporting you.
- Raise both arms straight out to your sides until they are level with your shoulders, palms facing forward and elbows just slightly soft.
- Brace your trunk lightly and draw your shoulder blades down your back so they stay away from your ears.
- Begin tracing small circles with both hands at the same time, leading the motion from the shoulder joints, about the size of a dinner plate.
- Keep your torso and head completely still as the arms circle; if you catch yourself rocking, shrink the circle.
- Complete eight to twelve revolutions in one direction, keeping the pace steady at roughly two to three seconds per circle.
- Reverse the direction without lowering your arms and complete the same number of revolutions the other way.
- Breathe continuously throughout, inhaling and exhaling evenly rather than holding your breath during the circles.
- When finished, lower your arms slowly to your sides and shake out the shoulders before your next set or exercise.
Tips & Tricks
- The most common error is shrugging as fatigue builds, which shifts the work from the rear shoulders to the upper traps. Check your neck space each few reps and consciously press the shoulders down if you feel them creeping up.
- Watch that the circles stay round. Many people drift into ovals or forward arcs because the rear shoulders are weak; slowing the pace usually fixes the shape better than enlarging the circle.
- Do not let your lower back arch as your arms work behind you. Ribs down and trunk braced keeps the motion at the shoulder joint where it belongs.
- Start small and grow. A tight shoulder often handles a small circle fine but pinches on a large one, so expand the diameter only across sessions, not mid-set.
- Keep the wrists neutral and fingers relaxed. Tension in the hands tends to travel up the forearms and stiffen the whole shoulder line.
- If one side circles smoothly and the other stutters, do one extra set on the stiffer side rather than matching reps symmetrically forever.
- Because the chair back sits beside you, resist the urge to hook an arm or lean onto it during rest between directions; stay upright so the trunk stays honest.
- Use this drill before overhead pressing or bench work rather than after, when the rear shoulders and rotator cuff are freshest and can prime the joint properly.
Frequently Asked Questions
Which muscles does Sitting Side Circle Draw On A Chair work?
The rear shoulders do most of the guiding work, with the traps and rhomboids stabilizing the shoulder blades and the rotator cuff steering the arm through the circle. The side shoulders assist as the arms sweep through the upper part of the arc.
Is Sitting Side Circle Draw On A Chair suitable for beginners?
Yes. The seated position removes balance demands and the body-weight load is very light, so beginners can learn to feel their shoulder blades moving correctly. Start with small circles and fewer revolutions before building up.
Why should I sit sideways on the chair instead of using the backrest?
Sitting sideways keeps the chair back beside you so you cannot slump against it, forcing your own trunk muscles to hold you tall. This stable, self-supported posture is what lets the shoulders move freely through the circle.
How large should the circles be?
Begin at roughly the diameter of a dinner plate and enlarge the circle only when the motion stays smooth and pain-free. A controlled small circle trains the shoulder better than a wide, jerky one.
What is the most common mistake in this exercise?
Hiking the shoulders toward the ears as the arms tire, which shifts work to the upper traps and defeats the purpose. Keep the shoulder blades drawn down and reduce the circle size if you cannot maintain that position.
Should I do Sitting Side Circle Draw On A Chair before or after lifting?
It works best as a warm-up before pressing or pulling, when it primes the rear shoulders and rotator cuff for heavier work. It also serves as gentle active recovery on rest days.
Can I substitute this exercise if I do not have a chair?
Yes, the same side circles can be done standing, though you lose the trunk support. A bench, stool, or the edge of a stable bed works as a substitute seat as long as it does not wobble.
Is it normal to hear clicking in the shoulder during the circles?
Painless clicking is common and usually harmless, but if it comes with discomfort or a catching sensation, shrink the circle and slow down. Persistent pain is a reason to stop and have the shoulder assessed.
How many reps and sets should I perform?
A practical dose is two to three sets of eight to twelve circles in each direction, done at a steady two to three seconds per revolution. Increase volume gradually as the shoulders move more freely.