Mountain Climber Low Lunge
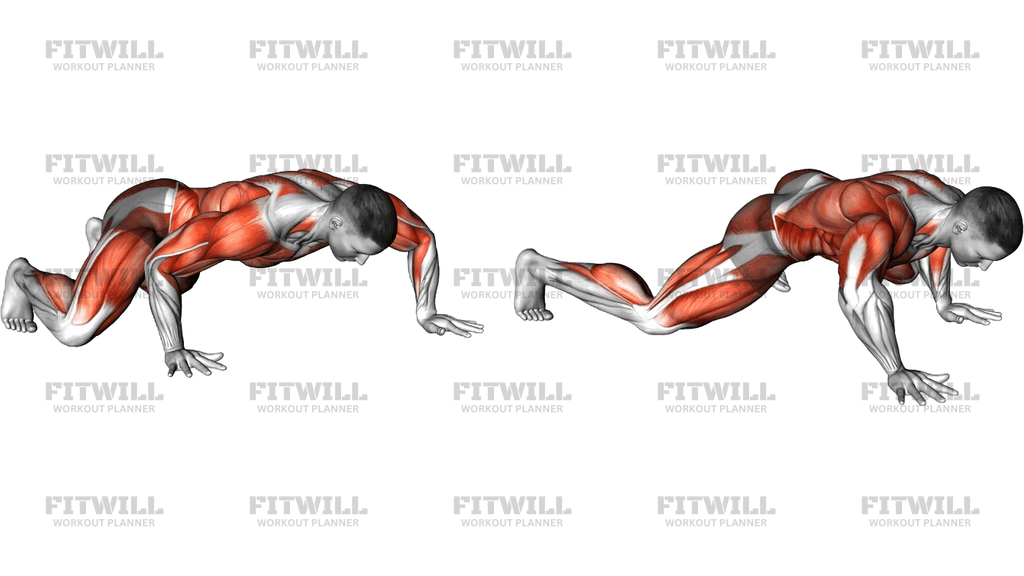
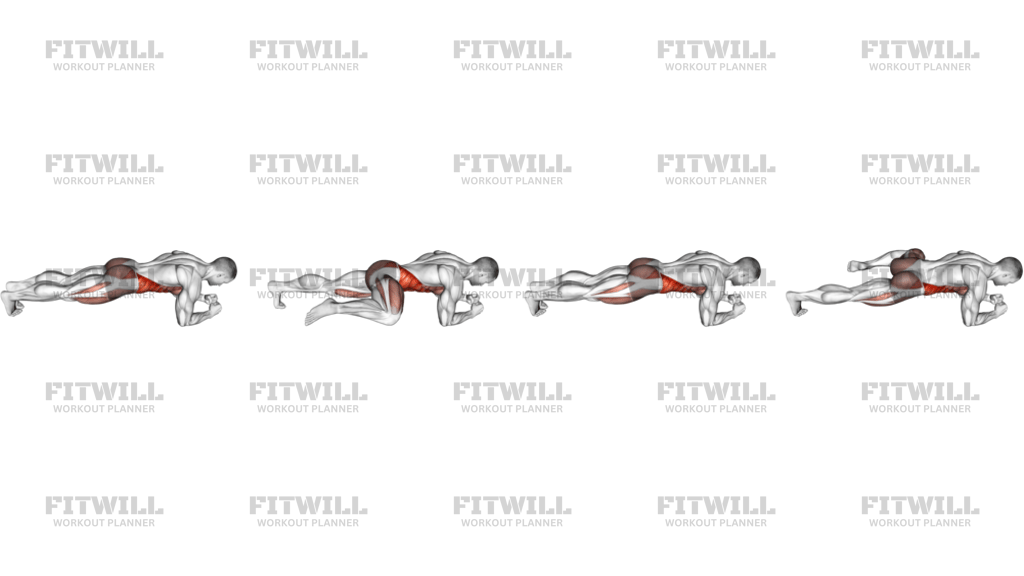
Mountain Climber Low Lunge is a bodyweight core and hip drill that blends the fast knee-drive of a mountain climber with a slower, deeper low lunge finish. You start in a high plank with your hands under your shoulders and your body in one straight line, then drive one knee forward toward your chest and settle it into a low lunge position with the foot planted on the floor beside or just behind your hand. The emphasis is on that controlled travel of the knee forward and the deliberate pause at the front before you return the foot to the plank.
This movement earns its place in a workout because it does two jobs at once. The driving knee works the hip flexors through a long range, while the planted torso forces the abs, obliques, and shoulders to hold the plank position steady instead of letting the hips rock and twist. The brief low lunge hold adds a hip-opening stretch for the trailing leg's hip flexors, which makes it a smart drill for anyone who sits a lot and feels tight through the front of the hips.
The setup matters more than most people expect. If your hands drift forward of your shoulders or your hips sit too high, the knee drive turns into a shallow hip bump and the core stops doing its job. Hands stacked directly under the shoulders, shoulders pressed away from the ears, and hips level with the spine give the moving knee a clear path and keep the working muscles honest.
To execute it well, think of the knee traveling in a straight line toward your chest rather than swinging out to the side. Place the front foot down softly instead of stomping it, keep the back leg long and active, and let the pause in the low lunge be a real moment of control before you push the foot back to the start. Alternate legs or complete a set on one side before switching, depending on what the rest of your training calls for.
You will see this exercise in warm-ups, core circuits, and conditioning blocks. It works well early in a session to wake up the hips before squatting or lunging, and it also fits into higher-intensity intervals when performed with quicker but still controlled tempo. Because it needs nothing more than floor space, it is a go-to for home training and travel workouts.
Keep the weight in your hands and the front foot evenly distributed, and stop short of any position where the lower back rounds or the front knee collapses inward. If the plank position is too demanding at first, drop to an incline version with hands on a bench or step, which shortens the lever while keeping the same knee path.
[ Workout Log & Planner ]
Put your next workout in Fitwill
Keep your plan and training log ready when you are.


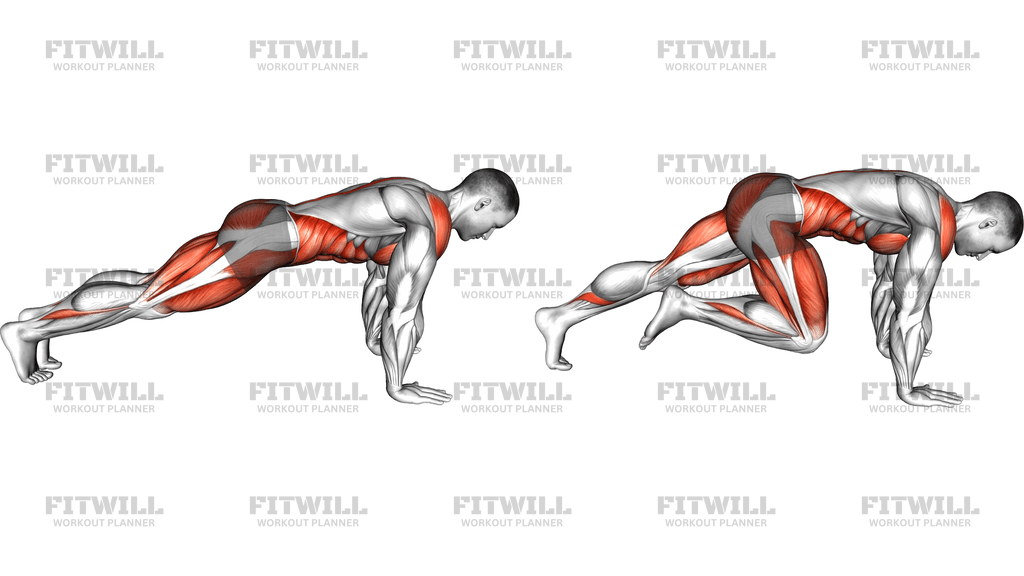
Instructions
- Set up on a mat or other non-slip floor in a high plank: hands flat under your shoulders, arms straight, legs extended behind you with feet about hip-width apart.
- Press the floor away so your upper back stays broad, squeeze your glutes lightly, and align your head, hips, and heels in one straight line.
- Brace your abs as if bracing for a light nudge to the stomach, and shift slightly more weight into your hands so the moving leg travels freely.
- Drive one knee forward toward your chest, keeping the knee tracking in line with your hip rather than flaring outward.
- Place the front foot down into a low lunge just beside or behind the same-side hand, letting the back leg stay long with the knee hovering off the floor.
- Hold the low lunge for a beat: chest tall enough that your back is not rounded, front heel loaded, and hips pressing gently forward to feel the stretch along the front of the trailing hip.
- Push through the front foot to slide it back to the plank, then re-square your hips before driving the opposite knee.
- Breathe steadily throughout: exhale as the knee drives forward, inhale during the lunge hold, and exhale again as the foot returns.
- Reset your plank line after each rep if you notice your hips drifting up or sagging, then continue alternating for your target reps or time.
- To finish the set, bring both feet under you or lower your knees to the floor and stand up rather than collapsing out of the plank.
Tips & Tricks
- If your shoulders creep up toward your ears during the knee drive, actively push the floor away and widen the space between your shoulders and jaw; this keeps the plank position stable while the leg moves.
- A common mistake is letting the hips swing sideways as the knee travels forward. Imagine a glass of water balanced on your lower back and keep it level through every rep.
- Do not let the front foot slap down hard in the lunge. Set it down quietly to control the movement; a loud landing usually means the hip flexors are yanking the leg instead of steering it.
- If your back knee drops to the floor in the low lunge when you want a stronger hold, keep light tension in the trailing leg by pressing the ball of that foot into the floor.
- Speed is not the point of this variation. If you cannot pause cleanly in the low lunge, slow the knee drive down before adding tempo.
- Keep the moving knee pointed roughly forward. A knee that drifts well outside the ribs shifts the work away from the hip flexors and strains the front knee in the lunge.
- Shorten the range by starting with your hands elevated on a step or bench if your hamstrings or lower back limit the plank, then progress to the floor as your plank strength improves.
- Spread your fingers and grip the floor lightly to share the load through your forearms; dumping weight into the heels of your hands is a common source of wrist discomfort in this drill.
Frequently Asked Questions
What muscles does Mountain Climber Low Lunge work?
The primary movers are the hip flexors on the driving leg, supported strongly by the abs and obliques holding the plank. The glutes, quads, shoulders, and chest contribute to stabilizing the position, and the lunge hold stretches the hip flexors of the trailing leg.
How is Mountain Climber Low Lunge different from a standard mountain climber?
A standard mountain climber uses fast, alternating knee drives with no pause, while this version drives the knee all the way into a low lunge and holds it briefly. The slower pace shifts the emphasis from cardio toward hip mobility, control, and deeper core stability.
Is Mountain Climber Low Lunge suitable for beginners?
Yes, as long as you can hold a basic plank for about 20 seconds. Beginners should move slowly, pause in the lunge, and can place hands on a step or bench to reduce the load on the shoulders and core.
Why does my lower back ache when I do Mountain Climber Low Lunge?
This usually means your hips are sagging or your hands have drifted ahead of your shoulders, letting the spine take over for the core. Re-stack your hands under your shoulders, squeeze your glutes, and shorten the knee drive until you can hold a flat plank line.
Should the front foot land next to my hand or behind it?
Landing it just beside or slightly behind the same-side hand is the standard placement. Going further forward turns it into a deep lunge stretch, which is fine if your hips allow it, but it demands more mobility and can round the back.
Can I use Mountain Climber Low Lunge as a warm-up?
It is an excellent warm-up before squats, lunges, or running because it raises the heart rate while opening the hip flexors and activating the core. Use slow, controlled reps and pause longer in the lunge when using it for mobility rather than conditioning.
How many reps should I do?
For mobility and control, aim for 5-8 deliberate reps per side with a short pause in each lunge. For conditioning, 30-45 seconds of continuous alternating reps works well, keeping the tempo quick but still quiet and controlled.
What can I substitute if the plank position bothers my wrists?
Place your hands on a low step, bench, or a pair of dumbbells with neutral handles to keep your wrists straight. This preserves the same knee path and lunge finish while taking pressure off the wrist joints.
Do I need a mat for Mountain Climber Low Lunge?
A mat is recommended on hard floors to cushion the ball of the back foot and the planted hand, but any grippy surface works. Avoid slick floors since the front foot needs traction when you push it back to the plank.