Body Rock To Down Dog
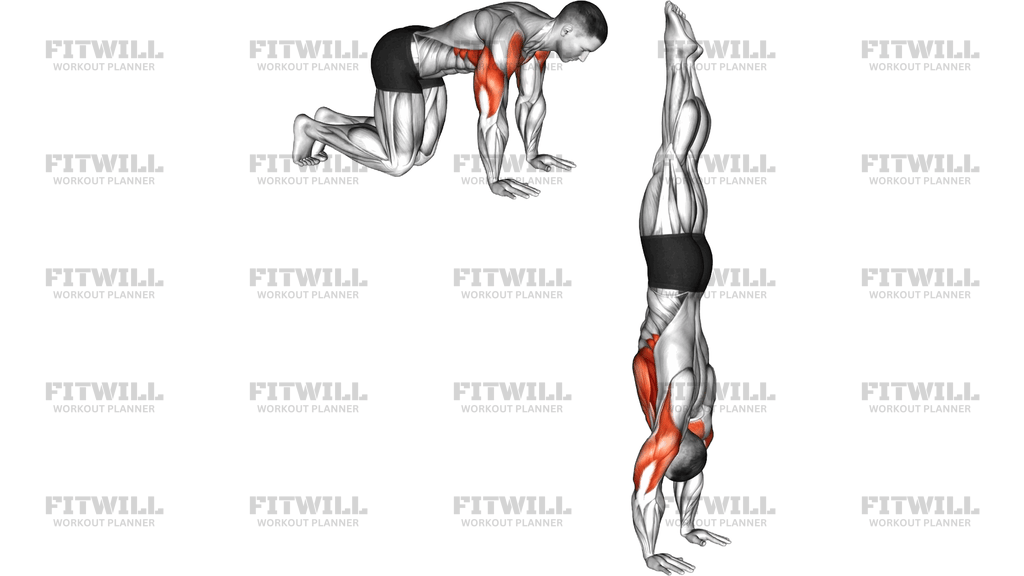
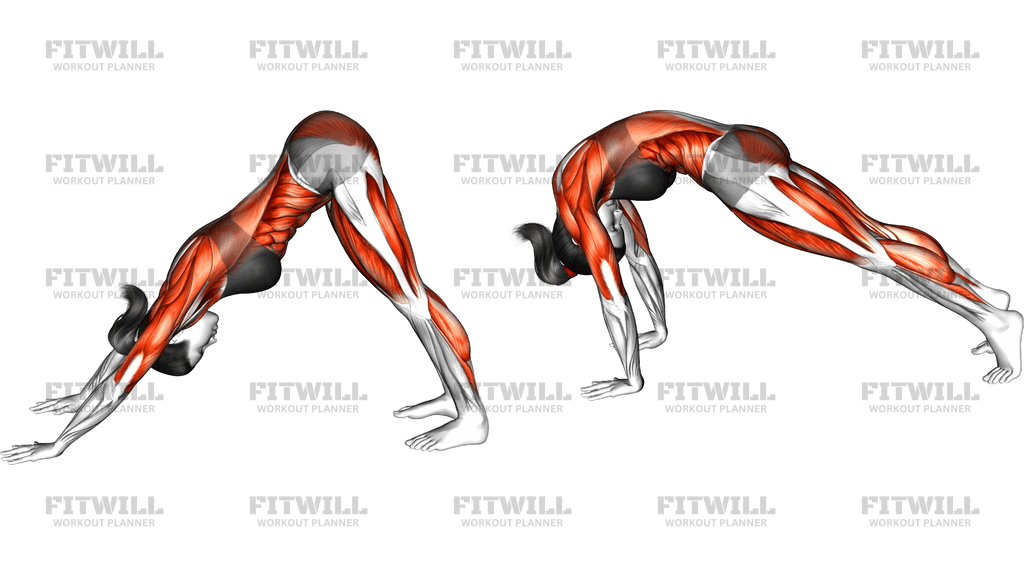
The Body Rock To Down Dog is a flowing bodyweight drill that links two positions most people already know from yoga and calisthenics warm-ups: a high plank, where you rock your whole body forward and back over your hands, and downward dog, where the hips lift high so your body forms an inverted V. Instead of holding either shape statically, you move rhythmically between them, using the shift of your body weight to open the shoulders, lengthen the back of the legs, and wake up the trunk.
This movement is especially useful as a warm-up before push-ups, planks, handstand work, or any pressing session, because it takes the shoulders and wrists through a loaded range while the core learns to transfer force between the upper and lower body. It also works well as a standalone mobility flow on rest days or as a gentle reset after long periods of sitting, when the hamstrings, calves, and lats tend to feel compressed and stiff.
To perform it well, your setup matters more than speed. Place your hands shoulder-width apart with fingers spread, and keep a soft bend in the knees at first so you can rock from the whole body rather than hinging only at the hips. As you rock forward, your shoulders should travel over and slightly past your wrists; as you rock back, the hips rise and the chest sinks toward the thighs. The transition should feel like a wave traveling through the spine, not a series of separate jerks.
The muscles doing the work change with each phase. The forward rock loads the chest, shoulders, and triceps in a plank position while the abs brace to keep the hips from sagging. The press back into downward dog switches the demand to the shoulders, lats, and the entire back line of the legs as the heels reach toward the floor. Because both phases share the same hand position, you never lose contact with the ground, which makes the drill surprisingly safe when performed with control.
Common uses include warm-up circuits, yoga-inspired strength flows, and low-impact conditioning rounds where you complete a set number of rocks or flow continuously for time. Beginners can bend the knees generously and reduce the range; more advanced lifters can add a slight pause in each downward dog to deepen the shoulder flexion and hamstring stretch.
Keep your weight spread across the whole palm rather than dumping into the heel of the hand, and move only within a range where your lower back stays supported by an active trunk. If your heels never touch the floor, that is fine — the goal is a long, active spine and steady rhythm, not a specific foot position.
[ Workout Log & Planner ]
Put your next workout in Fitwill
Keep your plan and training log ready when you are.


Instructions
- Start on hands and knees on a mat or non-slip surface, then walk your feet back until your body forms a straight high plank with hands under shoulders and fingers spread wide.
- Set your feet about hip-width apart and press evenly across both palms so your weight sits over the whole hand, not just the heel of the palm.
- Brace your abs and squeeze your glutes slightly so your body moves as one solid line from head to heels.
- Rock your whole body forward, letting your shoulders travel over and slightly past your wrists while your heels press back and your plank line stays rigid.
- Rock back through the plank, letting your body travel toward your heels, then push your hips up and back into downward dog so your body forms an inverted V.
- In the downward dog position, press the floor away, let your chest sink toward your thighs, and reach your heels toward the mat, keeping the neck relaxed between the arms.
- Lower your hips back down and glide forward into the plank so you return to the forward-rocked position in one smooth line.
- Continue the cycle — rock forward, rock back, lift to down dog, flow down to plank — for your target reps or time, moving with your breath: exhale as you press up to down dog, inhale as you lower back through the plank.
- After the final rep, lower your knees to the mat and sit back on your heels briefly to release the wrists and shoulders before standing up.
Tips & Tricks
- If your hips sag during the forward rock, shorten the range instead of letting your lower back take the load — the plank line should stay rigid the whole way.
- Wrist discomfort usually comes from dumping weight into the heel of the hand; redistribute pressure across the fingertips and the entire palm before adding more reps.
- Bending the knees in downward dog is not cheating — it lets you tilt the pelvis and lengthen the spine, which matters more than getting the heels flat.
- Avoid rocking by bending and straightening the elbows; the arms should stay long while the shoulders glide over the wrists.
- Let the head follow the spine: look down between your hands in the plank and let the neck relax in down dog rather than craning up to look forward.
- Move slower than feels necessary at first — the drill becomes much harder on the core when each rock and press takes two to three seconds.
- If your shoulders feel pinched at the top of the press back, lower the hips slightly and shorten the downward dog instead of forcing a deeper arch.
- On a slippery floor, use a mat or go barefoot; sliding feet make the plank phase unstable and shift stress away from the abs.
Frequently Asked Questions
What muscles does the Body Rock To Down Dog work?
It hits the core through the rocking plank phase, and shifts to the shoulders, lats, and the back of the legs during the downward dog press. The chest and triceps also work isometrically to hold the plank line.
Is the Body Rock To Down Dog good for beginners?
Yes, as long as the range is scaled. Beginners can keep a generous knee bend, rock over the wrists a shorter distance, and settle for a modest downward dog until shoulder and hamstring flexibility improve.
Why do my heels not reach the floor in the Down Dog position?
Tight calves and hamstrings are the usual reason, and it does not reduce the value of the drill. Keep the spine long and the chest pressing toward the thighs; heel height will drop naturally over time.
Should my wrists hurt during the forward rock?
No — discomfort usually means the weight is piled on the heel of the palm or the shoulders are collapsing. Spread the fingers, press through the whole hand, and reduce how far the shoulders travel past the wrists.
Can I use the Body Rock To Down Dog as a warm-up before push-ups?
It is one of the better push-up warm-ups because it loads the wrists, shoulders, and core in the exact plank position you will press from, while also opening the lats and hamstrings.
How is this different from just holding a plank and a Down Dog separately?
The rocking and transitioning teach weight transfer — your body has to move as one connected line over the hands, which builds coordination and dynamic trunk control that static holds do not train.
What is the most common mistake in the Body Rock To Down Dog?
Letting the hips sag and the lower back arch during the forward rock. Brace the abs and keep the ribs pulled down so the trunk, not the spine, absorbs the movement.
What can I substitute if the movement bothers my wrists?
You can perform the same flow on forearms, using a plank-to-dolphin transition, or place your hands on dumbbell handles or a push-up bar to keep the wrists neutral.
How many reps of the Body Rock To Down Dog should I do?
For a warm-up, 8 to 12 slow cycles work well; as a conditioning or mobility flow, aim for 30 to 45 seconds of continuous movement with a brief pause in each down dog.