90 To 90 Knee Thrust
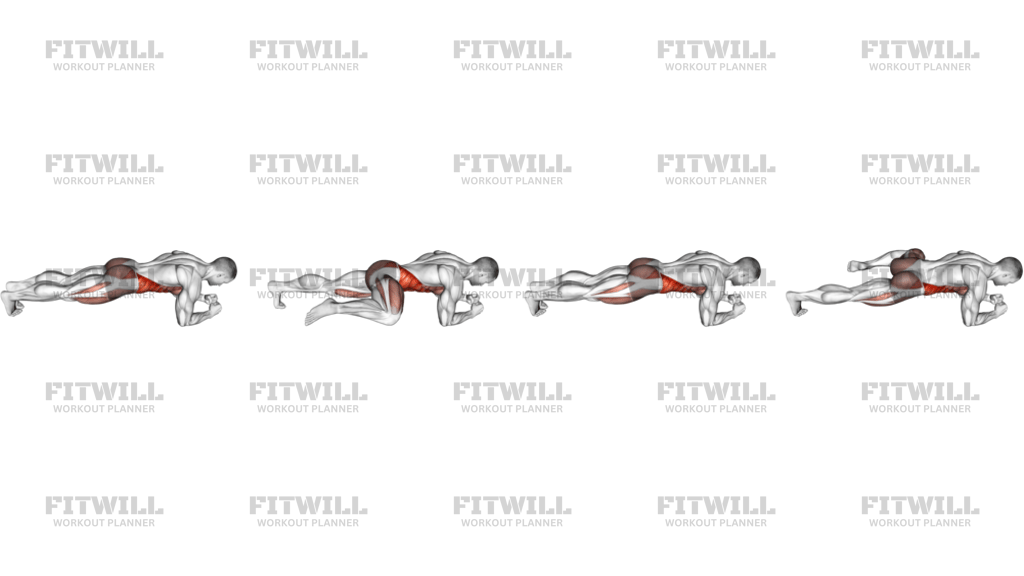
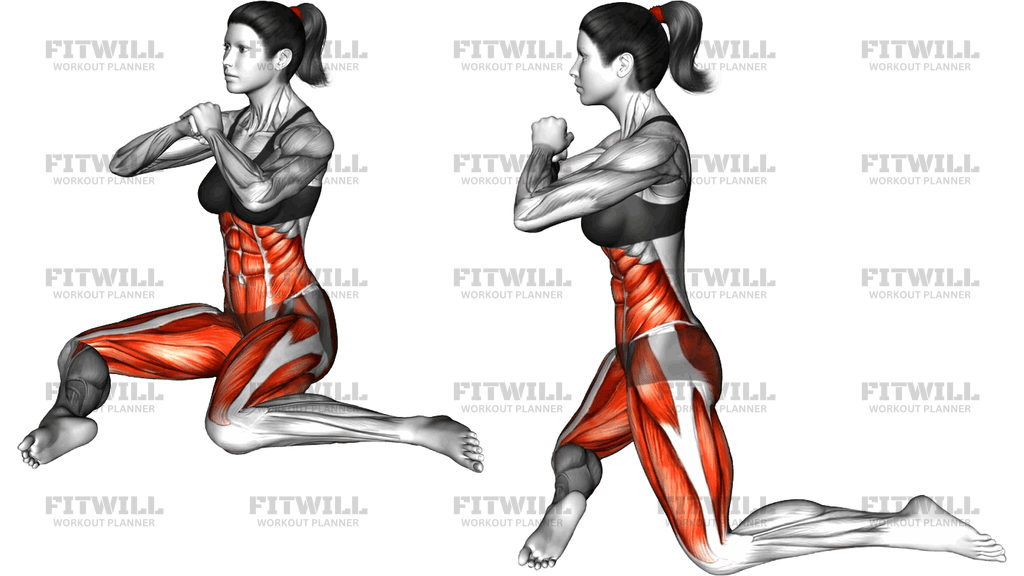
The 90 To 90 Knee Thrust is a bodyweight kneeling drill that trains the front of the hips and the deep trunk muscles together. You start in a tall kneel with the hips and knees both bent to roughly 90 degrees and the hands clasped at chest height with the elbows also bent to 90 degrees. From there you lean the whole body back a controlled few degrees while keeping the thighs vertical, then drive the knees down into the floor and the hips forward to return upright. The name describes those stacked 90-degree angles that define the setup.
This movement earns its place in a program because so many people spend long hours sitting, which leaves the hip flexors in a shortened position and weak at producing force. Short, controlled thrusts from a kneel load the iliopsoas and rectus femoris through exactly the range that sitting neglects, while the trunk has to stay braced to stop the lower back from arching. Runners, lifters, and anyone rebuilding hip control after a layoff tend to notice the front-of-hip work quickly.
The setup matters more than it looks. Because you are kneeling, the pelvis has nowhere to hide: if the ribs flare and the tailbone lifts, the lumbar spine takes over and the hip flexors get a free pass. Before moving, stack the ribs over the pelvis, brace the abdominal wall, and squeeze the glutes lightly. That locked-in torso is what turns a casual rocking motion into a genuine hip flexor and core exercise.
Execution should be slow and quiet. Lean back only as far as you can keep a straight line from head to knees, exhale, and think about pressing the knees into the floor rather than yanking the torso up with momentum. The fists stay glued to the chest the whole time so the arms cannot cheat. If you feel it in the kneecaps or the lower back instead of the deep front of the hip, shorten the range and reset the brace.
In practice, the 90 To 90 Knee Thrust works well as a warm-up primer before squats or sprints, as a focused finisher on lower body or core days, or as a standalone drill on recovery days. Pairing it with glute-dominant work like bridges balances the front-of-hip emphasis with the back of the body. Two or three sets of eight to twelve slow reps per side of a session is plenty, since the target muscles respond more to tempo and control than to volume.
On the safety side, kneeling puts direct pressure on the kneecaps and the top of the foot, so use a mat or pad and shift weight off the kneecaps onto the shin bones. Keep every rep pain-free, especially around the knees and lumbar spine, and build range gradually over weeks rather than forcing depth on day one.
[ Workout Log & Planner ]
Put your next workout in Fitwill
Keep your plan and training log ready when you are.


Instructions
- Kneel on an exercise mat with the knees hip-width apart directly under the hips and the shins parallel behind you.
- Sit up tall so the thighs are vertical and both the hips and knees sit at about 90 degrees; tuck the toes under or lay the tops of the feet flat, whichever feels steadier.
- Clasp the hands together in front of the chest with the elbows bent to 90 degrees, and keep them there for the whole set.
- Stack the ribs over the pelvis, brace the abdominal wall, and squeeze the glutes lightly to set a neutral spine before moving.
- Inhale, then slowly lean the whole body back from the knees a few degrees, keeping the thighs vertical and a straight line from head to knees.
- Exhale and drive the knees down into the floor while pressing the hips forward to return to the tall kneeling position, feeling the front of the hips and deep abs do the pulling.
- Use a slow tempo of roughly two to three seconds in each direction and avoid bouncing out of the lean-back.
- Keep the clasped fists at chest height throughout so the arms never assist the movement.
- Complete the target reps, then sit back onto the heels briefly to release the hips before the next set.
Tips & Tricks
- The most common error is letting the lower back arch as you lean back, which shifts work from the hip flexors to the lumbar spine; fix it by re-tucking the tailbone and pulling the ribs down before every rep.
- Start with a lean of only a few degrees. Depth is not the goal here, and leaning back too far too early usually shows up as lower back soreness the next day.
- If your hips drift back toward your heels during the thrust, you have turned it into a hip extensor movement; keep the thighs vertical over the knees so the front of the hip stays loaded.
- Watch the arms. As the lean gets harder, the clasped hands tend to float forward or the elbows drop, which means the trunk is borrowing help, so reset the fists at the sternum.
- Tucking the toes under gives you a wider base and easier balance; once stable, laying the tops of the feet flat increases the demand on the quads and hip flexors slightly.
- Place a folded towel or thick mat under the knees if you feel pressure on the kneecaps, and let some of the weight sit on the shins rather than the kneecaps themselves.
- Treat the exhale on the thrust as part of the exercise. Blowing air out as you drive the hips forward reinforces the brace and keeps the trunk rigid.
- Because the drill emphasizes the front of the hip, pair it with glute bridges or hip thrusts in the same session so the hip extensors stay balanced.
- If one side feels weaker or shakes earlier, that asymmetry is normal; keep the reps symmetric and let the weaker side set the pace.
Frequently Asked Questions
What muscles does the 90 To 90 Knee Thrust actually work?
The main work comes from the hip flexors, especially the iliopsoas, along with the rectus femoris at the front of the thigh. The deep core and obliques work hard to keep the trunk from arching as you lean back.
Why is it called the 90 To 90 Knee Thrust?
The name refers to the stacked 90-degree angles in the setup: hips and knees both bent to about 90 degrees in the tall kneel, with the elbows also bent to 90 degrees at the chest. You thrust from that 90/90 position.
Is the 90 To 90 Knee Thrust suitable for beginners?
Yes, it is one of the more accessible ways to load the hip flexors because it uses bodyweight only. Beginners should start with a very small lean back and a slow tempo before adding range.
Where should I feel this exercise if my form is correct?
You should feel a deep working sensation in the front of the hips and through the lower abdominal wall. Mild quadriceps engagement is normal, but the kneecaps and lower back should stay comfortable.
My lower back aches during the 90 To 90 Knee Thrust. What should I change?
That usually means the lumbar spine is arching to do the work. Reduce how far you lean back, squeeze the glutes harder, and exhale fully on each thrust to re-brace the trunk.
Do I need a mat to do this exercise?
A mat or folded towel is strongly recommended because the knees and the tops of the feet carry your bodyweight on a hard floor. On grass or a cushioned surface you can go without one.
How does this differ from a kneeling lean back?
The kneeling lean back emphasizes controlling the descent, while the 90 To 90 Knee Thrust emphasizes the concentric drive of the hips and knees forward from the 90/90 position. The thrust focus makes the hip flexors the primary mover rather than the trunk.
How many sets and reps should I use?
Two or three sets of eight to twelve slow reps works well, since control matters more than volume here. Stop the set when the brace or the smooth tempo starts to break down.
What can I substitute if kneeling hurts my knees?
Try standing high-knee holds, seated knee lifts, or lying hip flexor raises, which train the same hip flexor pattern without kneeling pressure. A thicker pad under the knees is worth testing before dropping the movement entirely.