Inchworm And Mountain Climbers
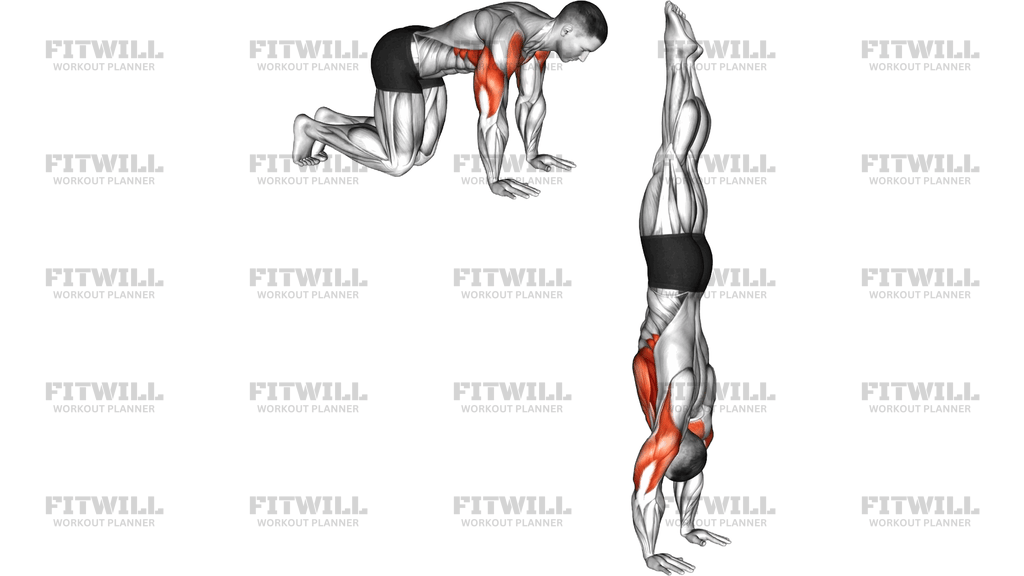
Inchworm And Mountain Climbers combines two body weight classics into one flowing sequence. You start standing, hinge down to walk your hands out along the floor into a high plank, run a set of mountain climbers from that position, then walk your hands back and stand up tall. Because you repeat this cycle for reps or time, it works as both a strength drill and a conditioning piece, which is why it shows up so often in warm-ups, bootcamp circuits, and home workouts that need to cover a lot of ground with no equipment.
The movement pulls double duty. The walkout and walkback load your hamstrings and calves through a deep hinge while challenging your core to stay braced as your weight shifts over your hands. The mountain climber section then raises the demand on your shoulders, hip flexors, and abs, since you are driving your knees while holding a stable plank on straight arms. Done properly, your trunk works the entire time, never getting a real rest between the two halves of the exercise.
Setup matters more than most people expect. Your hand and foot placement during the walkout determines whether you reach a clean, strong plank or a sloppy one with hips sagging and hands parked too far in front of your shoulders. Aim to finish the walkout with your wrists stacked under your shoulders, legs straight but not locked, and a long line from head to heels before the knee drives begin.
To execute well, move with control rather than speed. Hinge at the hips with a soft knee bend, place your palms flat, and walk your hands forward in small steps so your torso stays long instead of collapsing. Perform your mountain climbers in a steady rhythm, keeping your hips level and quiet rather than bouncing them toward the ceiling. On the way back, walk your hands in with short steps and let your hamstrings feel the stretch as you roll up to standing one vertebra at a time.
This sequence suits a wide range of trainees. Beginners can slow everything down and even add a knee bend on the walkback, while more advanced lifters use it as a warm-up primer or a metabolic finisher. It needs only a few feet of floor space and, ideally, an exercise mat to cushion your palms and the balls of your feet.
A few practical safety points: keep your weight spread across the whole palm rather than dumping it into the wrists, and bend your knees more on the fold-down if your hamstrings or lower back feel strained. Breathe steadily throughout instead of holding your breath during the plank section, and stop the set as soon as your hips start to sag, since a fatigued plank position is where form usually breaks down first.
[ Workout Log & Planner ]
Put your next workout in Fitwill
Keep your plan and training log ready when you are.


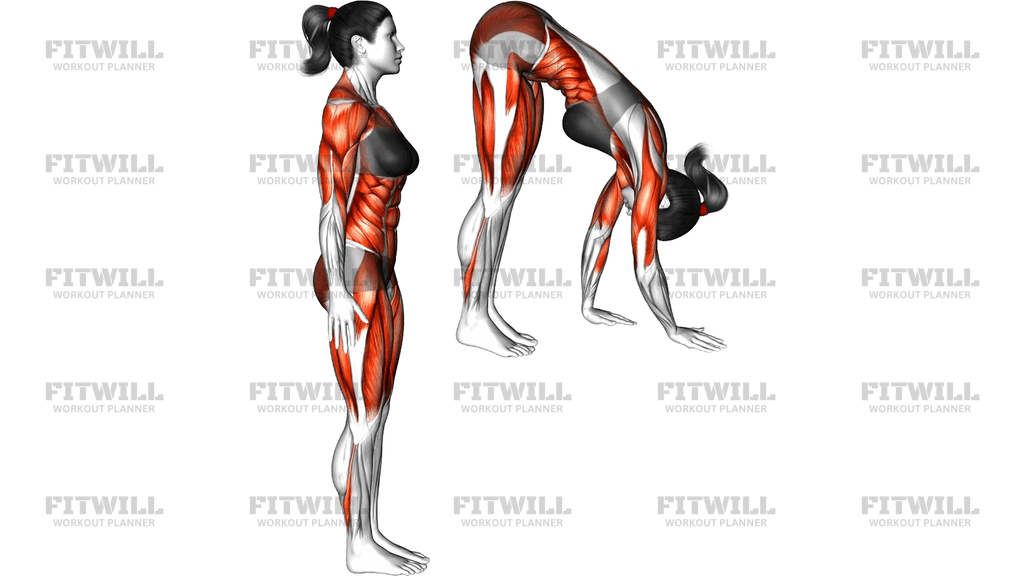
Instructions
- Stand tall at one end of an exercise mat with your feet about hip-width apart and your arms relaxed at your sides.
- Hinge forward at the hips with a slight bend in your knees and place both palms flat on the mat in front of your feet, fingers spread.
- Walk your hands forward in small steps, keeping your legs as straight as comfortable, until your wrists sit directly under your shoulders in a high plank with a straight line from head to heels.
- Brace your abs and squeeze your glutes so your hips stay level and your lower back does not sag toward the floor.
- From the plank, drive one knee toward your chest, set the foot back down, then drive the opposite knee, alternating in a steady mountain climber rhythm for your chosen number of reps per side.
- Keep your shoulders stacked over your wrists and your hips quiet throughout the knee drives rather than letting them bounce up and down.
- After your last knee drive, walk your hands back toward your feet in small steps, keeping your core tight so your torso does not collapse.
- Once your hands are beside your feet, bend your knees slightly and roll your spine back up to a full standing position with your head lifting last.
- Exhale as you fold and walk out, breathe steadily during the mountain climbers, and inhale as you walk back and stand up.
- Reset your stance and brace before starting the next repetition so every walkout begins from a tall, organized position.
Tips & Tricks
- If your hamstrings stop you short on the fold-down, bend your knees more instead of rounding your lower back to reach the floor.
- Check your hand position before starting the knee drives; wrists should be under your shoulders, not out ahead of them, or the mountain climbers will overload your shoulders.
- The most common mistake is letting the hips sag or pike during the plank section. Film yourself from the side once to see what your hips actually do when you get tired.
- Keep the mountain climber knee drive controlled. Racing through them usually turns the drill into a hip-bouncing bounce rather than a core exercise.
- Spread your fingers and press the floor away slightly with your upper back to protect your wrists during the plank hold.
- Walk your hands out in small steps rather than diving into a long plank in one reach; the small-step version keeps your core engaged the whole way.
- On the walkback, stop when your hands are next to your feet, not beyond them, so you can stand up without shifting your feet.
- If your wrists bother you, try making fists and supporting on your knuckles, or do the plank portion on an elevated surface like a low bench.
- Start with 4-6 mountain climbers per side per walkout and build from there; it is easy to underestimate how much the plank hold adds up over a set.
Frequently Asked Questions
What muscles does the Inchworm And Mountain Climbers work?
It hits your core throughout, with the walkout and walkback loading the hamstrings and calves, and the mountain climber portion adding work for the shoulders, hip flexors, and abs. It is best thought of as a full body drill with an emphasis on the trunk.
Is Inchworm And Mountain Climbers good for beginners?
Yes, because every part of it can be scaled. Beginners can bend the knees generously on the fold, walk the hands out a shorter distance, perform the mountain climbers slowly, or drop to the knees for the plank section until core strength builds.
Why do my lower back and hamstrings feel tight when I fold down to start the Inchworm And Mountain Climbers?
That usually means your hamstrings are limiting your forward fold, so your lower back compensates by rounding. Bend your knees more during the fold-down and walkout, and the strain should shift off your back while your hamstrings gradually gain range.
How far should I walk my hands out before starting the mountain climbers?
Walk out until your wrists are directly under your shoulders and your body forms one straight line from head to heels. Going too far forward puts extra load on the shoulders; stopping too short makes the mountain climbers feel cramped.
My hips bounce up and down during the mountain climber part. How do I fix that?
Bouncing happens when the knee drives come from the hips instead of the abs. Slow the tempo, keep your hips level with an intentional brace, and think about pulling each knee in with your lower abs rather than flicking the leg up.
Can I do Inchworm And Mountain Climbers every day?
In modest doses, such as a few walkouts in a warm-up, it can be done most days because the load is light. If you are doing it as a hard conditioning finisher with high reps, treat it like any strenuous session and allow recovery between.
What can I substitute if I cannot do a full plank on the floor?
Perform the walkout to an elevated surface like a bench or sturdy chair and do the mountain climbers with your hands on that surface. You keep the hinge, walkout, and knee-drive pattern while removing a large share of the wrist and shoulder load.
How many reps of Inchworm And Mountain Climbers should I do?
A practical starting point is 5-8 walkouts with 4-6 mountain climbers per side in each plank. Adjust from there based on whether you are using it as a warm-up, where fewer reps work, or a finisher, where you can accumulate more volume.
Do I need an exercise mat for the Inchworm And Mountain Climbers?
It is not required, but a mat makes the exercise noticeably more comfortable because your palms and the balls of your feet press into the floor repeatedly. Any non-slip surface works if you do not have a mat.
Should my feet stay planted during the mountain climbers?
Yes, your feet stay in place and only the knees move, with each foot returning to its starting spot after every drive. If your feet creep forward, your plank position is drifting and you should reset your hips before continuing.