Standing Switching Vertical Stacked Hand
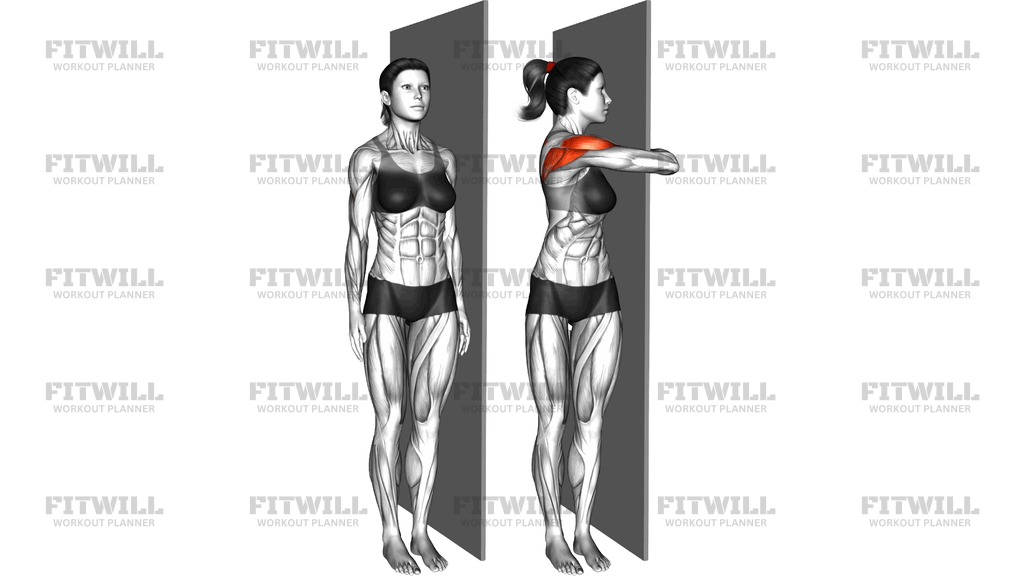
The Standing Switching Vertical Stacked Hand is a bodyweight shoulder mobility drill performed from a tall standing position. You raise one forearm vertically in front of your face, cross the opposite arm over it so the hands and forearms stack against each other, then switch which arm is stacked on top. The alternating crossing action takes each shoulder through horizontal adduction across the body while the stacked arm holds a vertical position, which is a combination most daily activities never ask for.
This movement is useful for anyone whose shoulders feel tight after long periods of desk work, driving, or pressing exercises like bench presses and push-ups. It gently lengthens the muscles across the back of the shoulder and upper back on the crossing arm, while the stacked arm works through active rotation and elevation. Because it is self-paced and load-free, it fits well into warm-ups, cooldowns, and short movement breaks during the workday.
The setup matters more than it might seem. Standing tall with feet about hip-width apart gives your shoulders a stable base, and keeping the stacked forearm truly vertical in front of the face is what directs the stretch into the rear shoulder rather than letting it drift into the neck. If you let the head jut forward or the elbow flare out wide, you lose the precise cross-body angle that makes this drill effective.
To execute it well, move slowly and let the crossing hand guide the stacked arm across the midline without yanking. Breathe steadily, hold the stacked position for a moment to feel the tissues of the rear shoulder settle, then unwind and re-stack with the opposite arm on top. The switching is the point: each side gets the same treatment, which helps reveal and gradually reduce left-right differences in shoulder mobility.
Common use cases include prepping the shoulders for overhead pressing, resetting between sets of pressing or pulling work, and addressing the rounded, internally rotated posture that comes from typing and phone use. It also works as a low-effort recovery drill on rest days when you want to move the shoulders without loading them.
For safety, keep the pulling action gentle and stay well short of any pinching sensation at the front of the shoulder. The goal is a comfortable stretch across the back of the shoulder and upper back, not forcing the elbow higher or the cross deeper. If one side is noticeably tighter, spend a little extra time there, but never push into sharp or catching pain.
Fitwill
Log Workouts, Track Progress & Build Strength.
Achieve more with Fitwill: explore over 9600 exercises with images and videos, access built-in and custom workouts, perfect for both gym and home sessions, and see real results.
Start your journey. Download today!




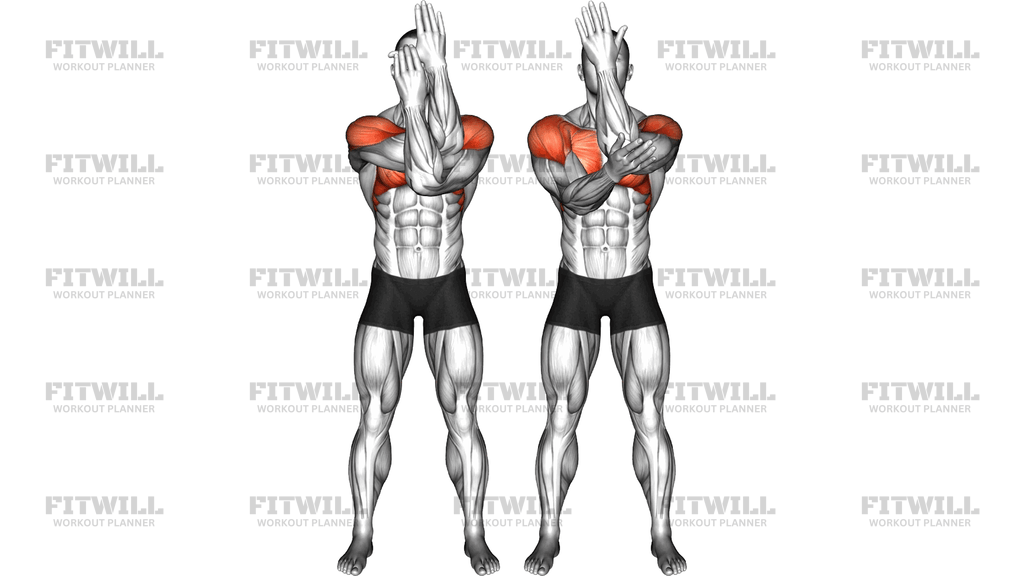
Instructions
- Stand with your feet about hip-width apart, weight evenly distributed, and your spine tall with the crown of your head reaching up.
- Relax your shoulders down away from your ears and take a normal breath in through your nose to set your posture.
- Raise your right arm and place the forearm vertically in front of the center of your face, elbow pointing down and palm facing outward with fingers toward the ceiling.
- Bring your left arm across the front of your body so the left forearm crosses over the right, letting the hands and forearms stack against each other in front of your face.
- Use the left hand to gently guide the right arm a little further across the midline until you feel a mild stretch in the back of the right shoulder and upper back.
- Hold the stacked position for one or two calm breaths, keeping your head stacked over your ribs instead of chasing the arm with your chin.
- Slowly unwind the arms, lower them briefly, then re-stack with the left forearm vertical in front of the face and the right arm crossing over.
- Continue alternating sides for your desired number of repetitions, moving with the same control on every switch.
- Breathe continuously throughout, exhaling softly as each stack settles into place and avoiding any breath-holding.
- Finish the set by lowering both arms, rolling the shoulders once or twice, and noticing whether one side feels looser than the other.
Tips & Tricks
- Keep the stacked forearm truly vertical, like a pillar in front of your nose; if the elbow drifts out to the side, the stretch slides away from the rear shoulder and into the neck.
- A common mistake is pulling hard with the crossing hand. Let gravity and a light guide pressure do the work, and imagine lengthening the arm across rather than jamming the elbow inward.
- Watch for the head leaning toward the stacked arm to fake extra range. Keep your ears level and let the shoulder do the moving.
- If you feel pinching at the front of the stacking shoulder, lower the stack slightly so the hands sit nearer chest height and rebuild the height gradually over sessions.
- Do not rush the switch. The brief pause with each stack is where the shoulder learns the position, so treat the transition as part of the exercise rather than dead time.
- If one side is clearly tighter, start with that side and give it one extra held breath each round instead of doubling the total volume.
- Keep the ribs stacked over the pelvis; arching the lower back to lift the arms higher is a common compensation that changes the angle of the stretch.
- Your grip on the crossing arm should be soft, resting near the upper arm or elbow rather than clawing at the wrist, which can create unwanted wrist tension.
- Pair this drill with gentle shoulder rolls before pressing workouts so the rear shoulder tissues are warm before you ask them for pressing range.
Frequently Asked Questions
Which muscles does the Standing Switching Vertical Stacked Hand target?
The main focus is the deltoid group at the shoulder, especially the rear deltoid on the crossing arm, with supporting stretch through the chest and upper back. The stacked arm also works through active rotation, engaging the rotator cuff in a controlled way.
Is the Standing Switching Vertical Stacked Hand a stretch or a strength exercise?
It functions primarily as a mobility and stretching drill for the shoulders. The switching action adds a small active-control element, but there is no external load, so it is best used for warm-ups, cooldowns, and posture breaks.
How high in front of the face should the stacked hand sit?
Start with the stacked hand around nose or forehead height, which keeps the forearm vertical and the angle comfortable. If that height causes any pinching at the front of the shoulder, lower the stack toward chest height and progress upward over time.
How many repetitions should I do on each side?
Around 5 to 8 switches per side with a one-to-two breath hold at each stack works well. That is enough to notice the rear shoulder softening without fatiguing the stabilizers before a workout.
Why does one side feel tighter than the other in this drill?
Most people have a dominant throwing or reaching side and asymmetric habits from desk work, so cross-body range often differs left to right. The switching format is designed to expose that difference, and giving the tighter side slightly longer holds helps it catch up.
Can beginners do the Standing Switching Vertical Stacked Hand?
Yes, it is very beginner friendly because it uses no equipment and the intensity is entirely self-controlled. A beginner only needs to keep the pull gentle and stay short of any pinching feeling at the front of the shoulder.
What is the most common mistake with this movement?
The most common errors are yanking the stacked arm across with the crossing hand and letting the elbow flare out so the forearm is no longer vertical. Both reduce the precision of the stretch, so slow down and keep the forearm stacked like a vertical post in front of the face.
What can I use instead if this position is uncomfortable?
A simpler substitute is a basic cross-body shoulder stretch, pulling one straight arm across the chest with the other hand. Once that feels comfortable, you can progress back to the vertical stacked position for a more specific angle.
When is the best time to use the Standing Switching Vertical Stacked Hand?
It works well as part of an upper-body warm-up before pressing or pulling, as a reset between heavy sets, or as a midday mobility break. Many people also enjoy it in the evening to counteract a day of rounded-desk posture.
Should I feel this in my neck at all?
No, the sensation should stay in the back of the shoulder and upper back. If you feel pulling in the neck, your head is probably leaning toward the stacked arm or the elbow has drifted outward, so reset your posture and lower the stack slightly.